

Welcome to Cloudamize. This document gives step-by-step instructions on how to add a new user to the Cloudamize Partner Dashboard. This user can be an Account Executive or Solution Engineer within your organization.
Step-by-step guide
Step 1: Log in to the Cloudamize Partner Dashboard at https://dashboard-partners.cloudamize.com using your userid and password.
Step 2: Open the "User Management" tab on the Cloudamize Partner Dashboard to view details of the registered users.
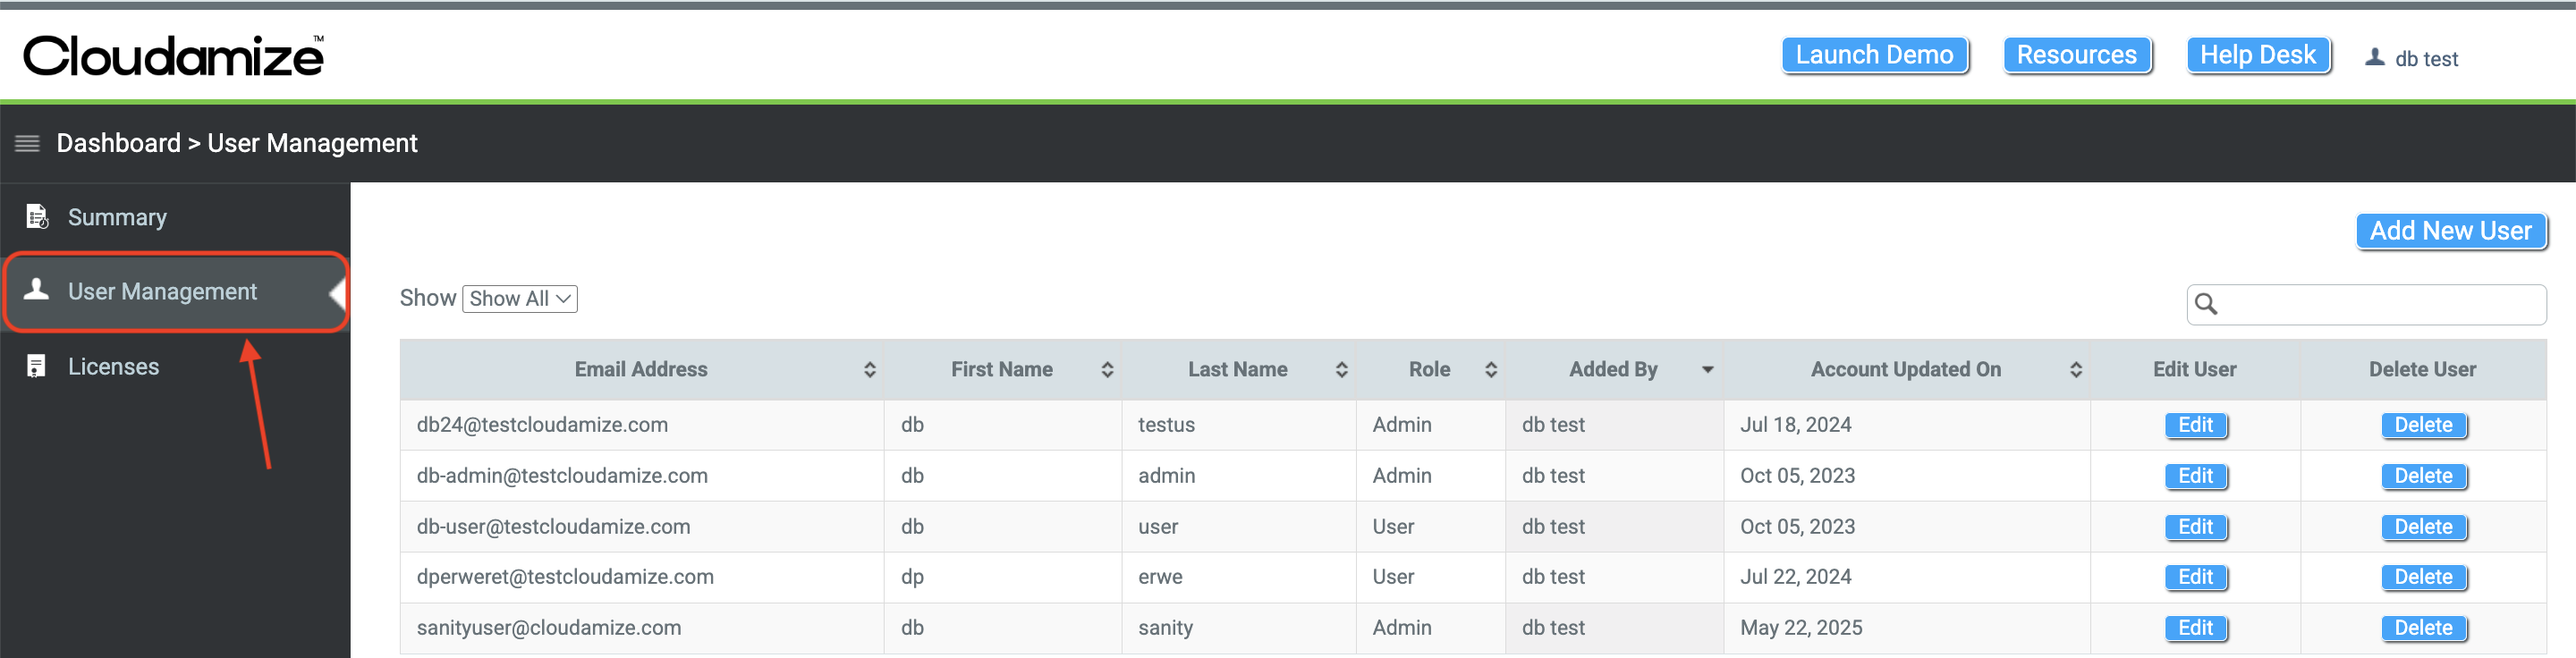
Step 3: Click on the "Add New User" button to launch the "Add New User" form.

Step 4: Enter the "First Name", "Last Name", and "Email Address" for the new user in the respective fields.Step 5: Select the "Role" for the user being added from the drop-down selector. This can be "Admin" or "User" role. An Admin user can
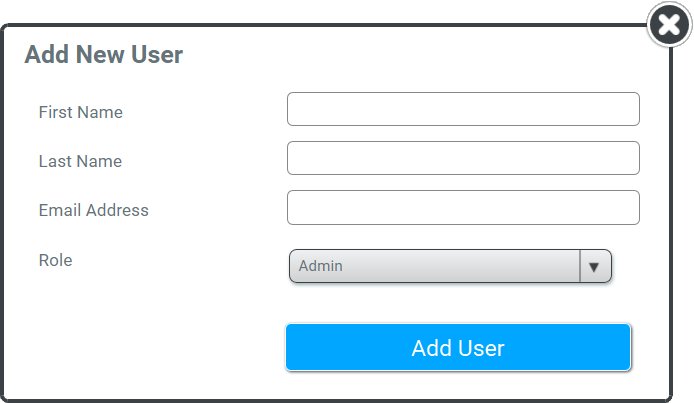
Step 5: Select the Role for the user being added from the drop-down selector. This can be an Admin or a User role. An Admin user can
-
Add/edit/delete other users
-
Re-assign the orders to users
-
Delete orders assigned to any user

Step 6: Add a user by clicking the "Add User" button. The user receives their user ID and temporary password by email. They must reset their password upon first login to the Cloudamize Partner Dashboard.

If you have any queries, please get in touch with the helpdesk via our Helpdesk Portal or by email at helpdesk@cloudamize.com.