
Migrate
📋 Overview
Migrate is a feature provided by Cloudamize that allows you to automate the migration of servers from groups defined in Migration Planner using the Hypercare approach. Where Migration Planner allows you to plan your cloud migration path, the Cloudamize Migrate allows you to manage the migration in full. Migrate integrates with both Migration Planner and Designer to enable you to automate and monitor the migration of groups using full CSP integrations, right-sizing provided by Cloudamize, and runbooks to assist with scheduling and planning the migration step by step.
Note: Currently, the Migrate feature is available only for AWS IAAS providers.
How to Use and Access the Migrate option:
How to Use and Access the Migrate option:
To access the Migrate option, please log in to the Cloudamize Console at https://console.cloudamize.com. Select Migrate on the Cloudamize Landing page.

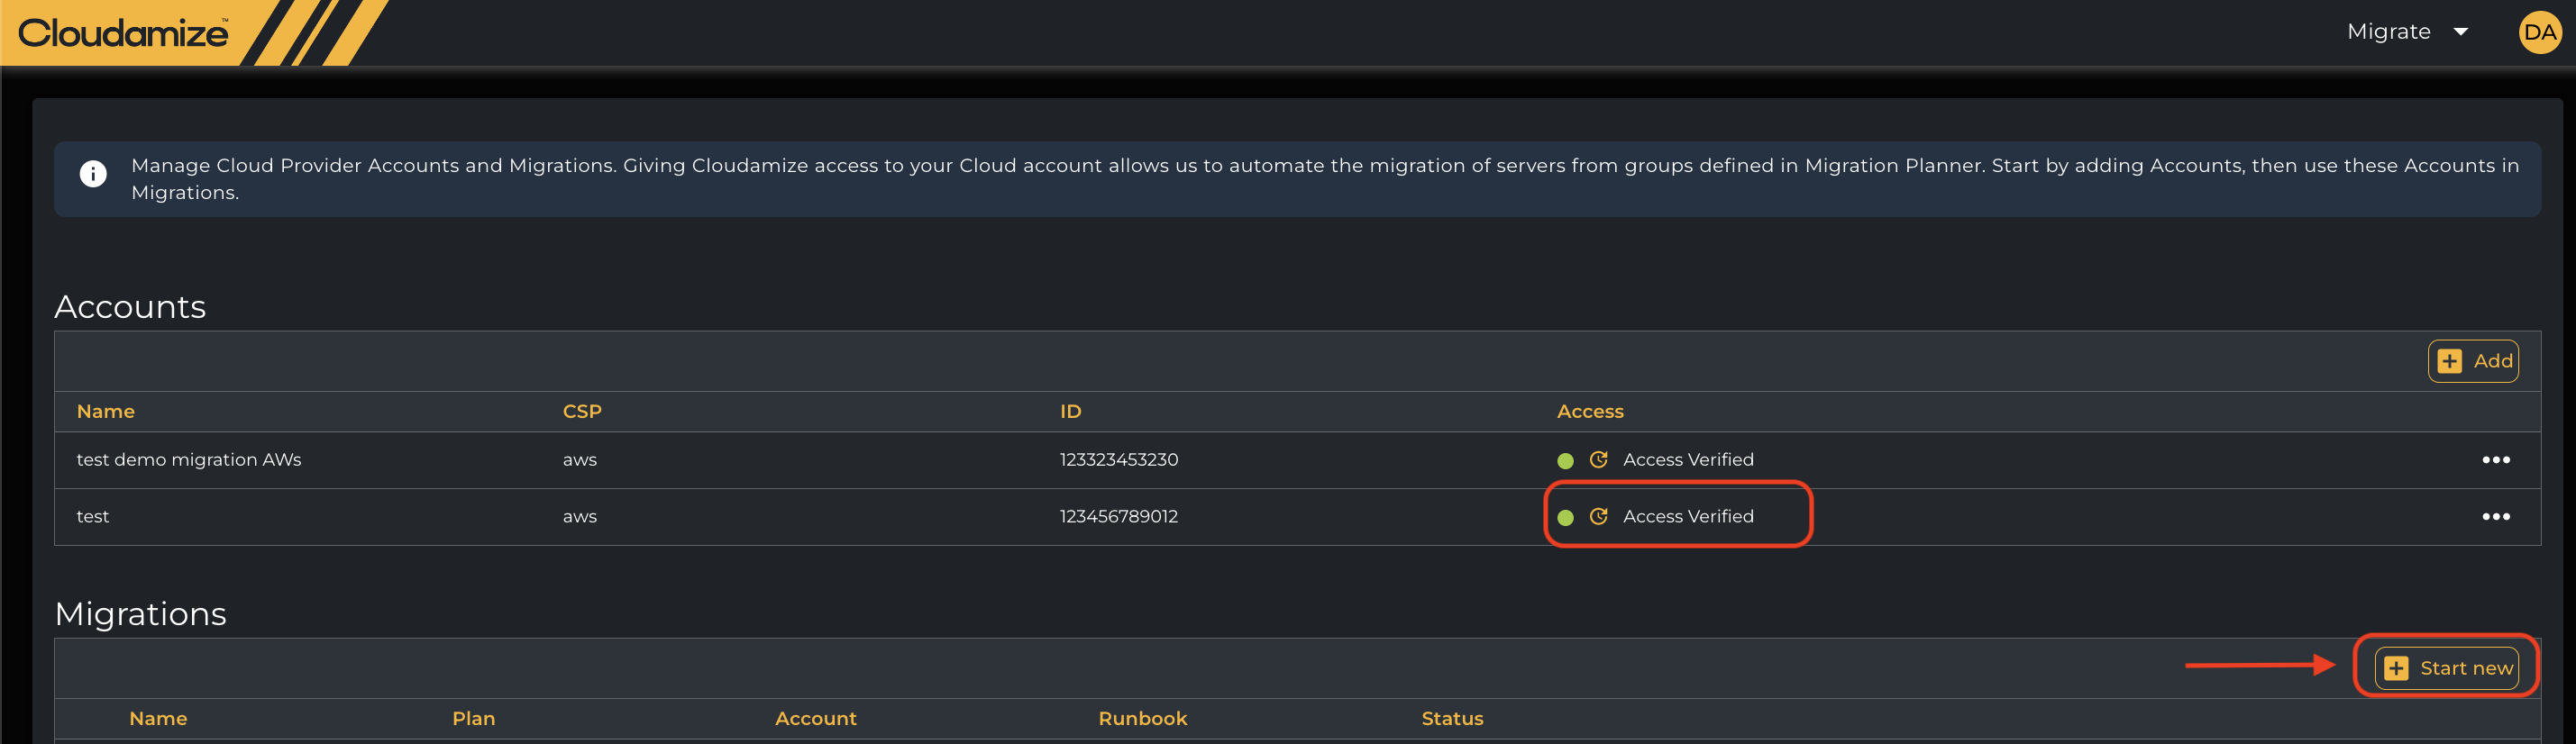
Once you click the Migrate option, you will land on the screen below.
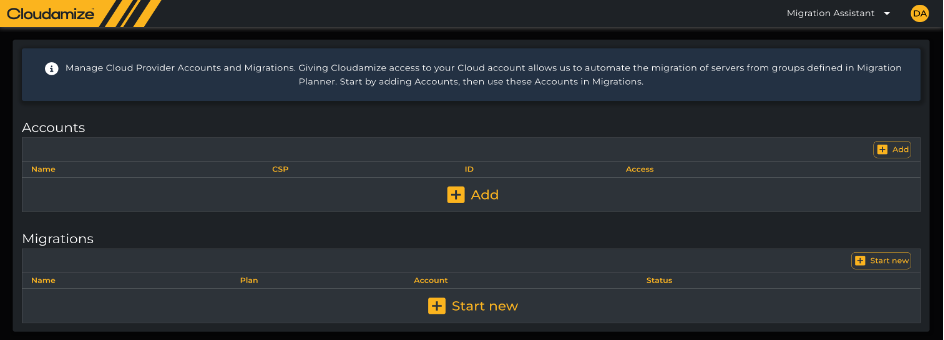
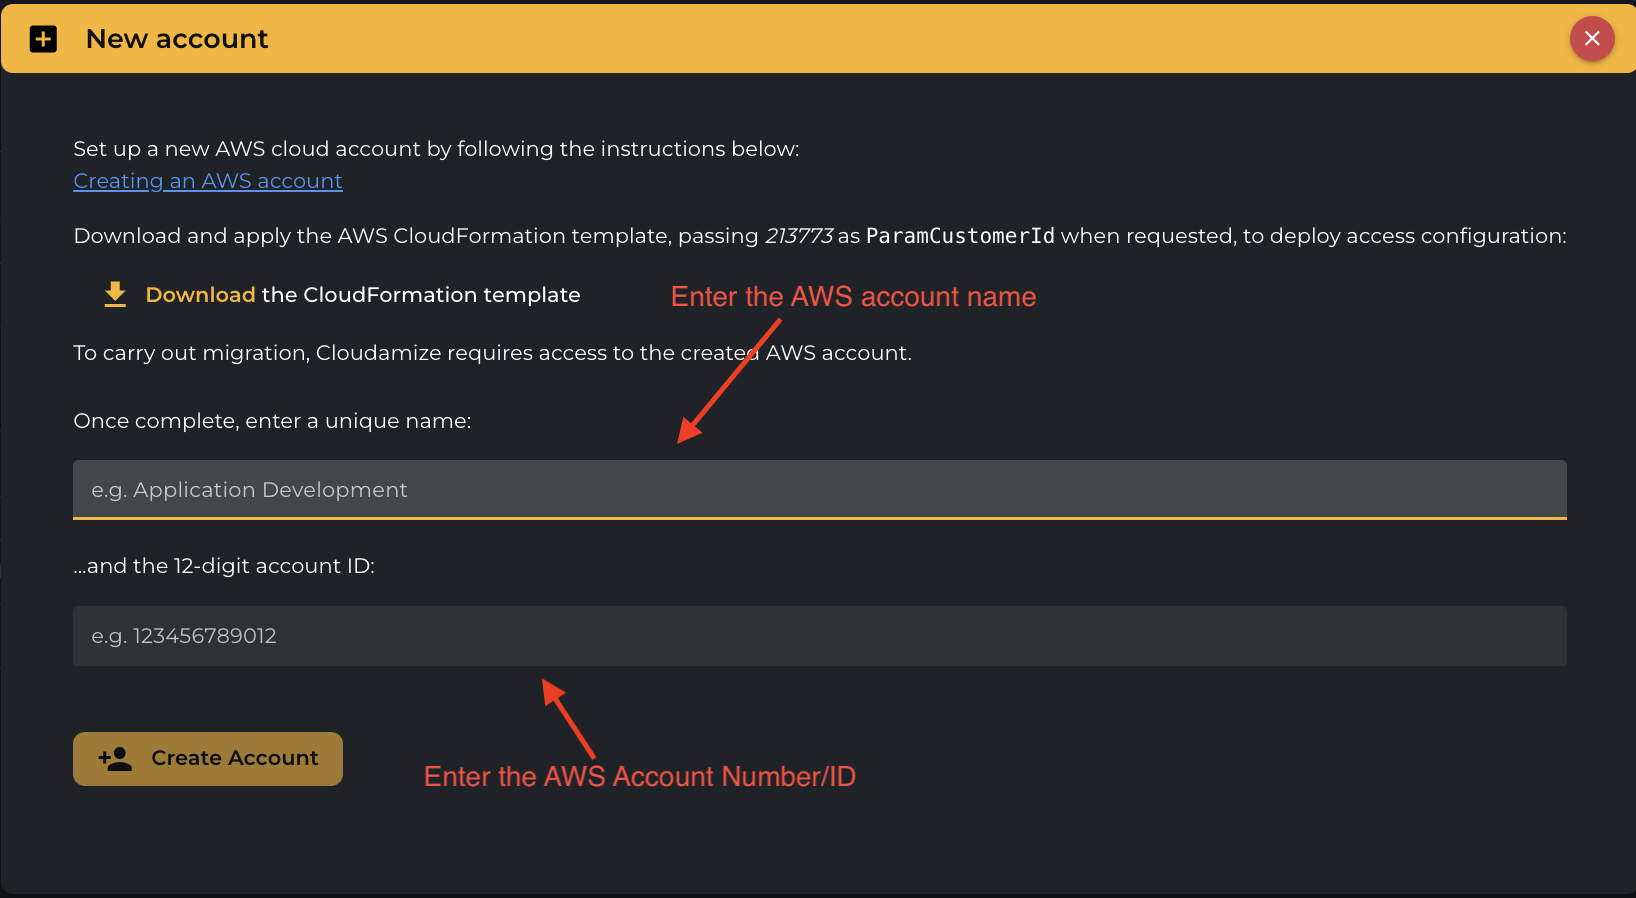
On this screen, you will be asked to add an AWS account. Click on the Add button. This will take you to the next screen, where you can download the AWS CloudFormation template. On this screen, you will also see the ParamCustomerId. You will need this ID on the AWS CloudFormation details page.
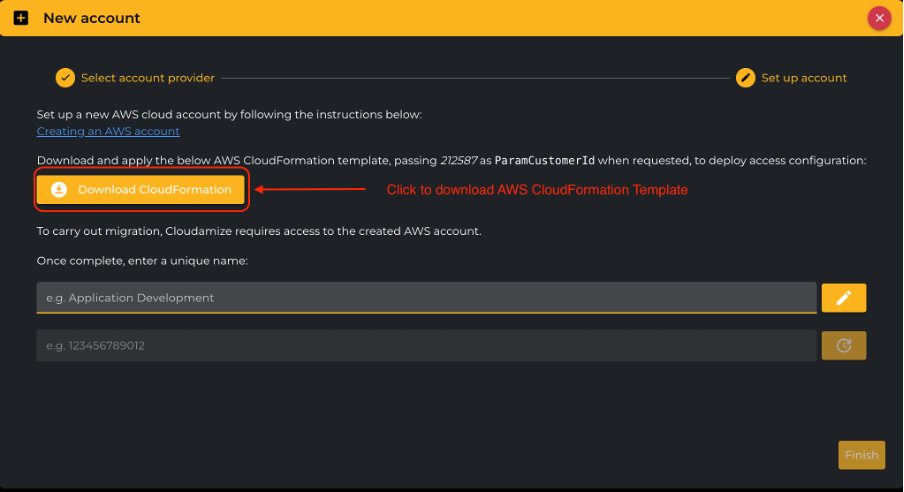
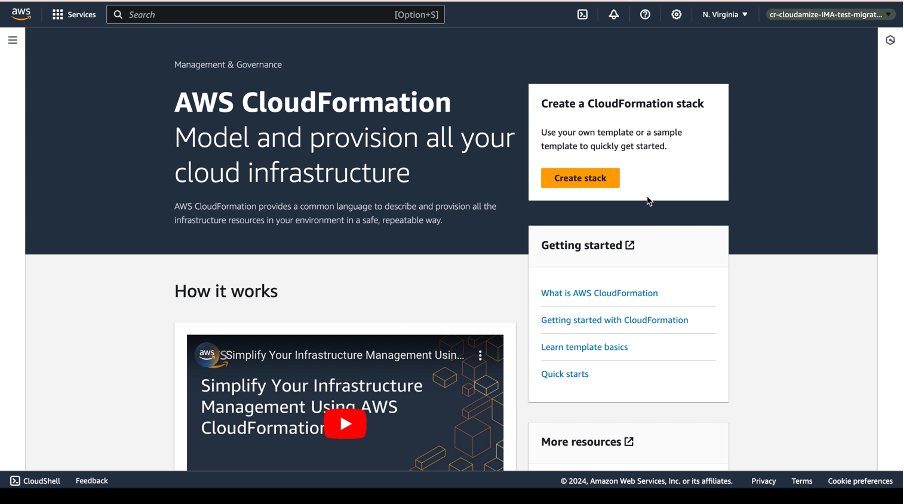
Once you download the AWS CloudFormation Template file, please log into your AWS account and access the AWS CloudFormation option. This will take you to the screen below. Please use the Create Stack option to upload the downloaded AWS CloudFormation Template file in YAML format.
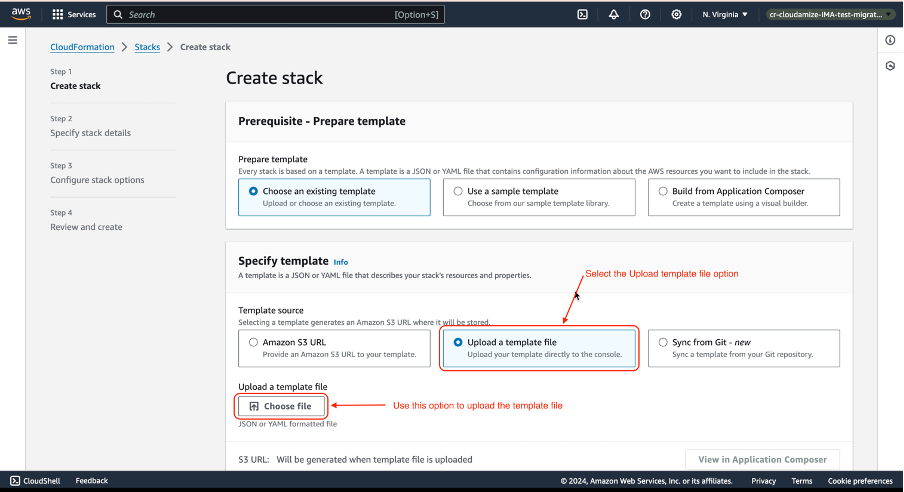
The Create Stack screen will provide you with options to upload the downloaded AWS CloudFormation Template file. To upload the template file, please follow the steps below.
1 -> Please select the Upload a template file option as highlighted in the below screenshot.
2 -> Use the Choose file option to upload the downloaded AWS CloudFormation Template file in the YAML format.
3 -> Scroll down on the page and click next.
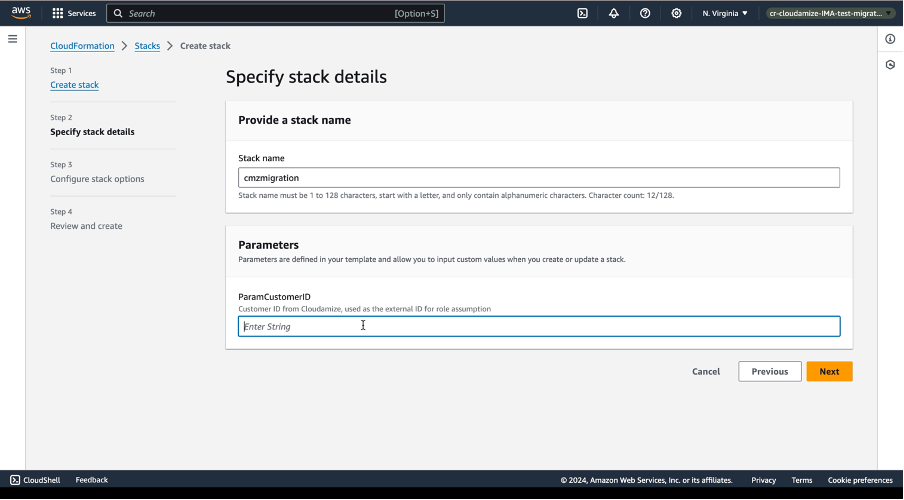
4 -> On the Next page, please enter the Stack Name and the ParamCustomerId and click Next.
5 -> On the Configure Stack Option page, no changes are required, and you can scroll down and click once again on the Next option.
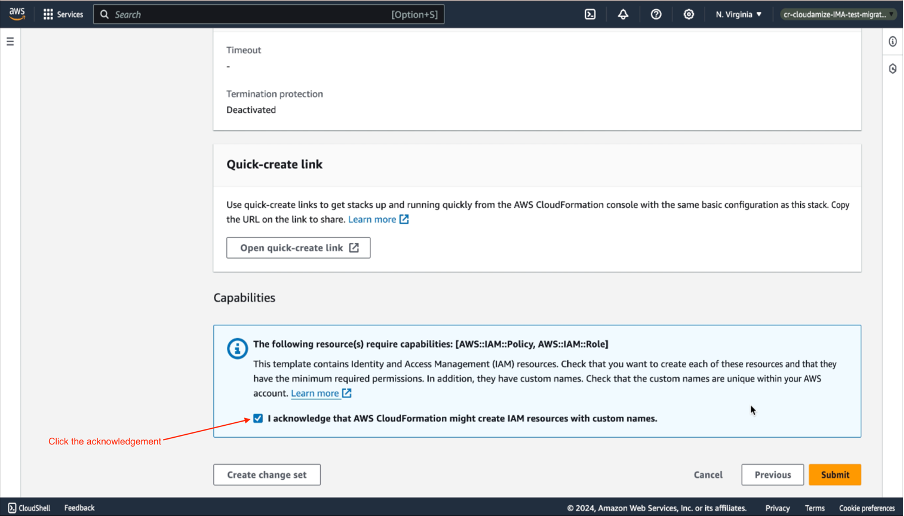
6 -> On the Review and Create page, please scroll down, click on the acknowledgment check box, and then click on Submit.
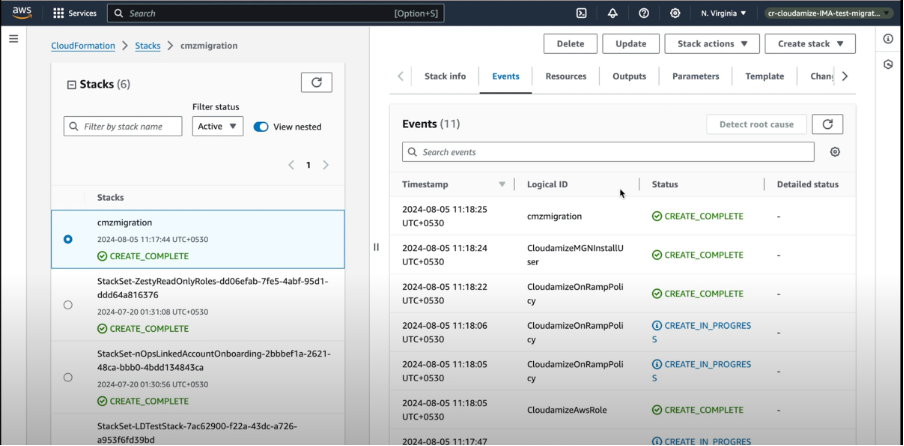
Once you have created the stack, you will see the created stack.
Once the stack is created, access the Add Account screen, enter the AWS Account name and Account number/ID, and click Create Account.
Once your AWS account details are verified, it shows Access Verified as shown in the screenshot below. A message stating "Account Created Successfully" will appear at the top of the screen. After this step, you can begin the migration process by clicking Start New under the Migrations menu.
On the next screen, you will be asked to enter the details below,
Name: You can give a unique Name for the migration. Please click on save once you have entered the name; this will allow you to continue to the next step.

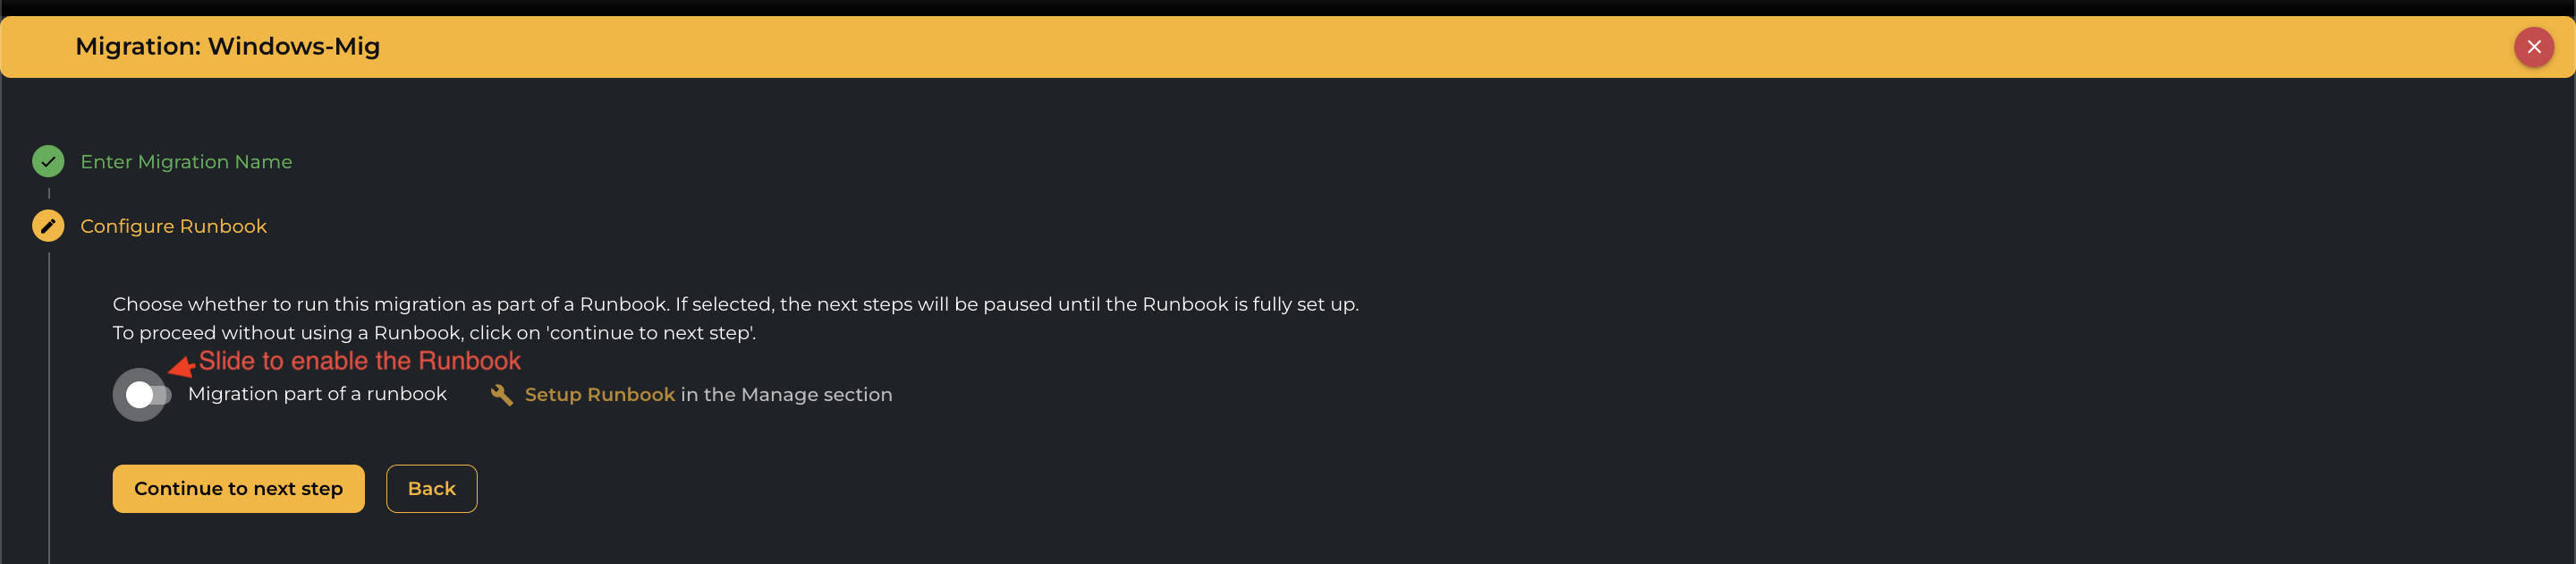
Runbook: You can also use a Runbook to execute the Migration. Please note that you will be able to proceed to the next step only once the Runbook is set up.
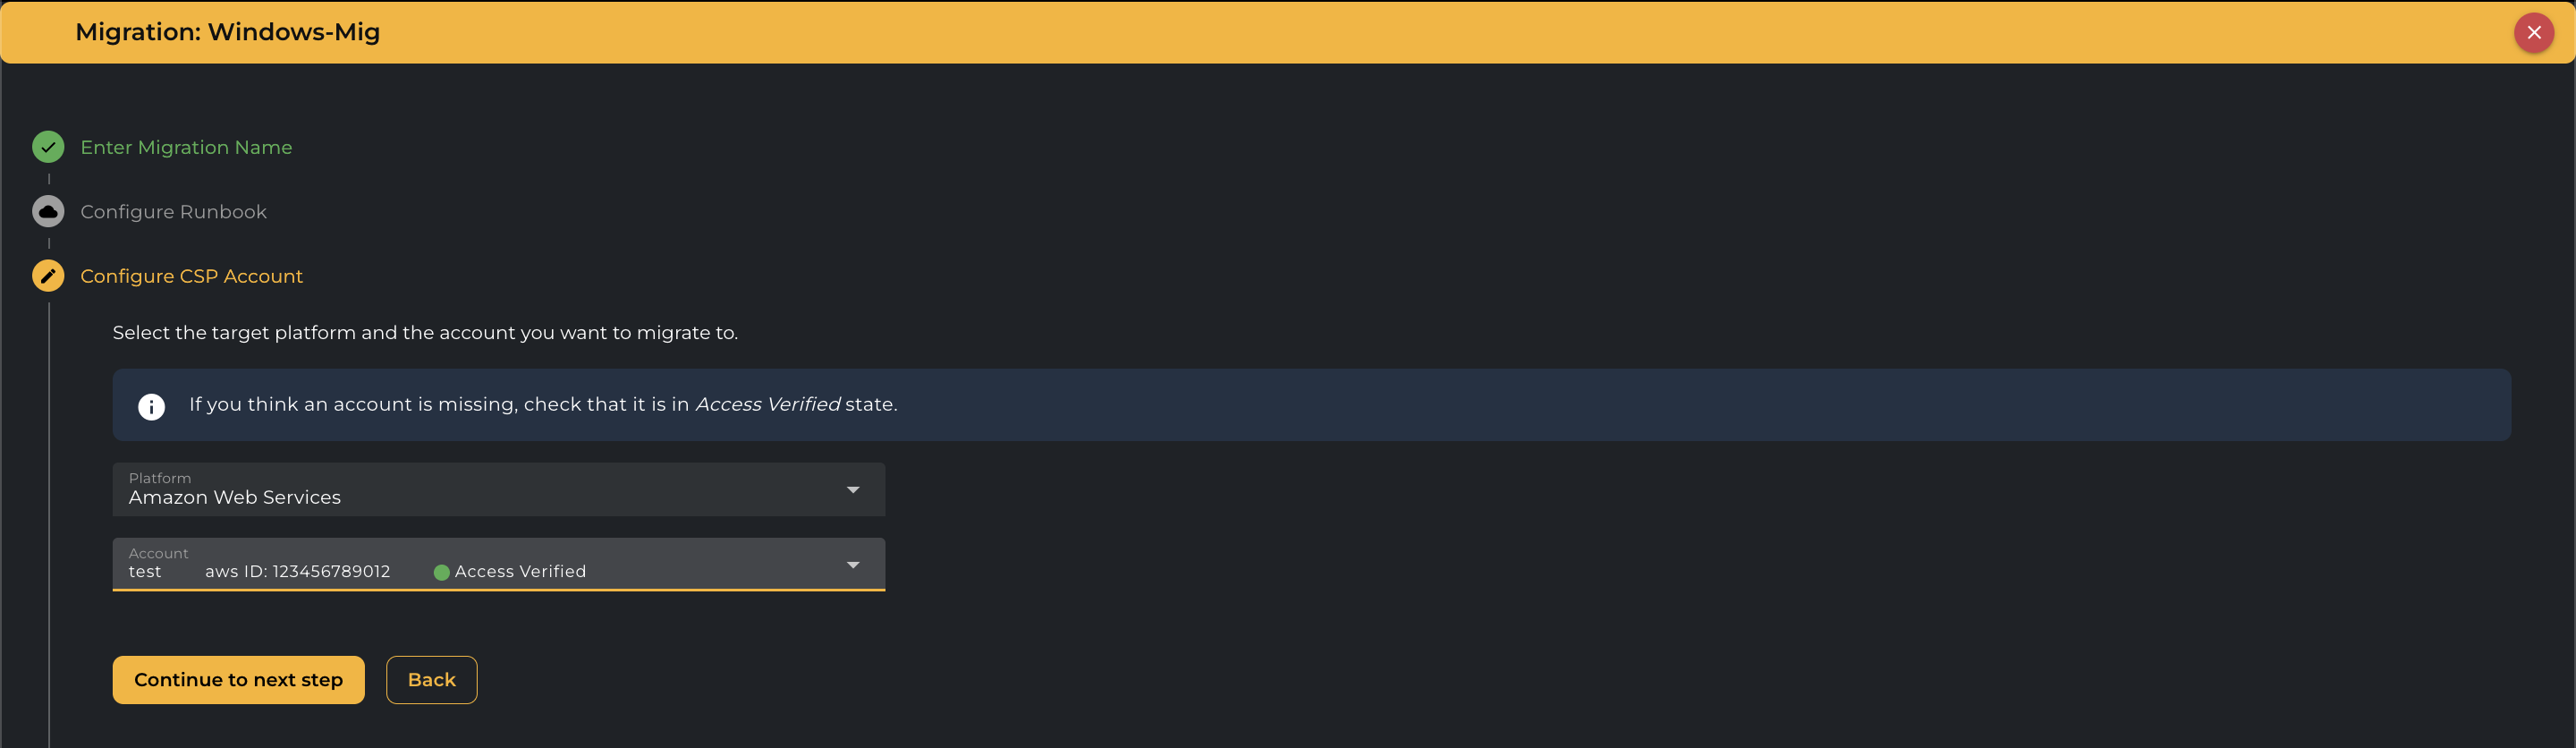
Platform: You can select the AWS IAAS provider and the account by using the drop-down button. Note that currently, the Migrate feature is available only for AWS IAAS providers.
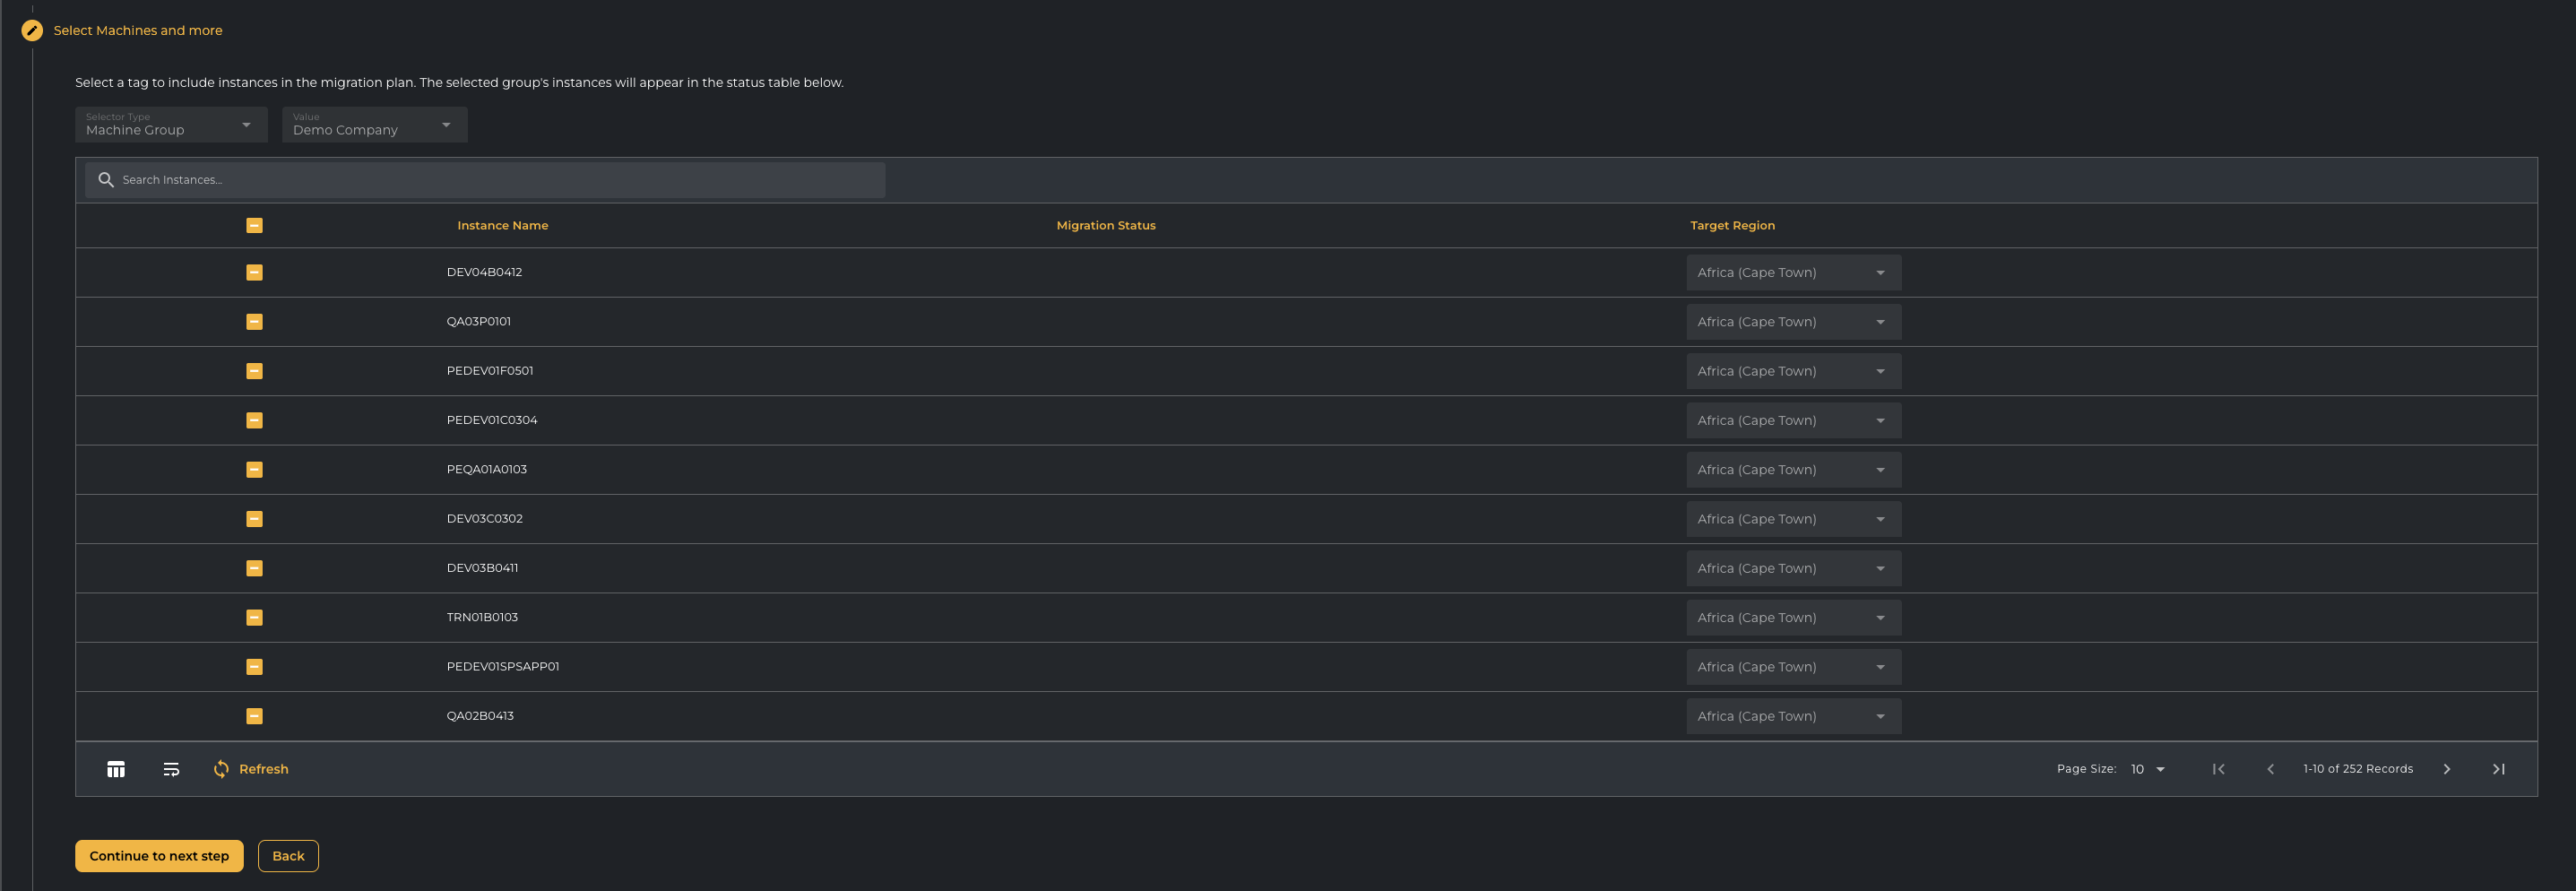
Machine Selection: You can use any one of the options of the Business Application, Migration Strategy, Waves, or Machine Group that you want to use for migration. The Migration groups are pulled from the Application Tagging from the Plan section.
The next screen will provide you with the option to install the MGN Agents on the Instances that are under the Migration group that was selected. The Credentials to install the MGN Agent will be generated in your AWS account and passed through the Cloudamize agent as part of the installation. This option will allow you to select a subnet to launch the instances on the cloud. You can use this option if you wish to launch the servers in a specific Subnet, else you can ignore this option and click the MGN installation option.
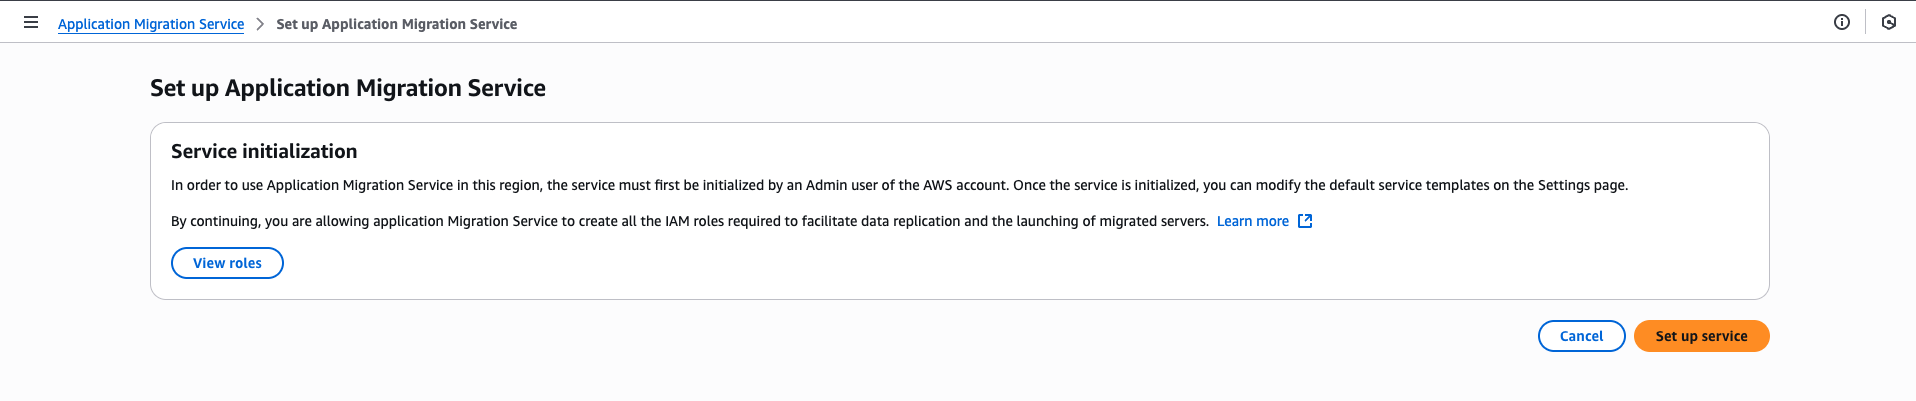
Please make sure the Application Migration Service is enabled in the AWS console for the region where you're migrating the machines using MGN, before proceeding with the MGN agent installation.
MGN Agent Pre-requisites: Hardware (Minimum Sizing)
CPU: At least 1 vCPU
Memory: At least 2 GB RAM
Disk Space: At least 500 MB of free disk space
Network: Internet access to communicate with AWS endpoints (either via public internet or VPC endpoints)
⚠️ Note: Machines with very low specs (e.g., Nano/ Micro instances) might fail due to insufficient memory or CPU throttling. AWS recommends at least t3.small or larger for smoother operations.
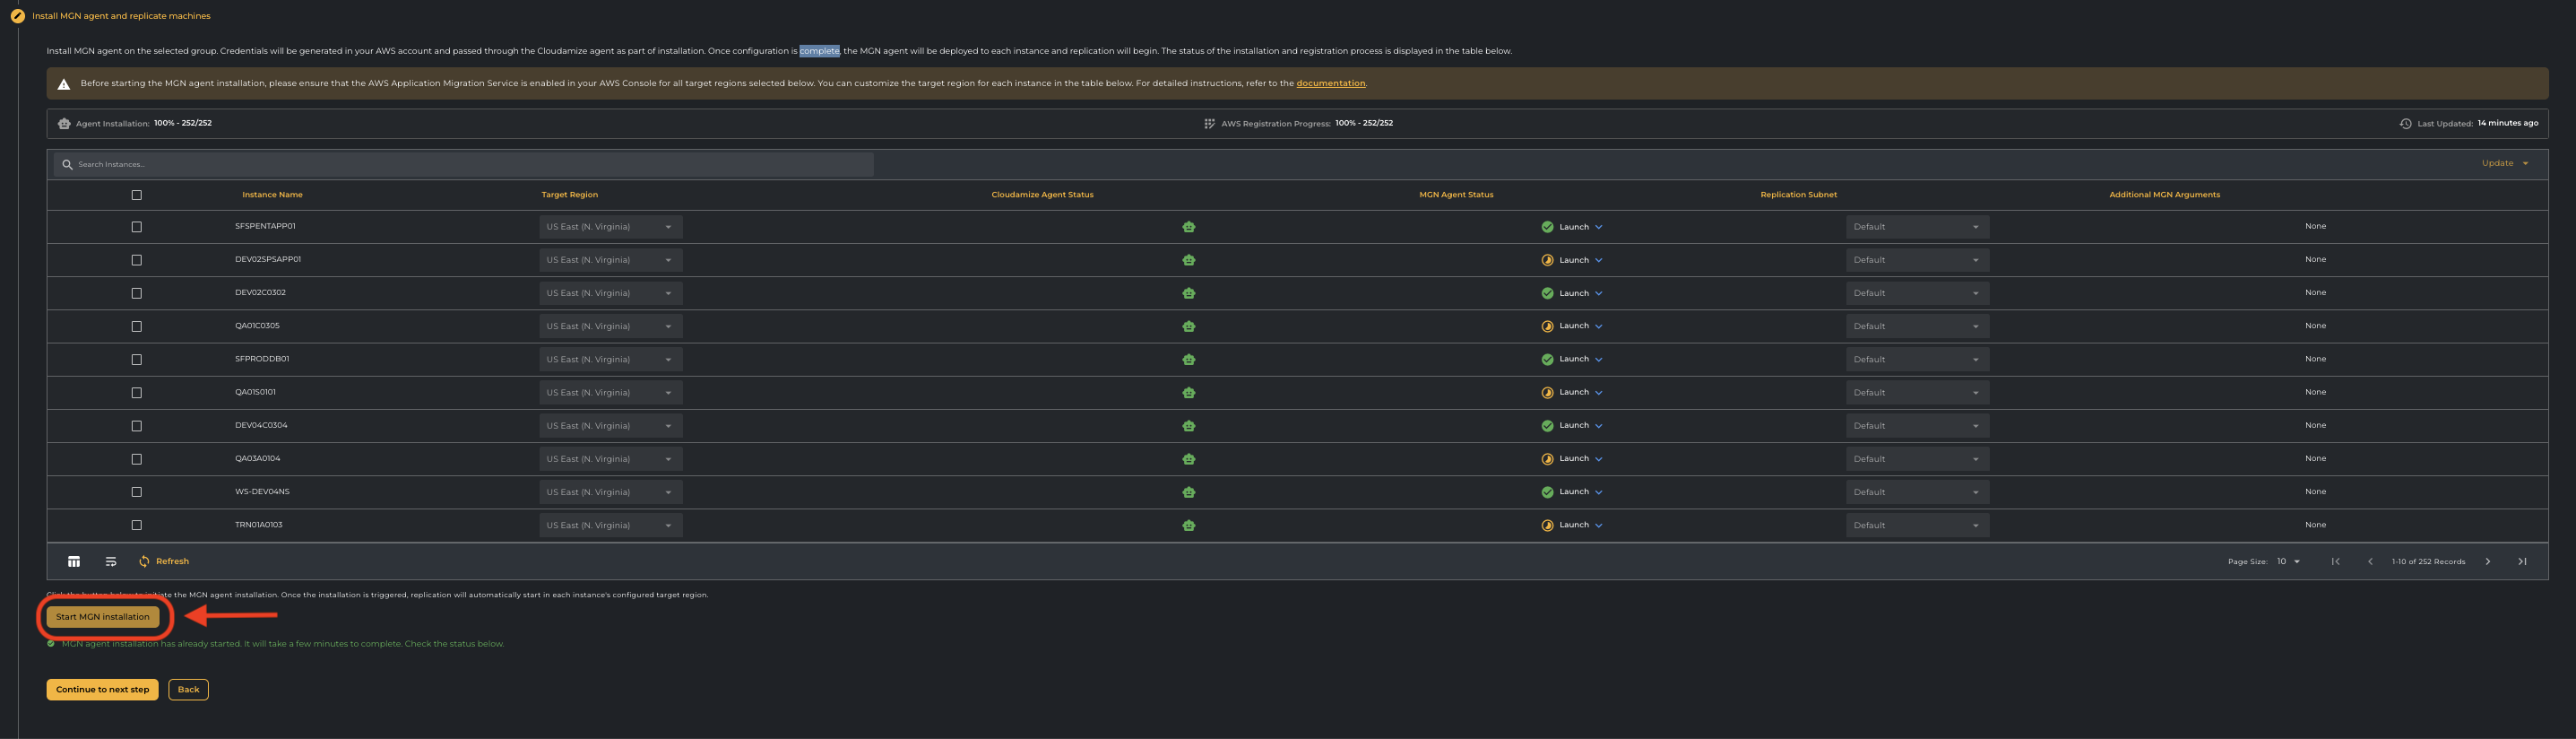
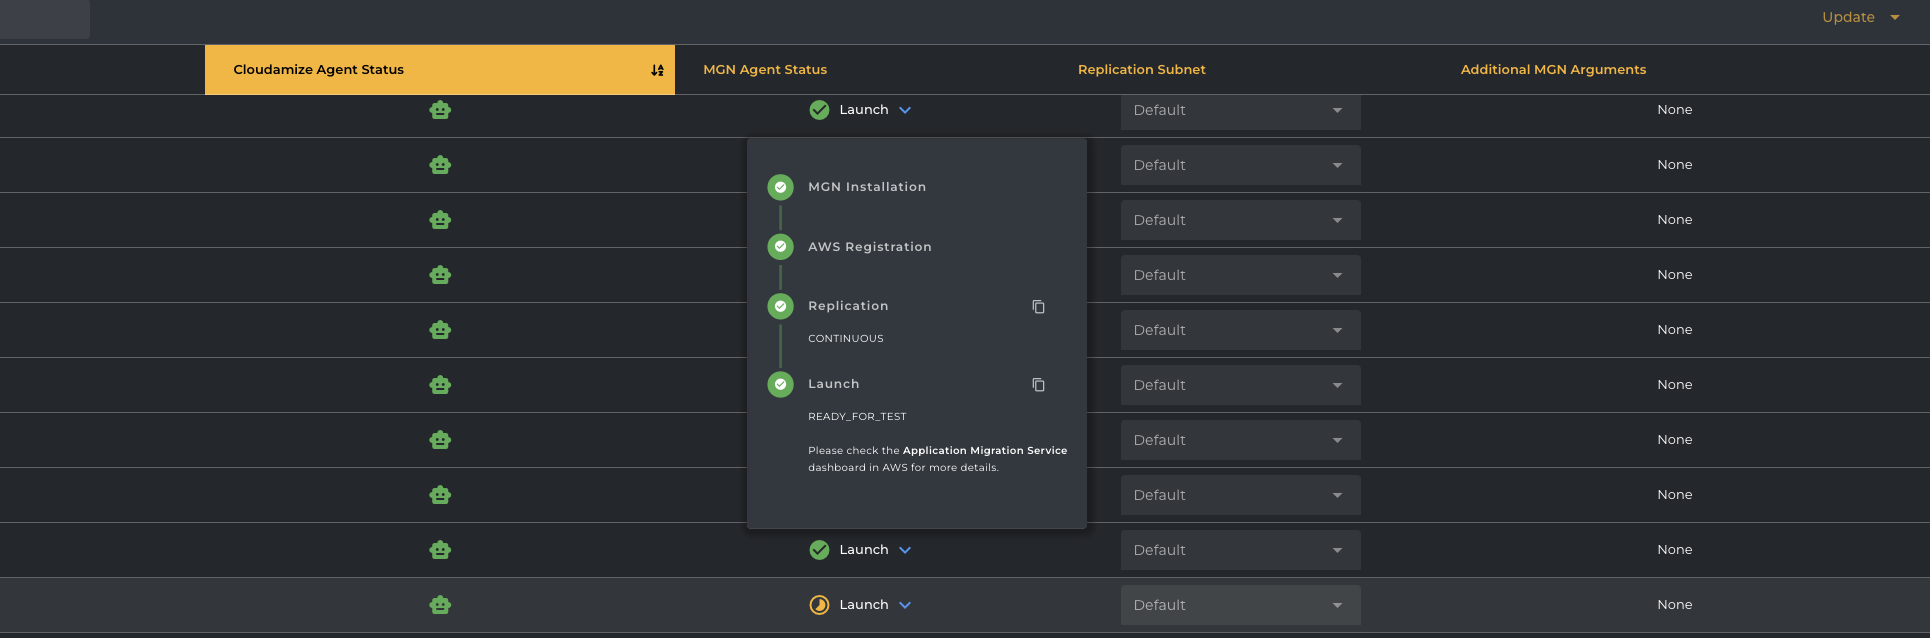
The MGN agent status can be checked after the installation has successfully started as shown in the above screenshot.
Note: The AWS region for an AWS Application Migration Service (AWS MGN) migration cannot be changed once the initial setup and assessment have begun. The service is region-specific, meaning that the migration process, including data replication and instance launches, is tied to the region that was initially selected.
You can pass multiple arguments as provided in the AWS documentation below,
Linux: https://docs.aws.amazon.com/mgn/latest/ug/linux-agent.html
Windows: https://docs.aws.amazon.com/mgn/latest/ug/windows-agent.html
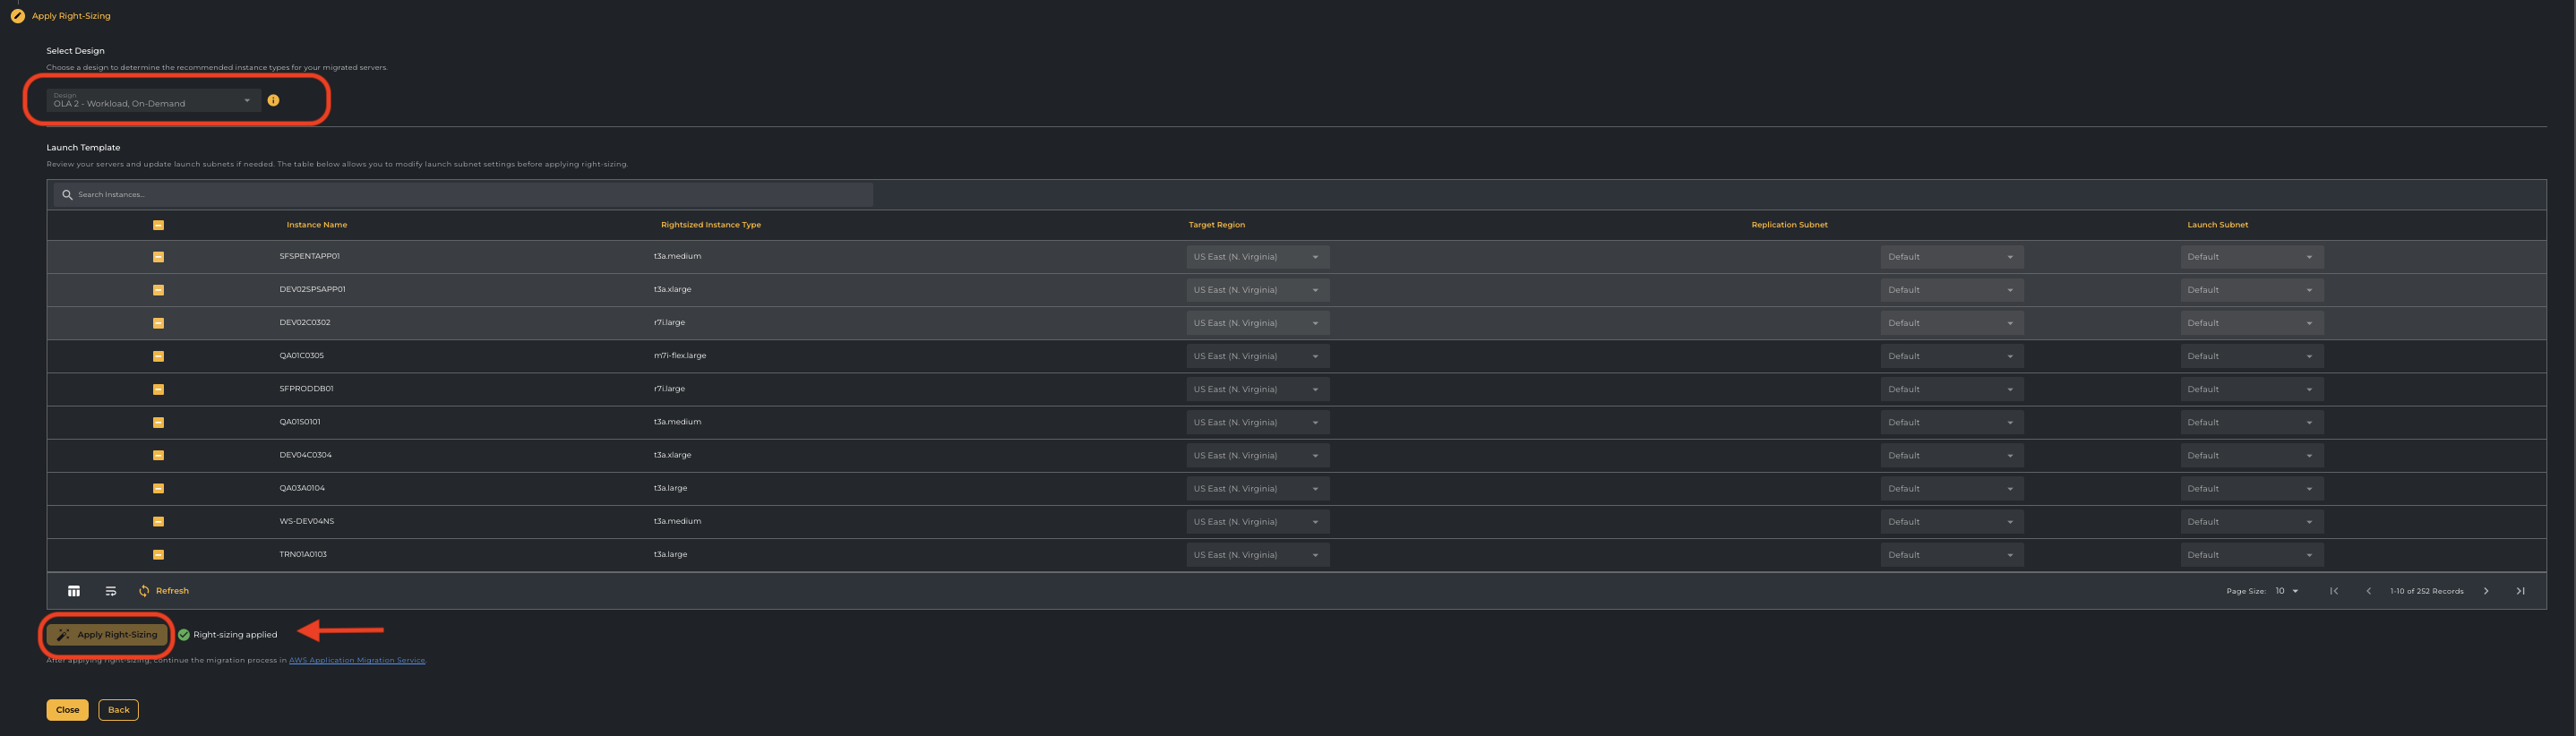
Now, once the MGN Agent installation is completed, you can click the button “Continue to next step”. You will see an option “Apply Right-sizing“. Once you apply the right sizing, the screen will show you that the right sizing has been applied and will provide you with the link to access the AWS console.
Design: You can also select the Design that you want to apply for migration.

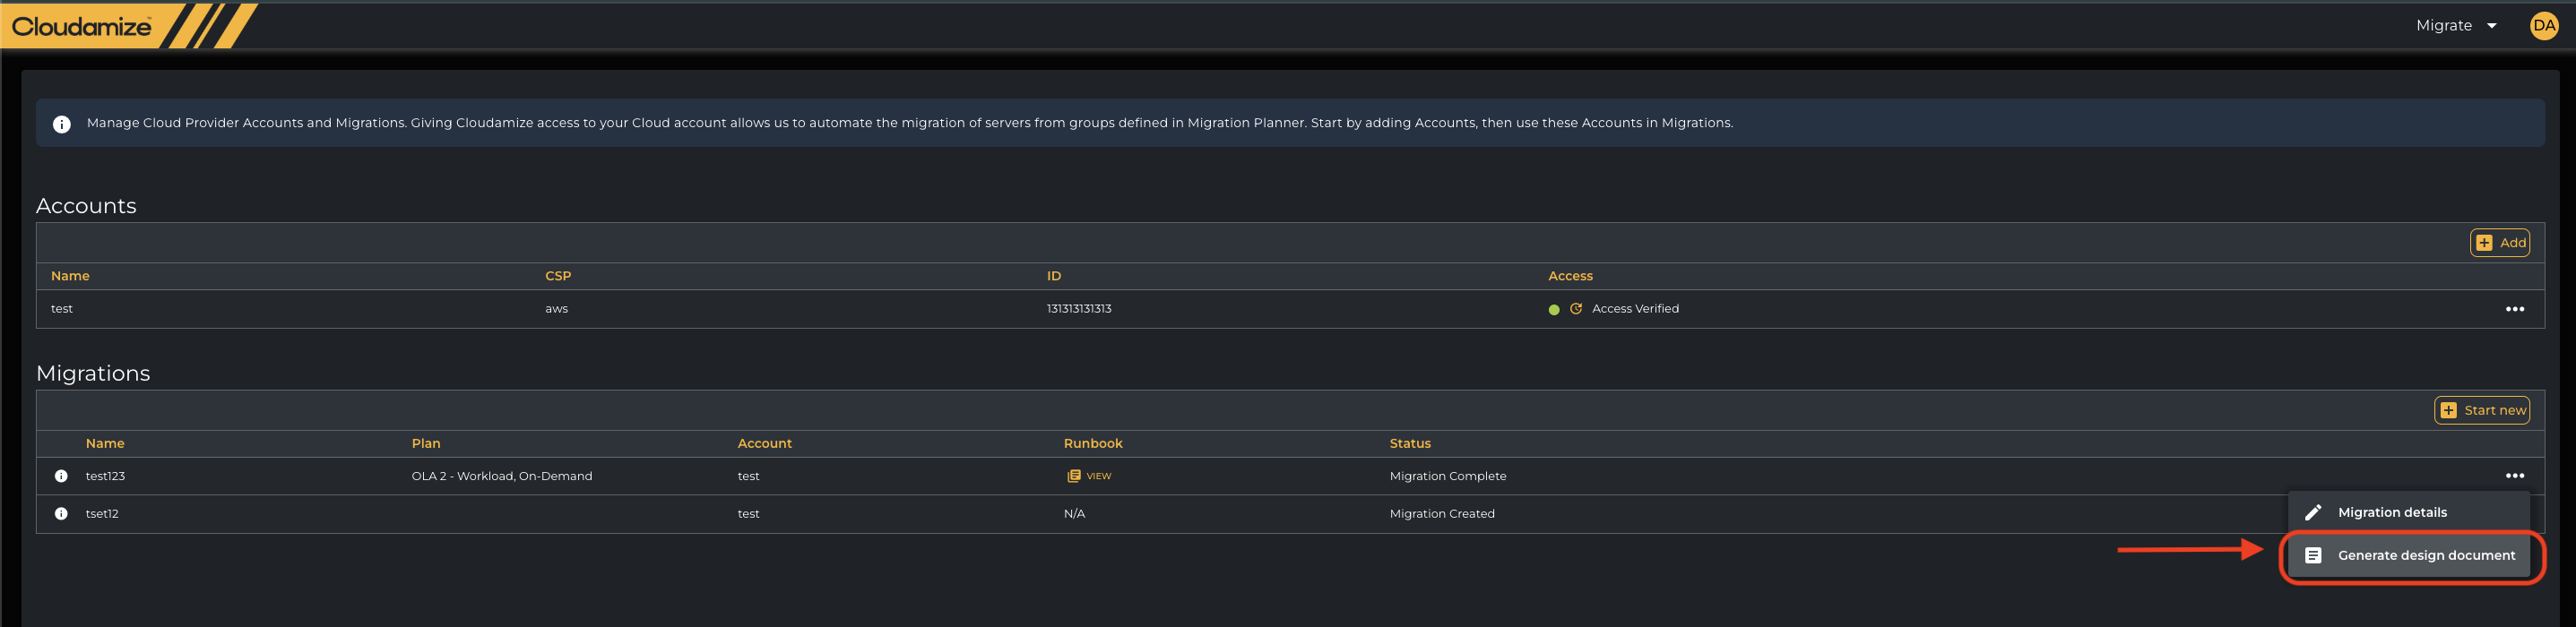
Now, let’s generate the Low-Level Design document. To generate the document, please click on the 3 dots as shown in the screenshot and click the option “Generate Design Document”.
Note: The Status column displays the current state of the MGN installation. Below are the statuses and their meanings:
'Created': The migration has been created, but the installation process has not yet begun.
'MGN Started': The MGN installation has been initiated and is currently in progress.
'MGN Complete': The MGN installation was successful.

Note: The Runbook column in the migration grid will display 'Setup runbook' if you've enabled the runbook slider but haven't attached a runbook. Once a runbook is attached, the status will change to 'View'. This status change occurs after selecting and attaching a runbook using the slider.

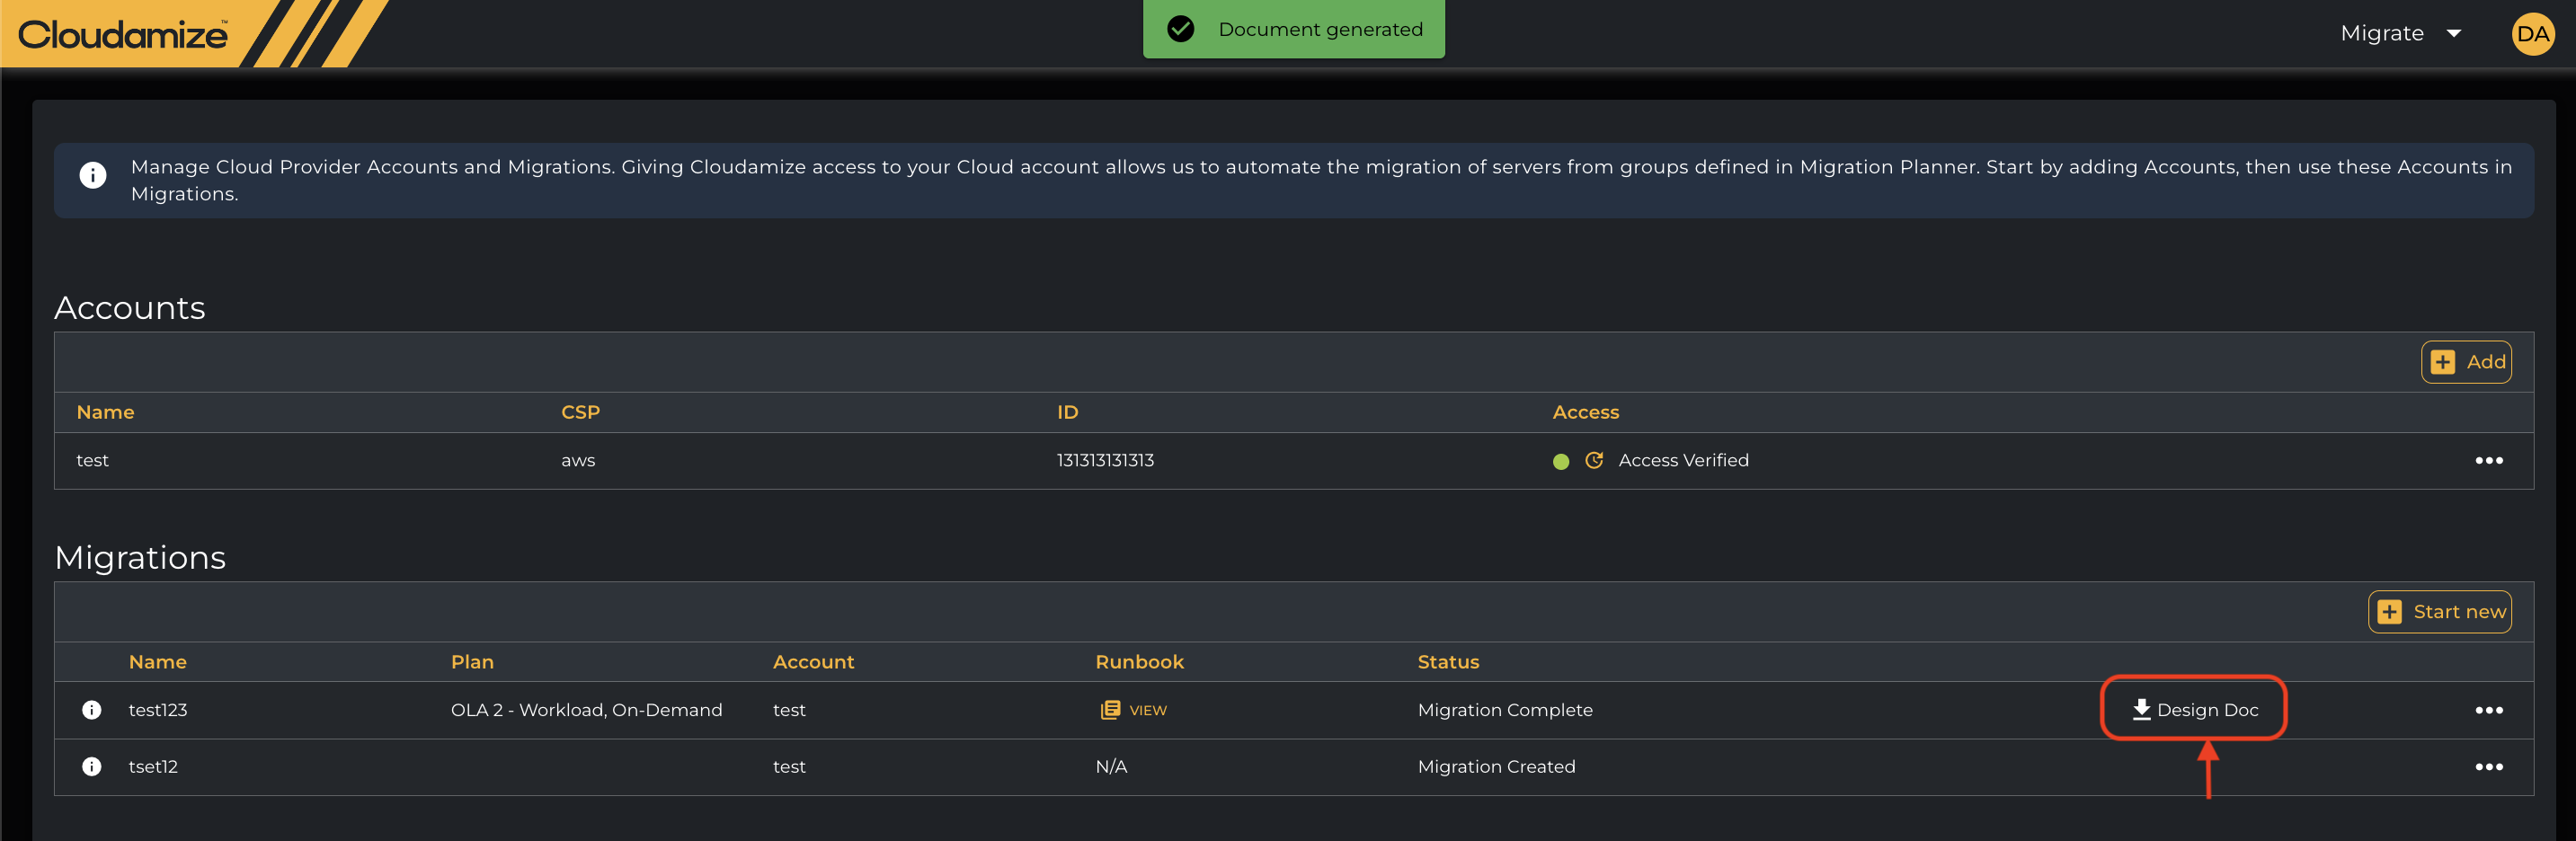
Once the design document is generated, you will get the message at the top of the screen and an option to download the document.
We have attached a sample Design Document file for your review.
lld(1).docx