

This guide walks you through the process of deploying the Cloudamize Agent to Windows and Linux machines using ManageEngine Endpoint Central's software deployment feature. It includes package creation, configuration, and deployment steps to ensure a smooth rollout across your network.
Steps to install a Cloudamize Agent on Windows
Prerequisites
-
Cloudamize Agent installer for Windows (
cloudamizeAgent.msi) from Cloudamize Console -
Customer key from Cloudamize Console
-
Valid Windows credentials for the target machines are required, and the user must have admin access to install the agent.
Log in to Endpoint Central, navigate to the Software Deployment section, and then select Package > Add Package > Windows.
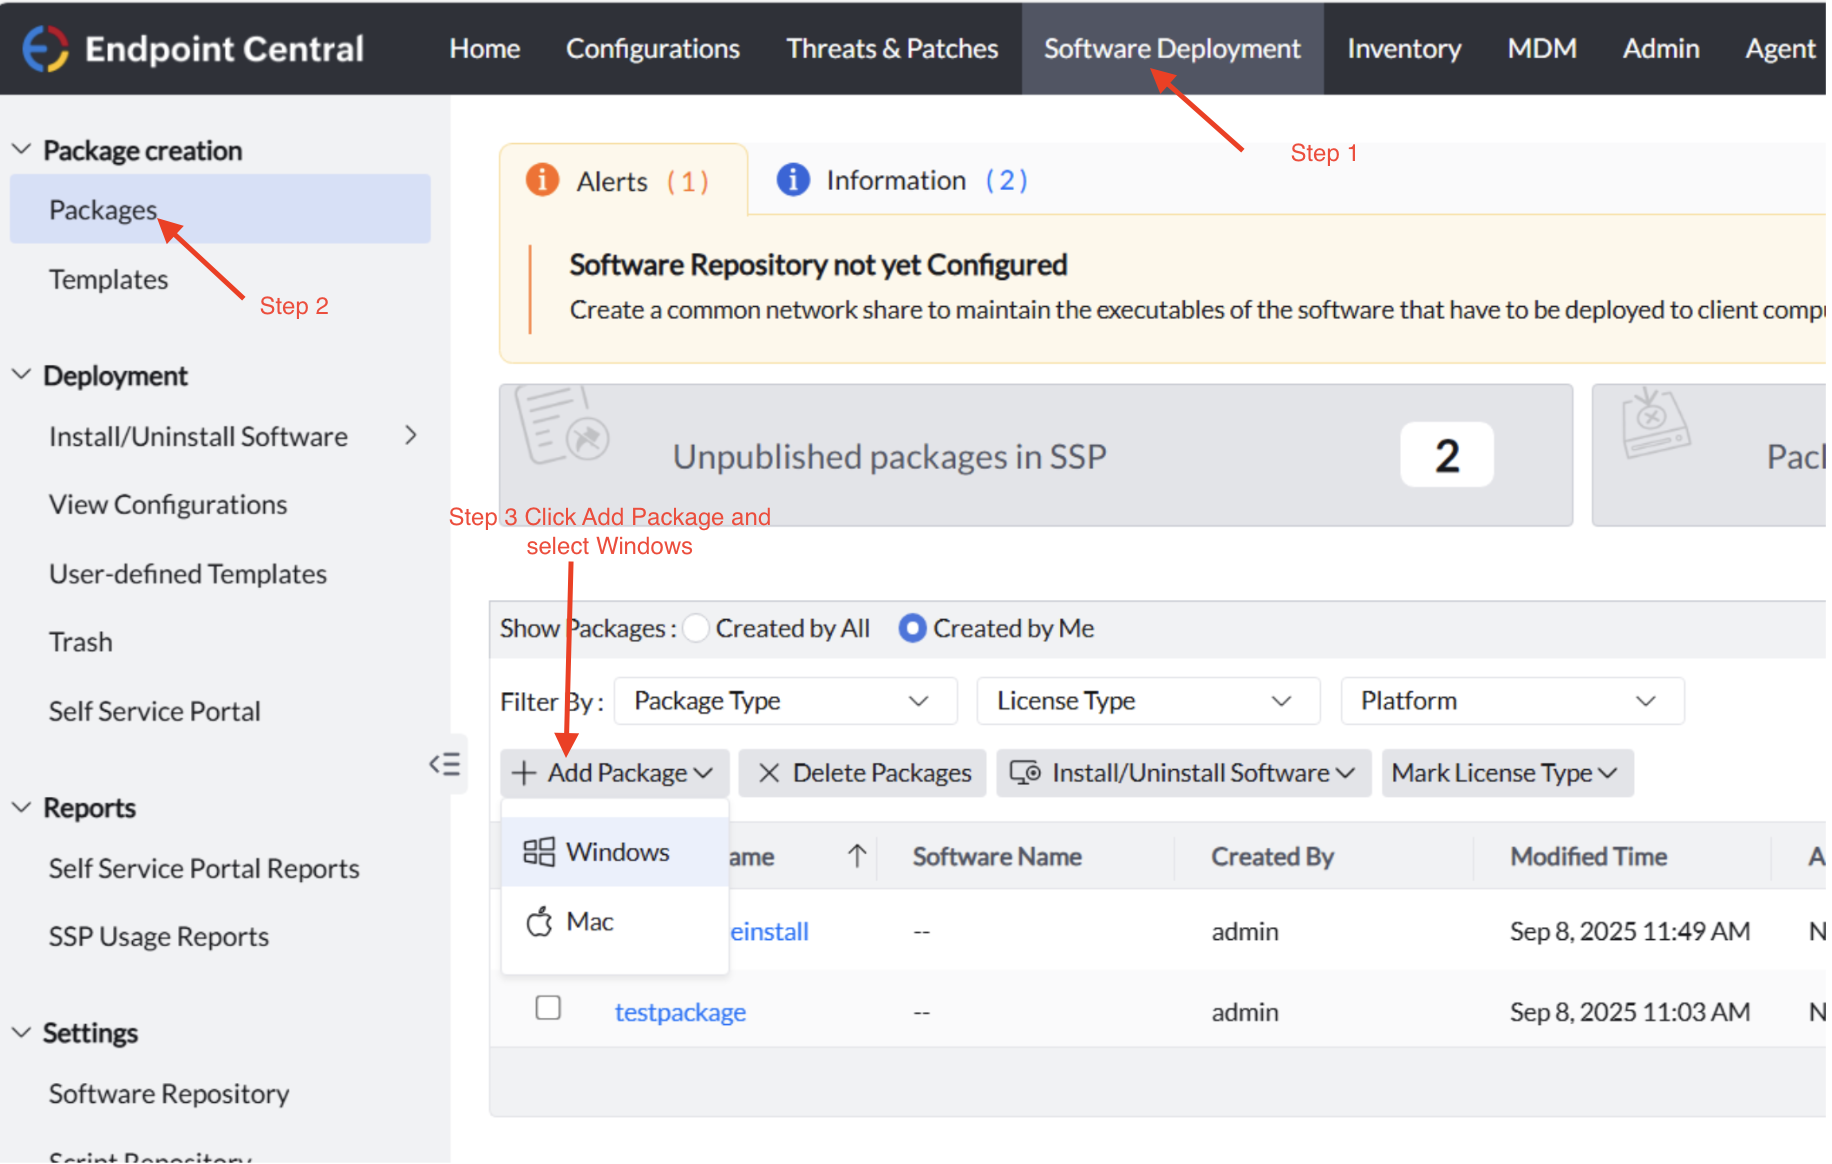
-
Package Naming & Type
-
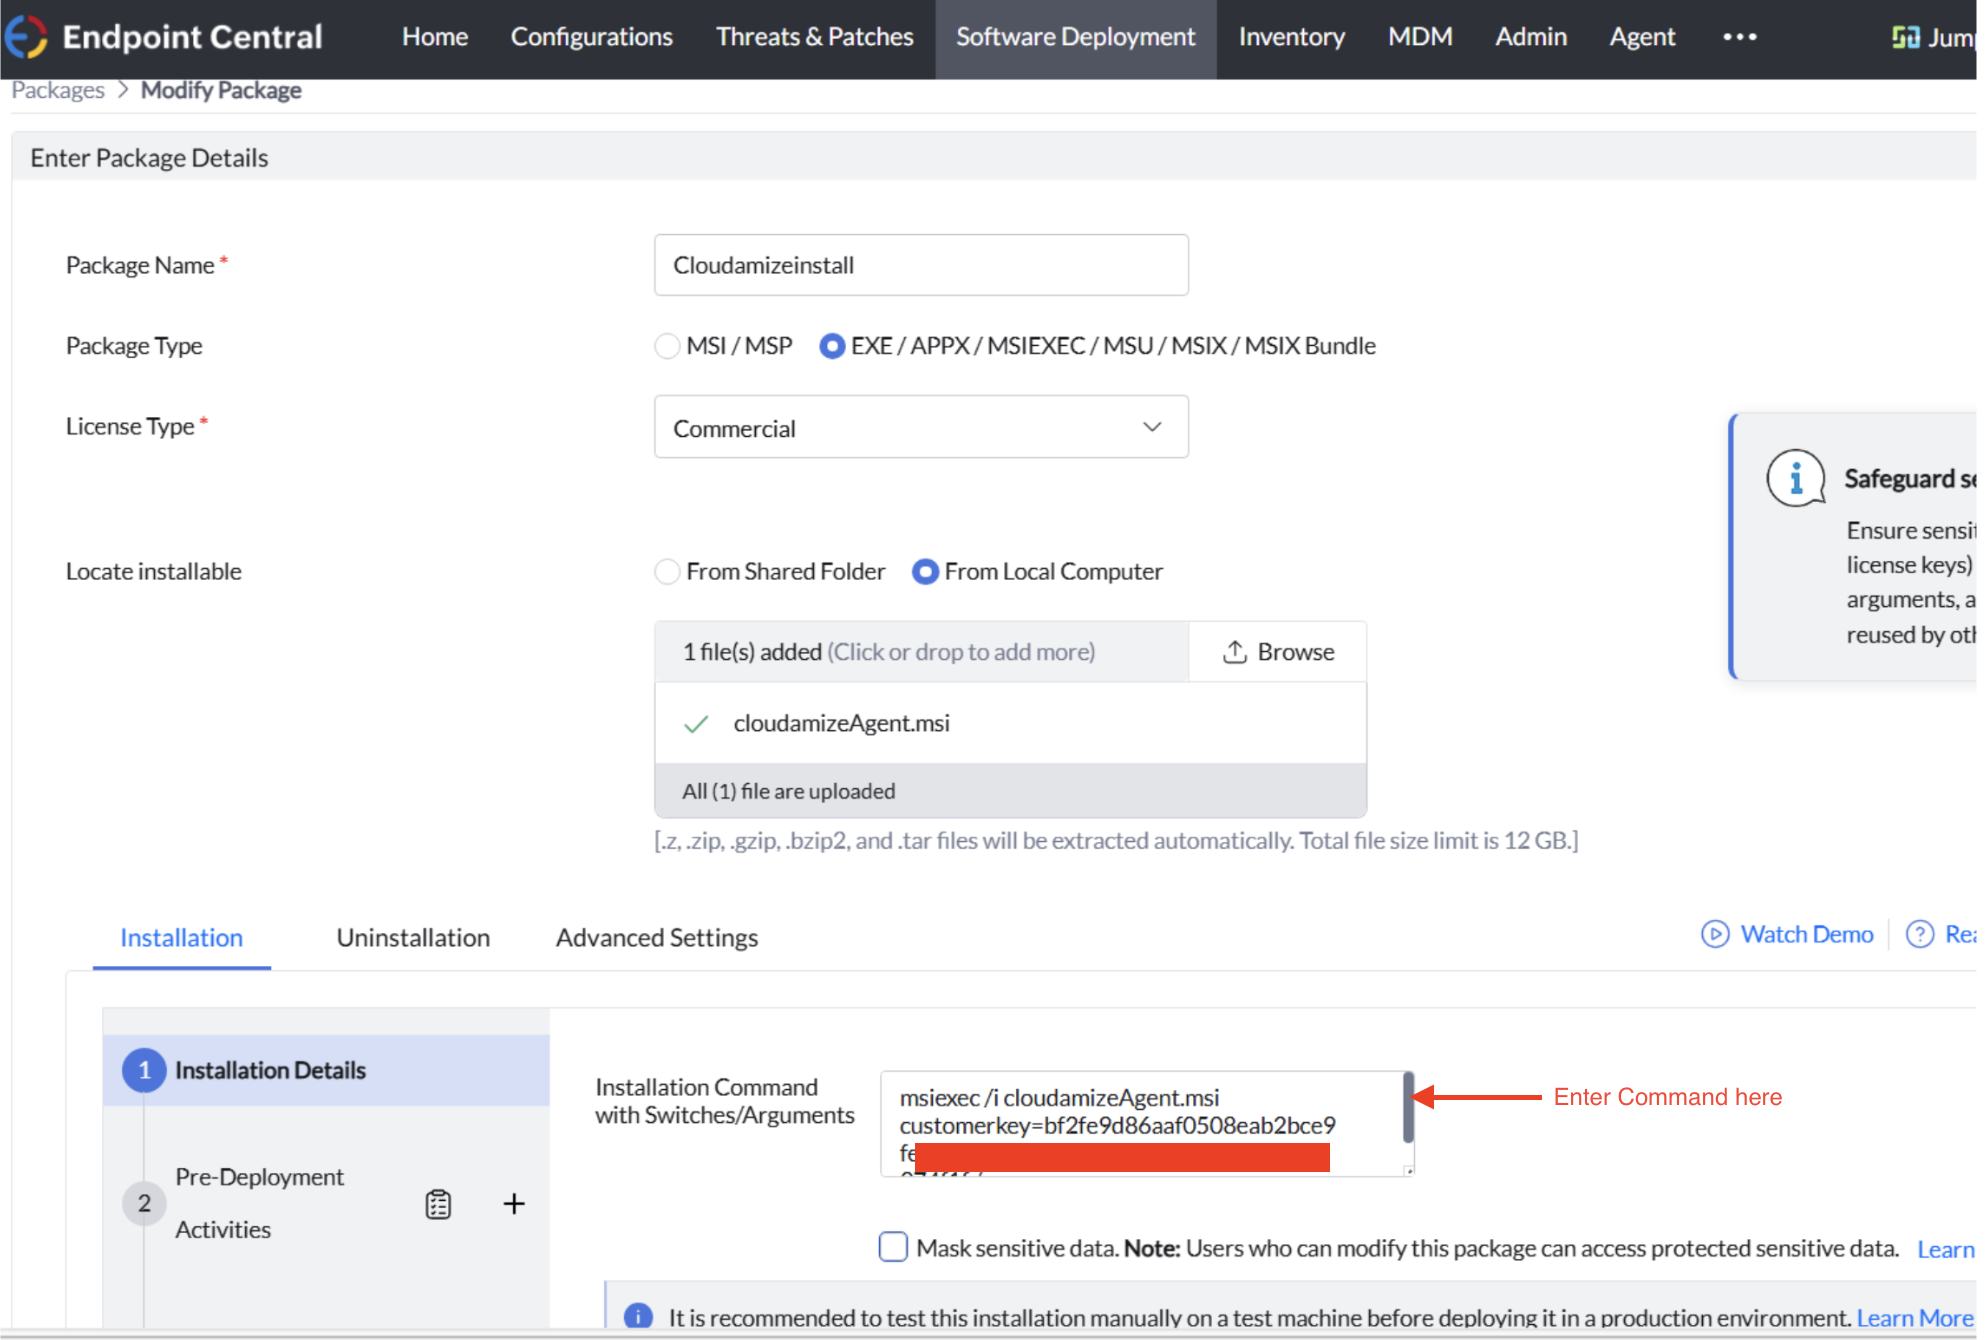
Enter a descriptive Package Name.
-
Set the Package Type to
EXE. -
Choose Commercial for the License Type.
-
-
Locate and Upload Installer
-
Select From local computer to locate the installer.
-
Upload the installer file.
-
-
Installation Command
-
In the Installation Details section, enter the following command in the
Installation Command with Switches / Argumentsfield:msiexec /i cloudamizeAgent.msi customerkey=<key_goes_here> /qn -
Note: The full command can be found on the Cloudamize console by navigating to Setup > Windows > Install Agent using Command Line.
-
-
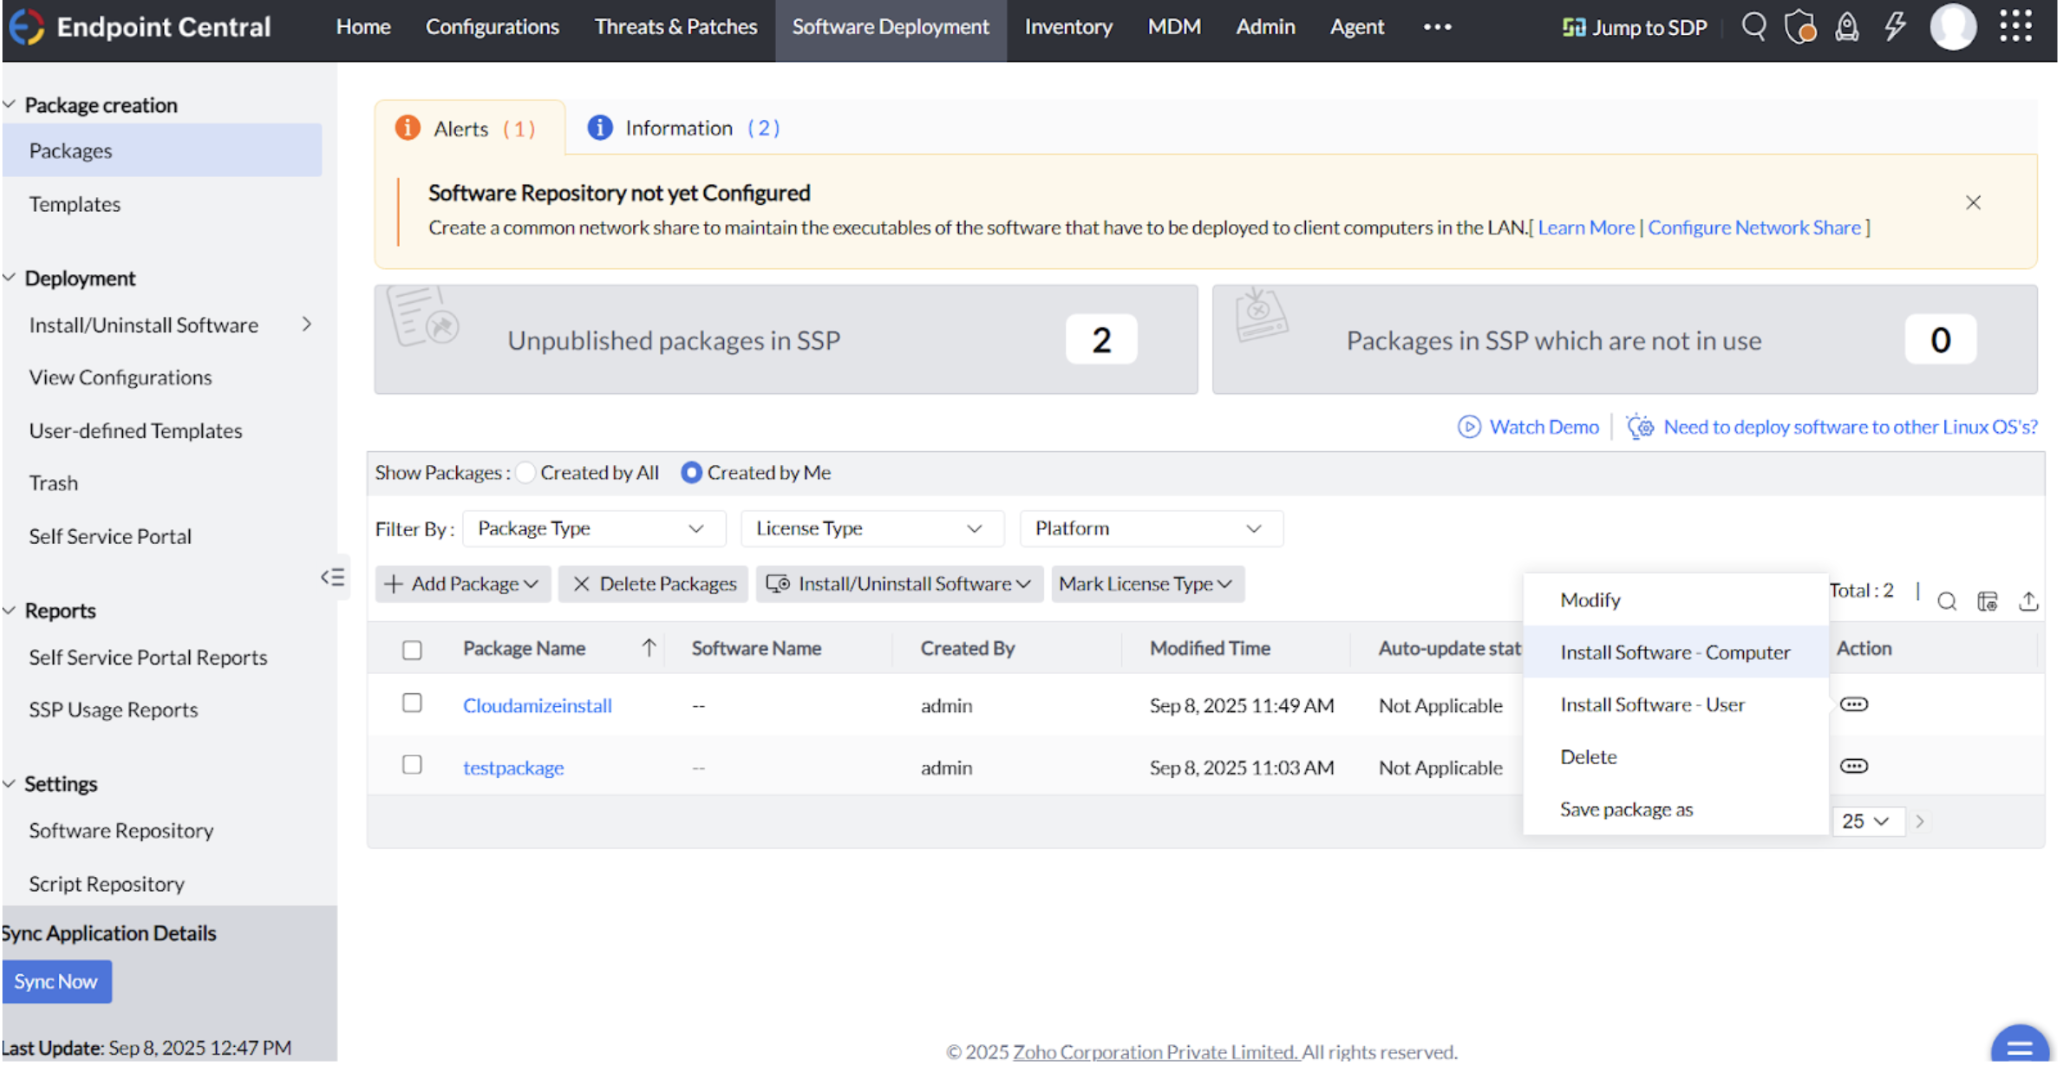
Click Add Package.
-
Locate the package you just created. Under the Actions column for that package, select Install Software - Computer.
-
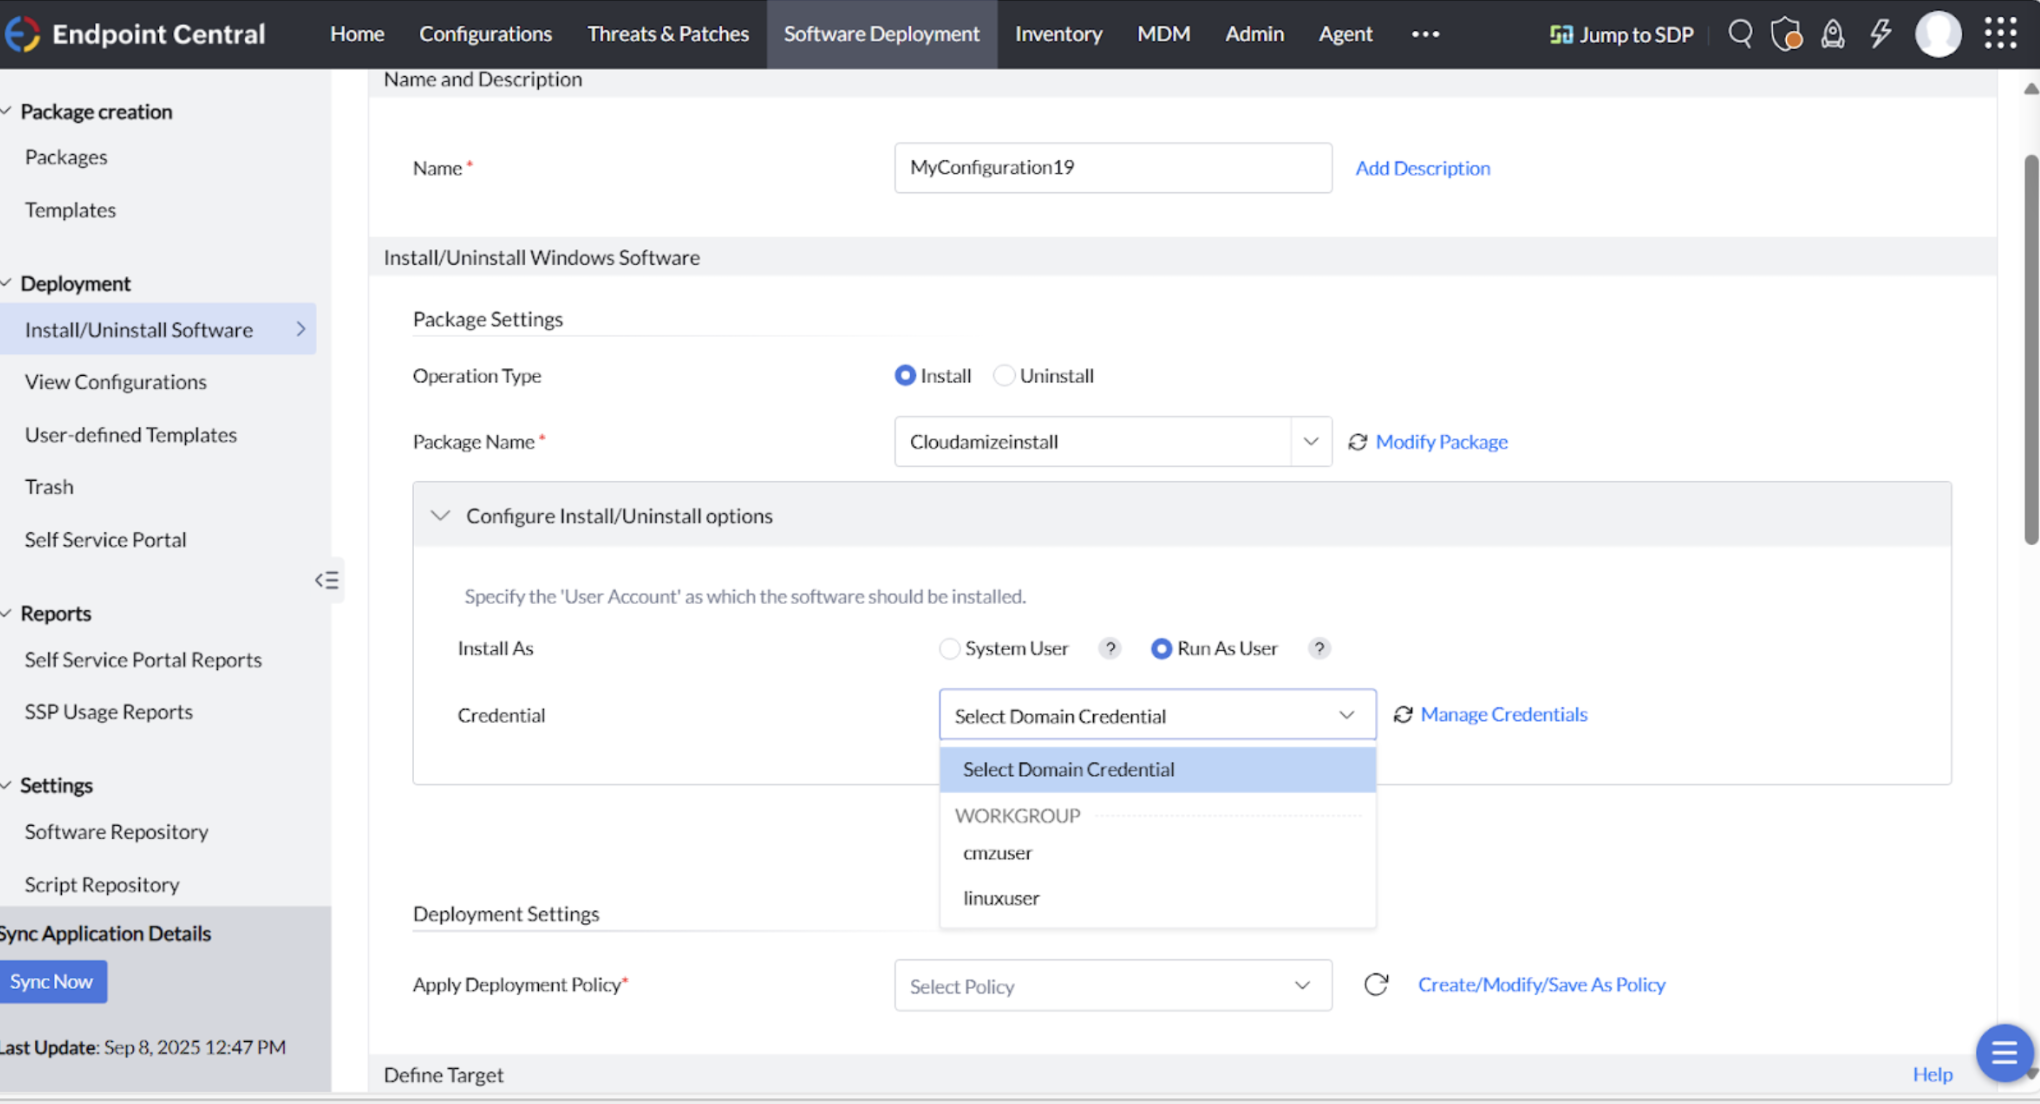
Expand the Configure Install/Uninstall options section.
-
Click Manage credentials.
-
Create new credentials to log in to the Windows machine. These credentials will then be available to select from the Credential dropdown menu.
-
Select the deployment policy as Download immediately and install.
-
Select the machine: Choose the appropriate option from the dropdown menu (either Remote, Local, or Domain).
-
Enter the machine name: Type or select the name of the machine you want to deploy the package to.

-
Click Deploy Immediately.
-
The installation process will begin, and the package will be deployed to the selected machine(s) according to your configured policy. You can monitor the deployment status from the Deployment Status page.
Steps to install a Cloudamize Agent on Linux
Prerequisites
-
Before deploying the Cloudamize Linux agent via Endpoint Central, the target machine must be discoverable by the Endpoint Central server. This can be achieved in one of two ways:
-
Domain Membership: The Linux machine is a member of the same domain as the Endpoint Central server.
-
Agent Installation: The Endpoint Central agent has been manually installed on the Linux machine.
-
After completing either of these prerequisites, confirm that the Linux machine is visible and listed under the Computers section within the Endpoint Central console before proceeding with the deployment.
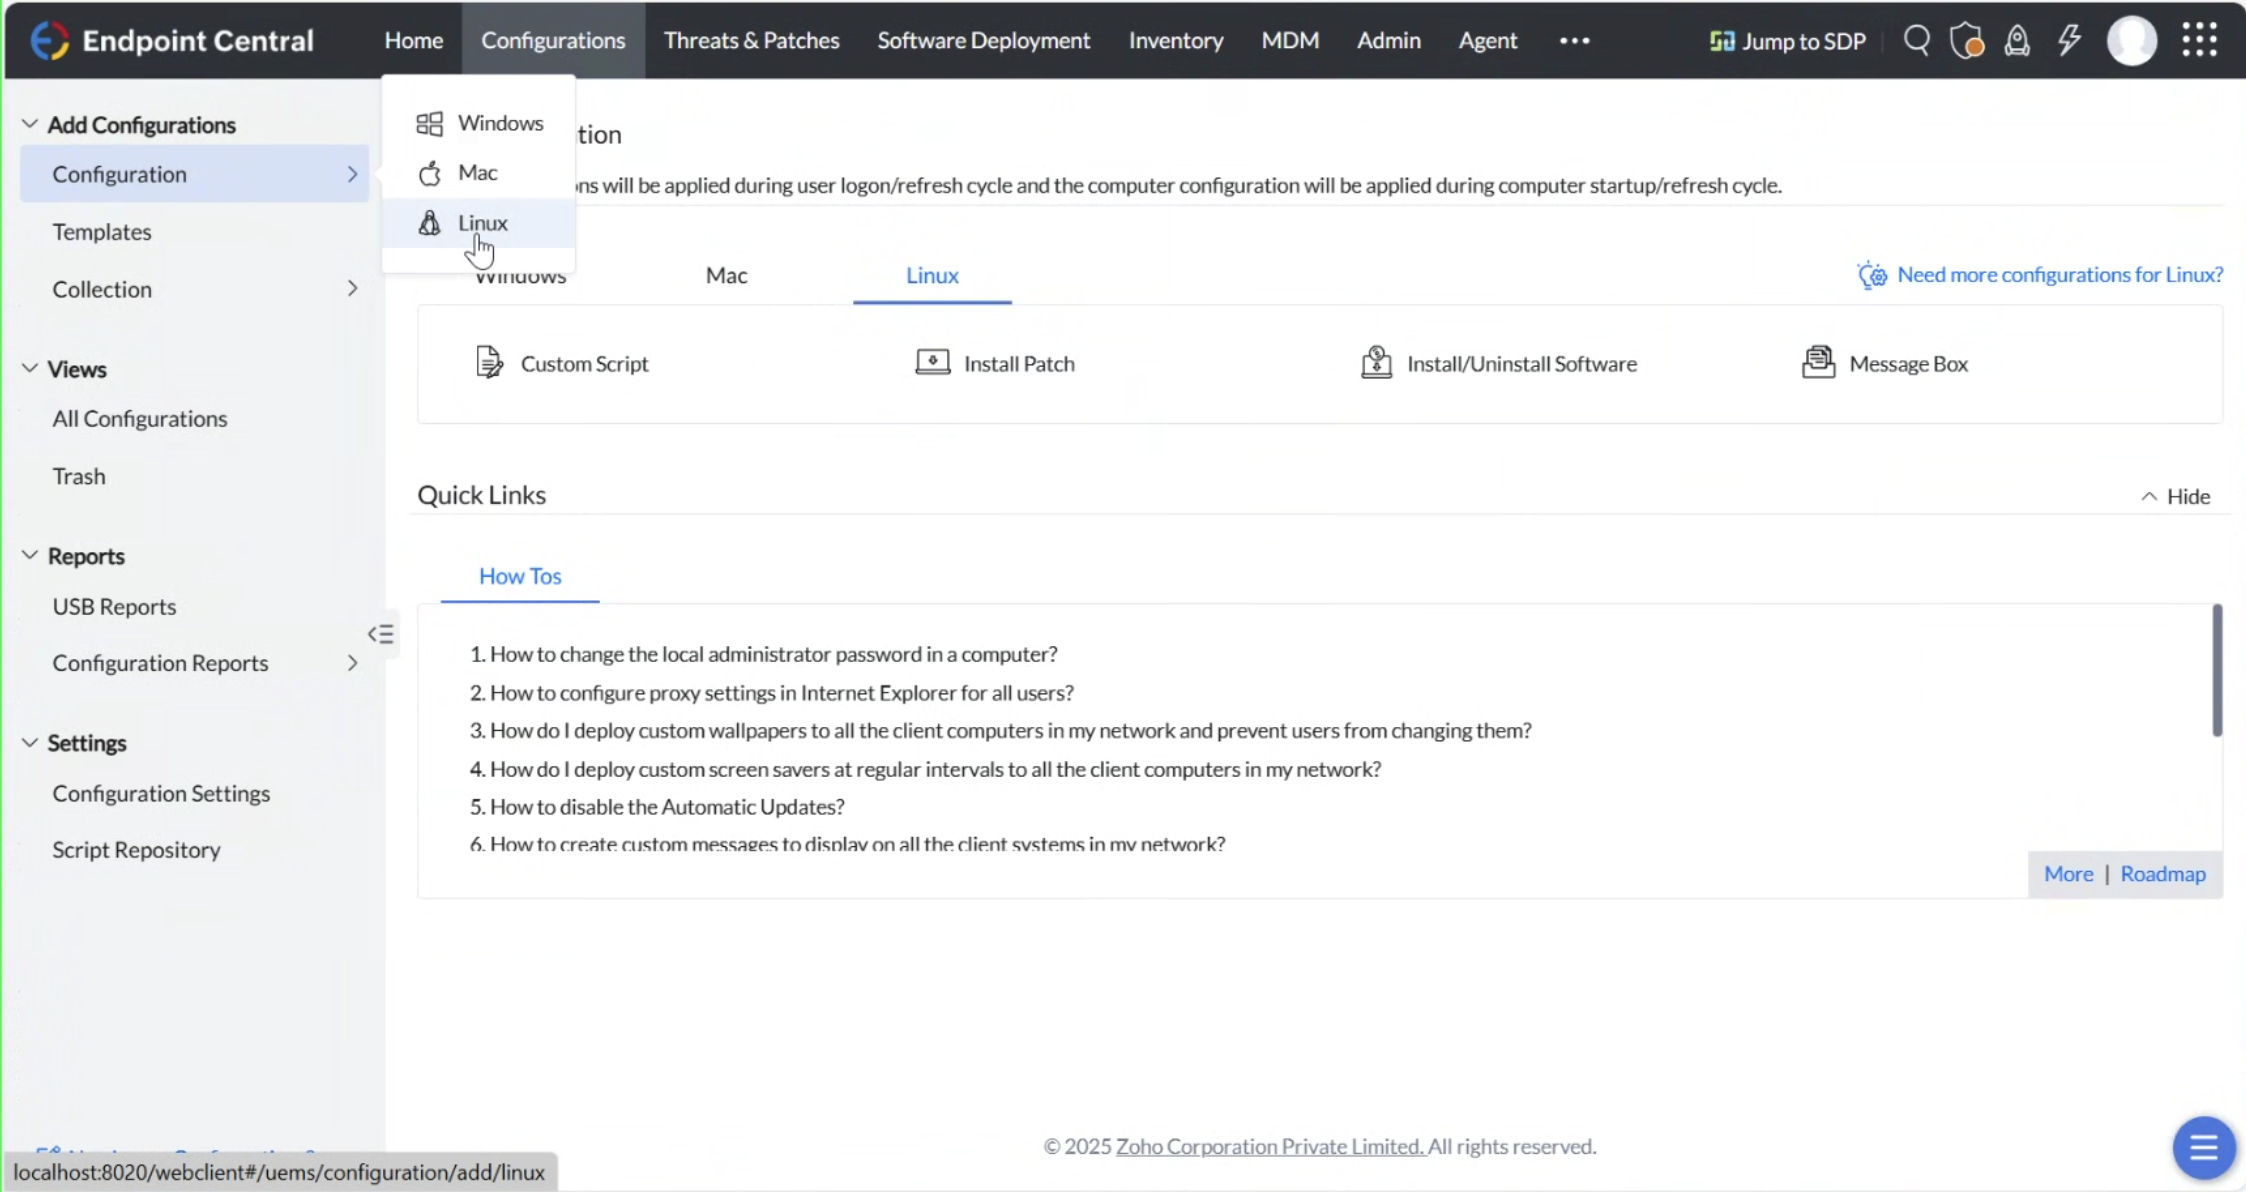
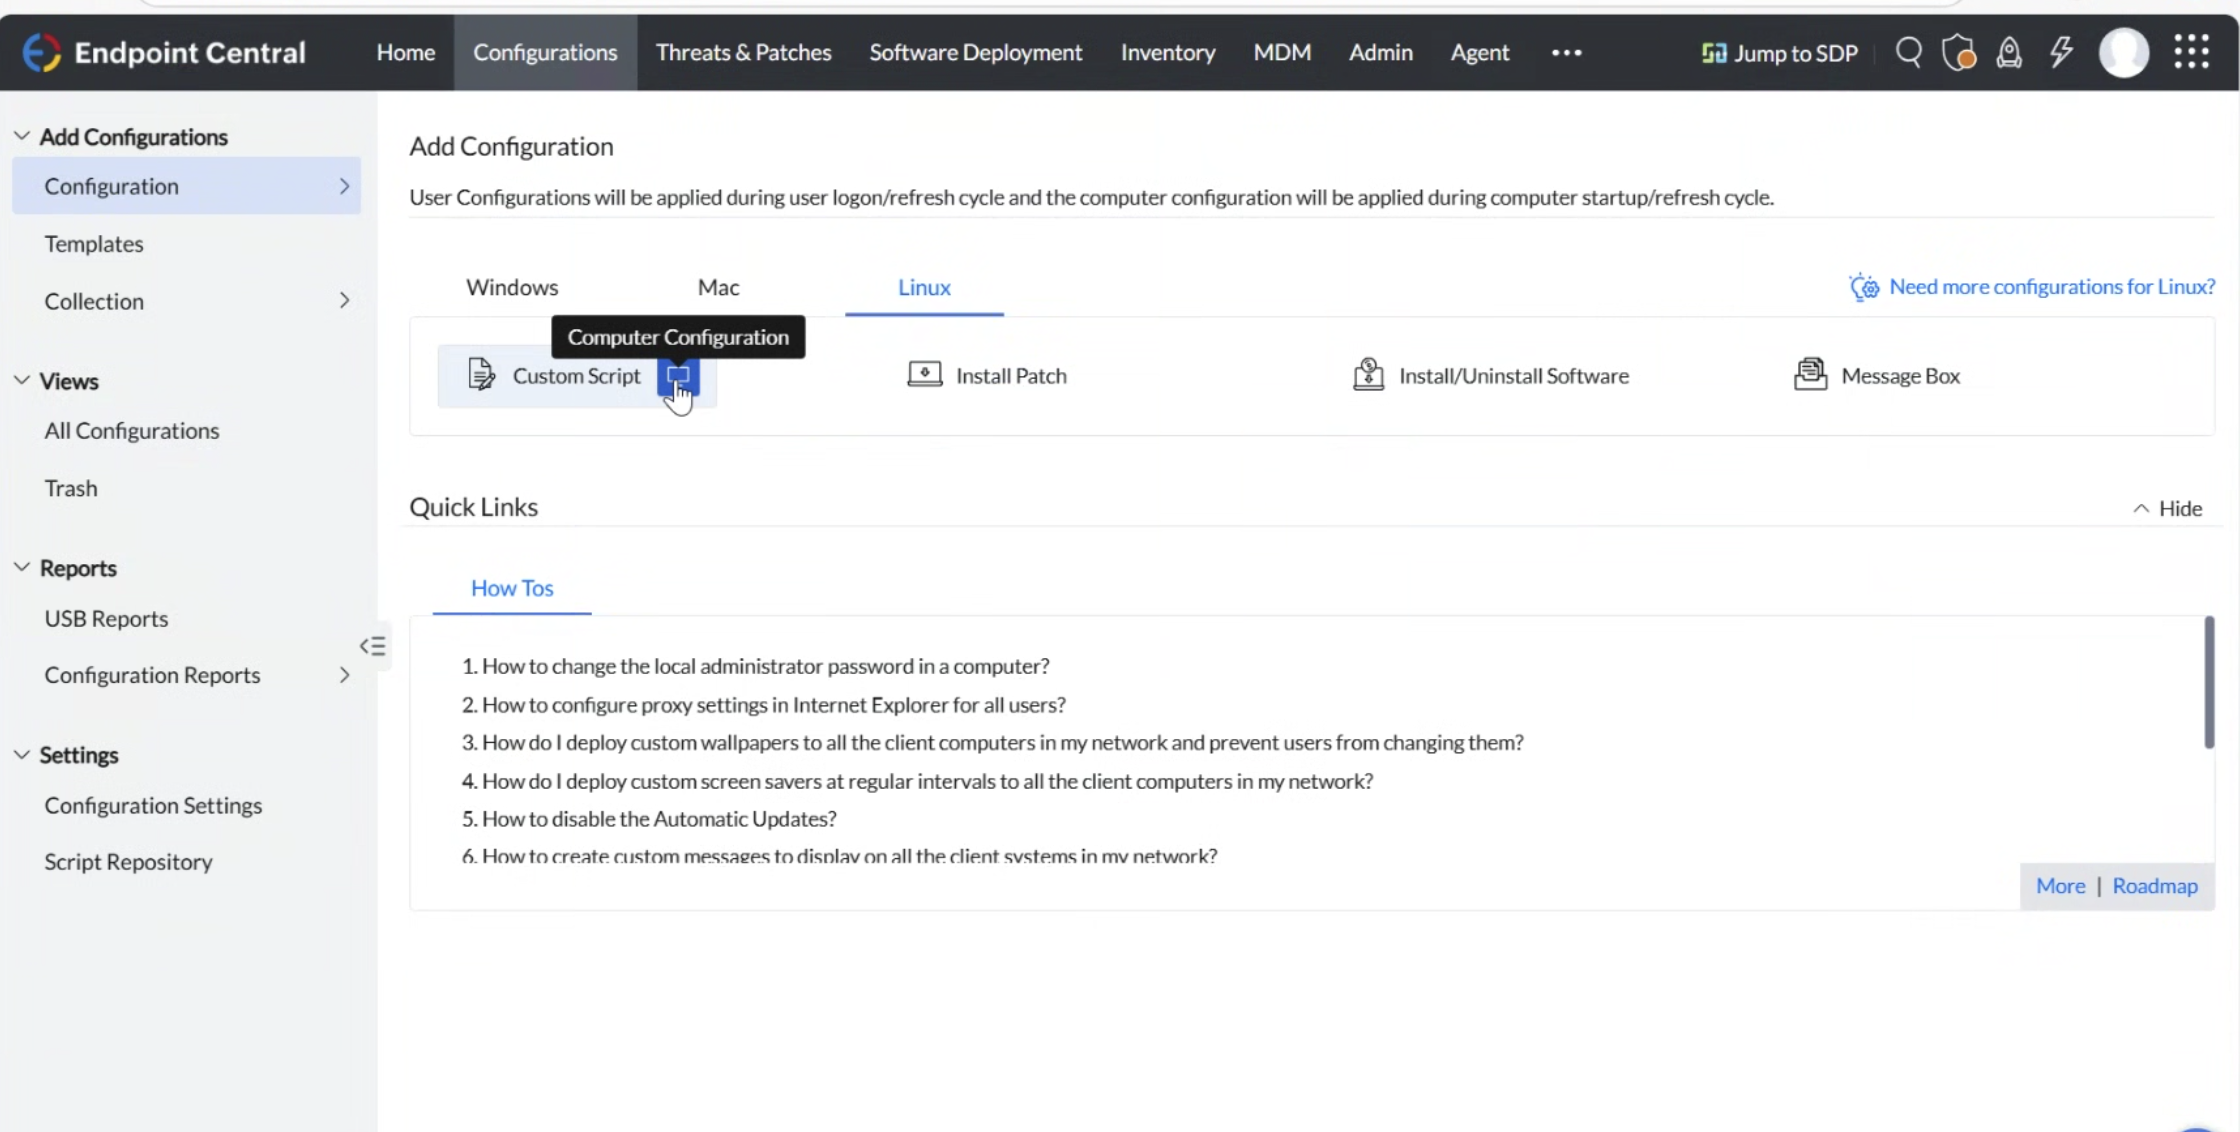
From the Endpoint Central console, go to the Configuration tab, and then select the machine type as Linux.
-
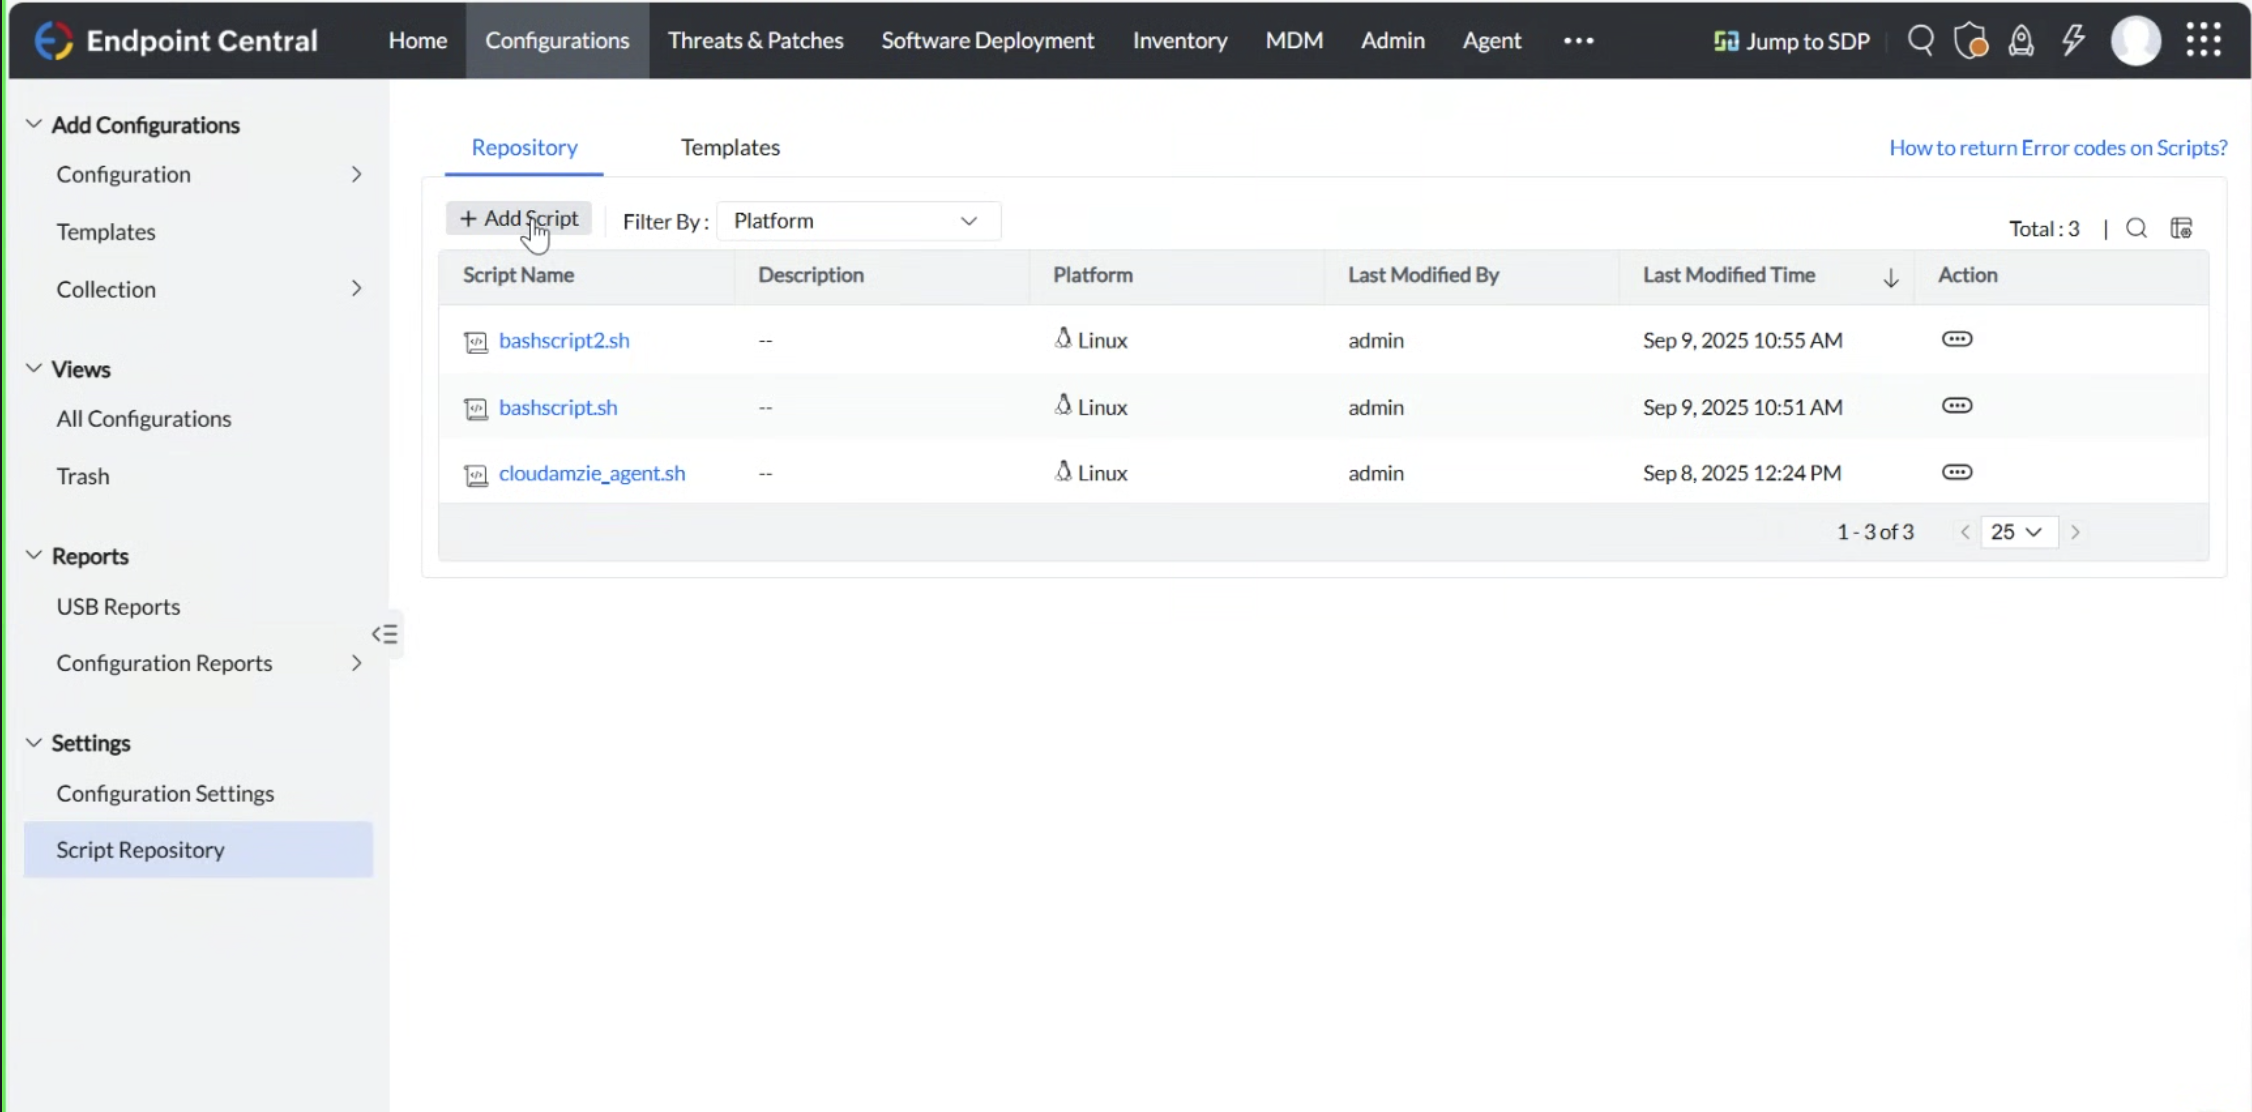
Select the custom script from Endpoint Central's repository.
-
Click on Add/Modify Script.
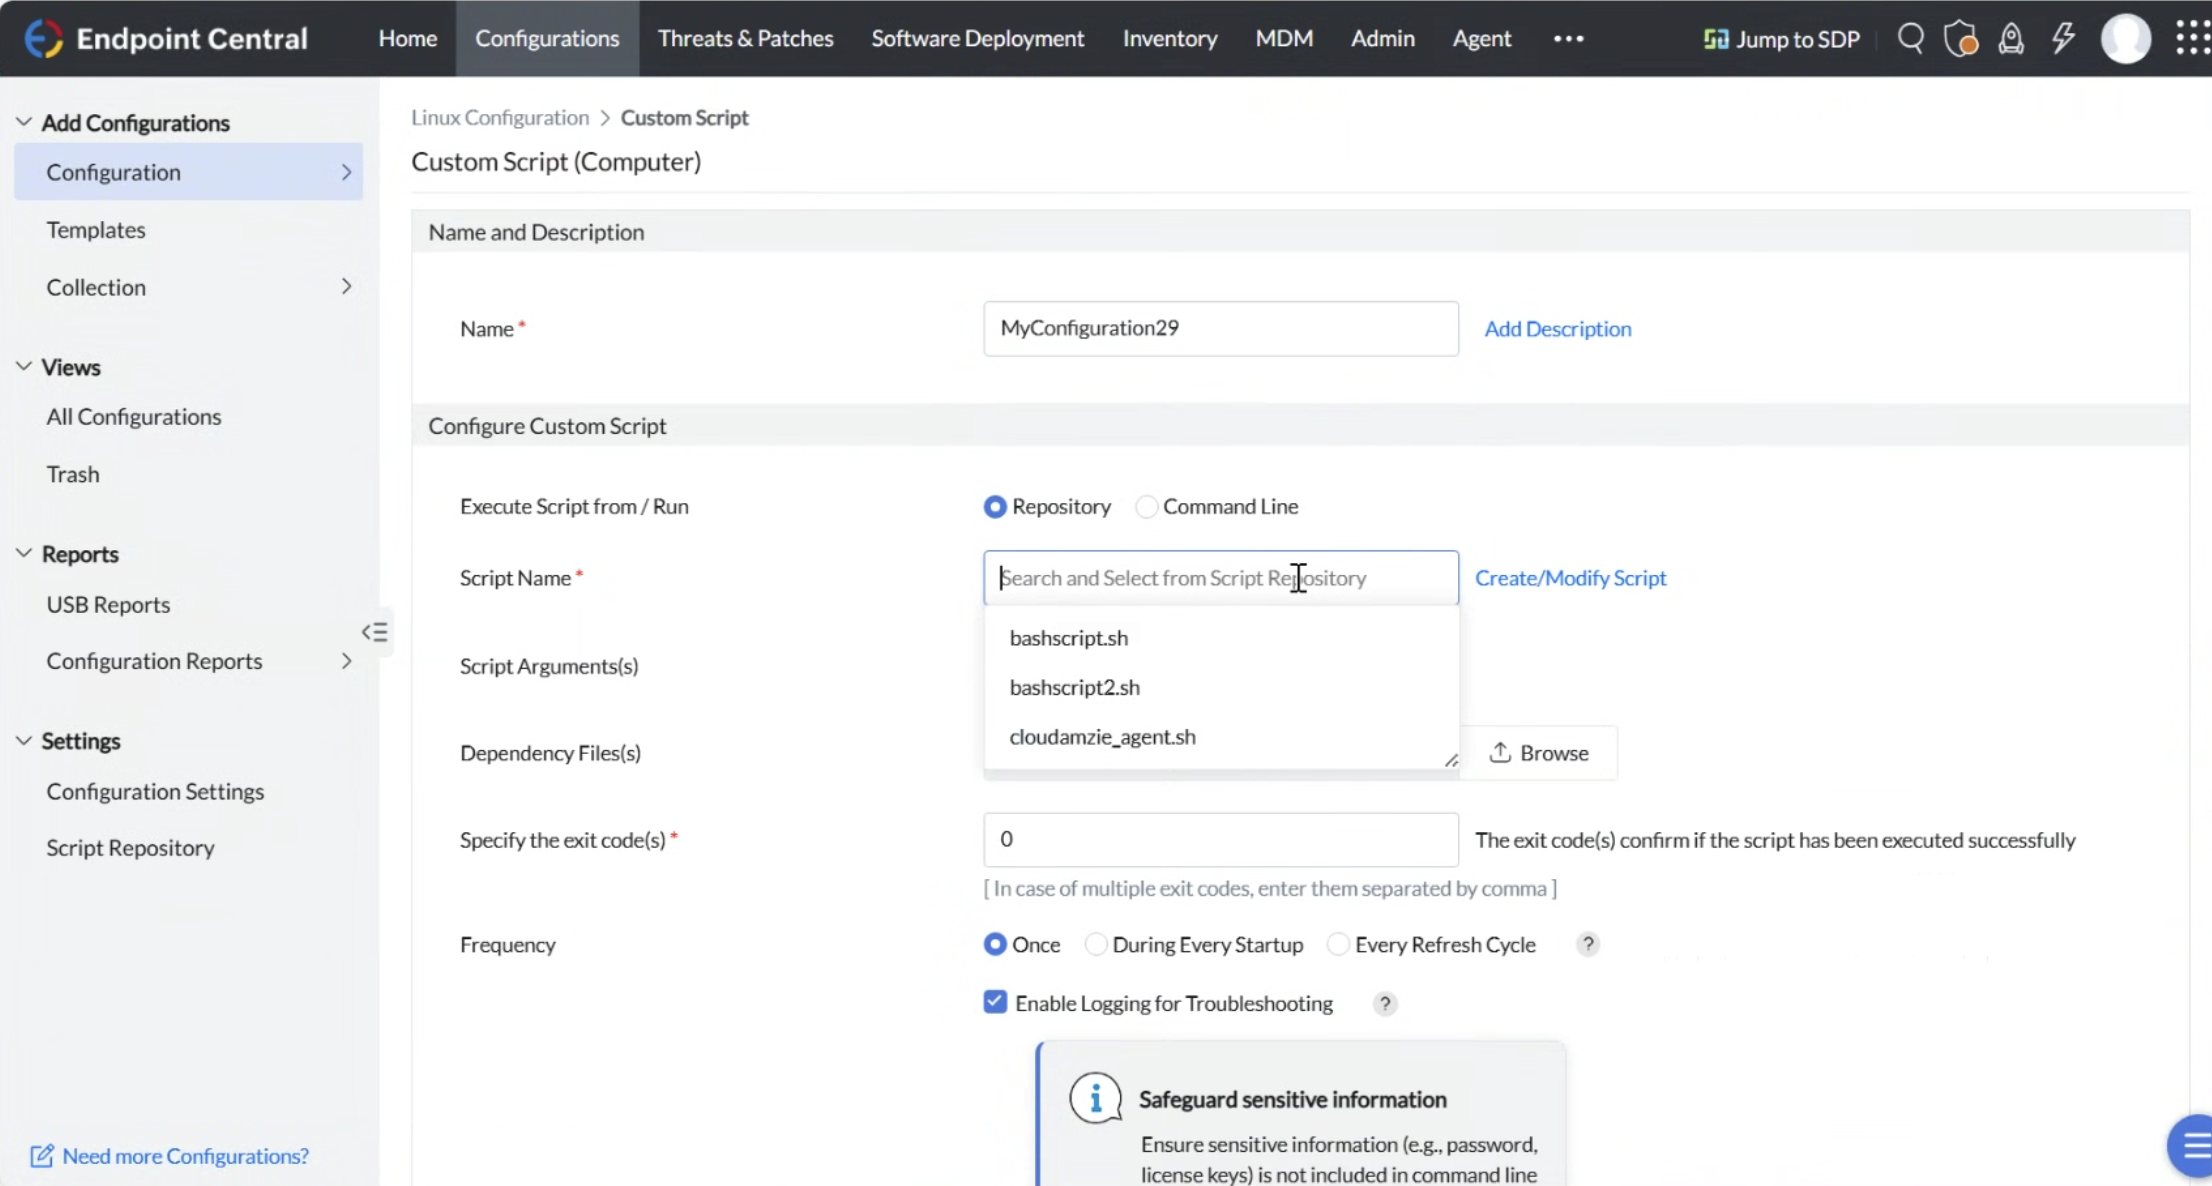
Steps to upload the script:
-
In the repository, select the custom script you wish to use.
-
Click the Add/Modify Script button to proceed.
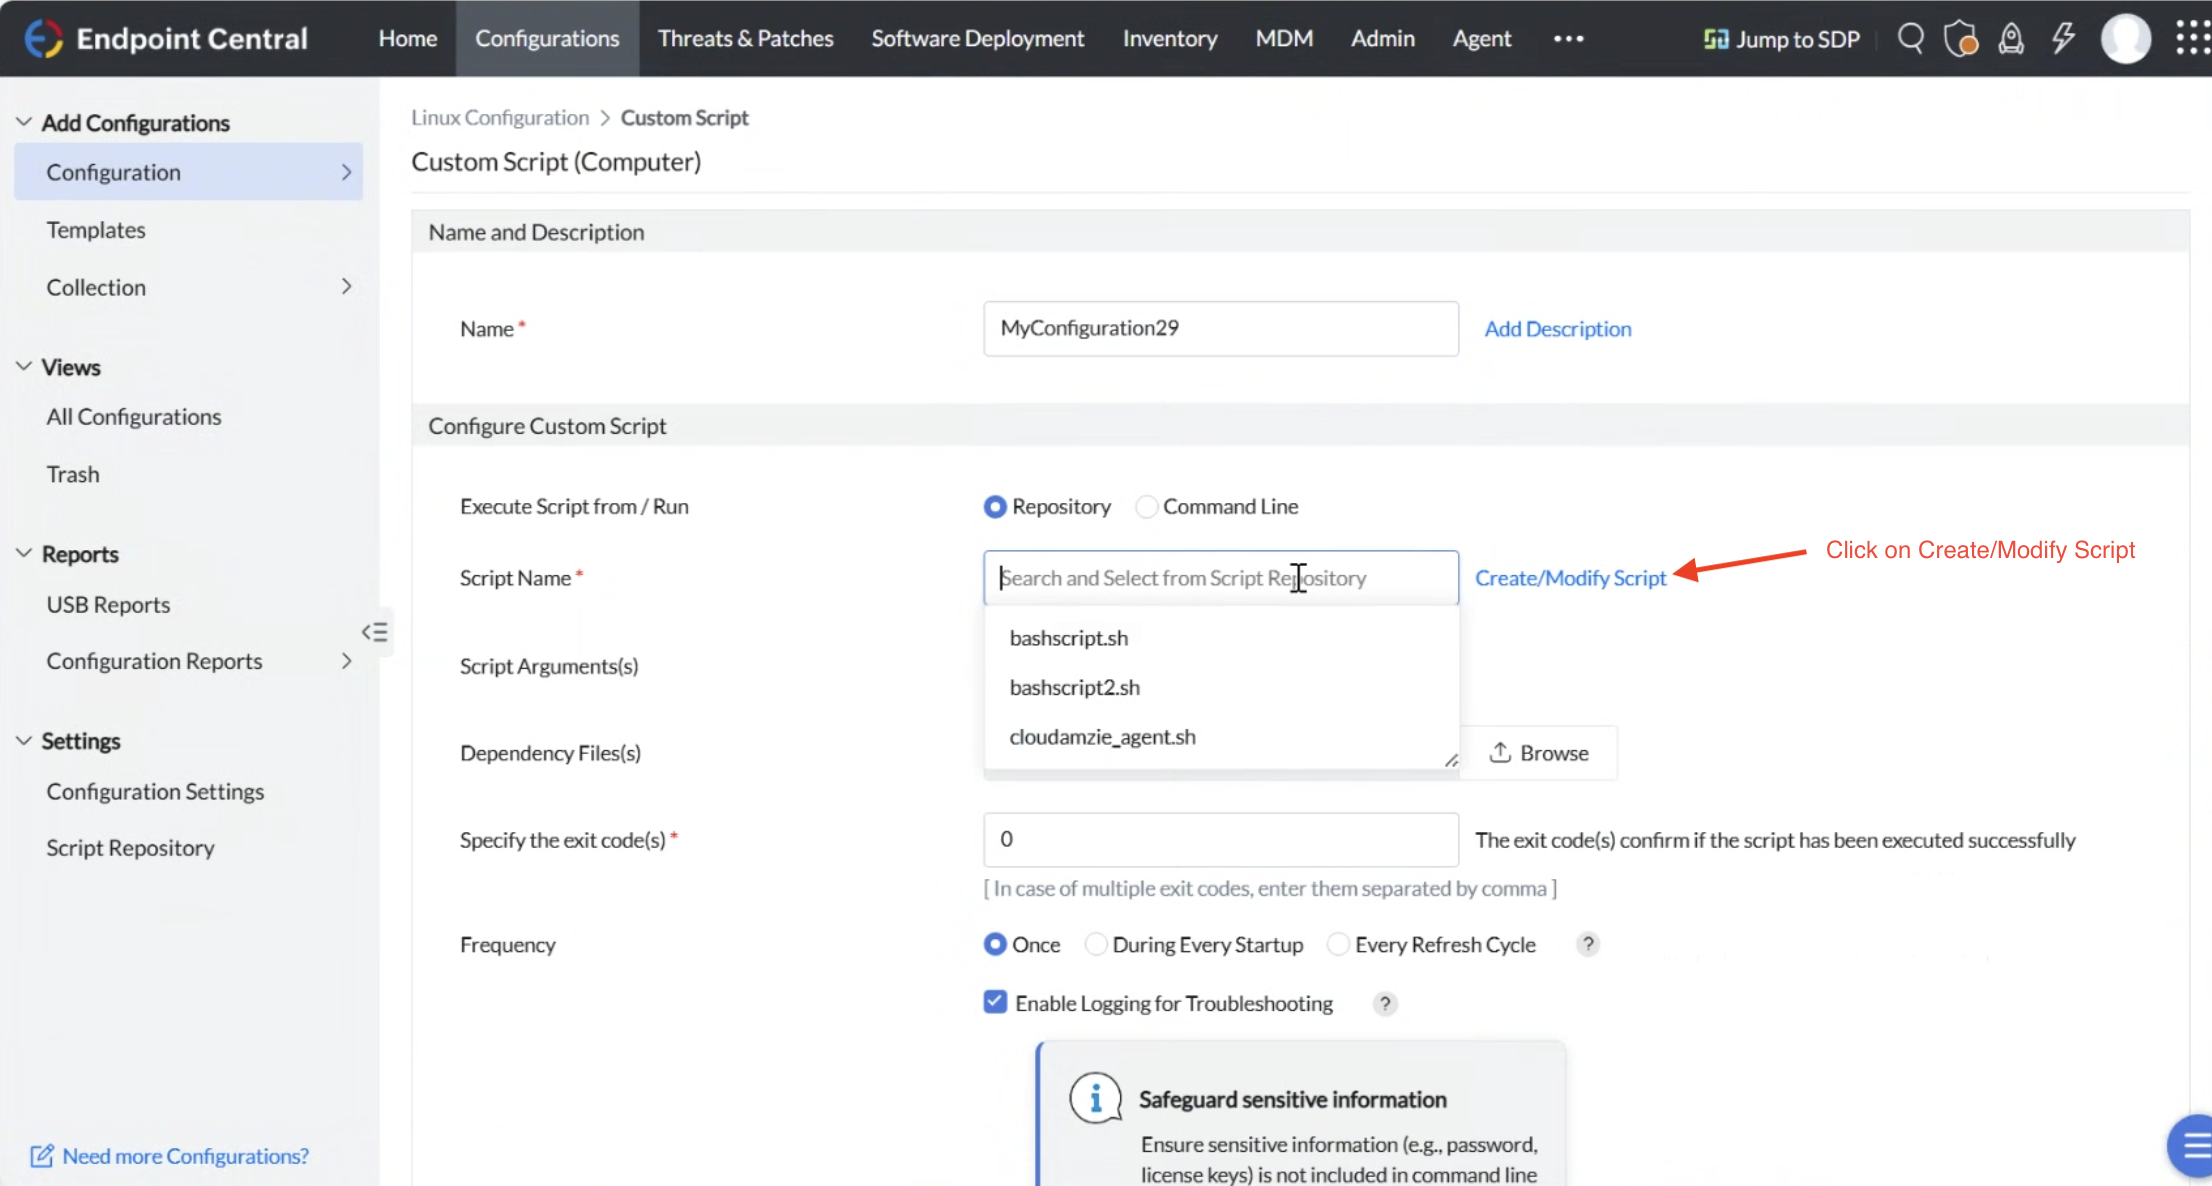
-
Click on Add Script to upload a new script.
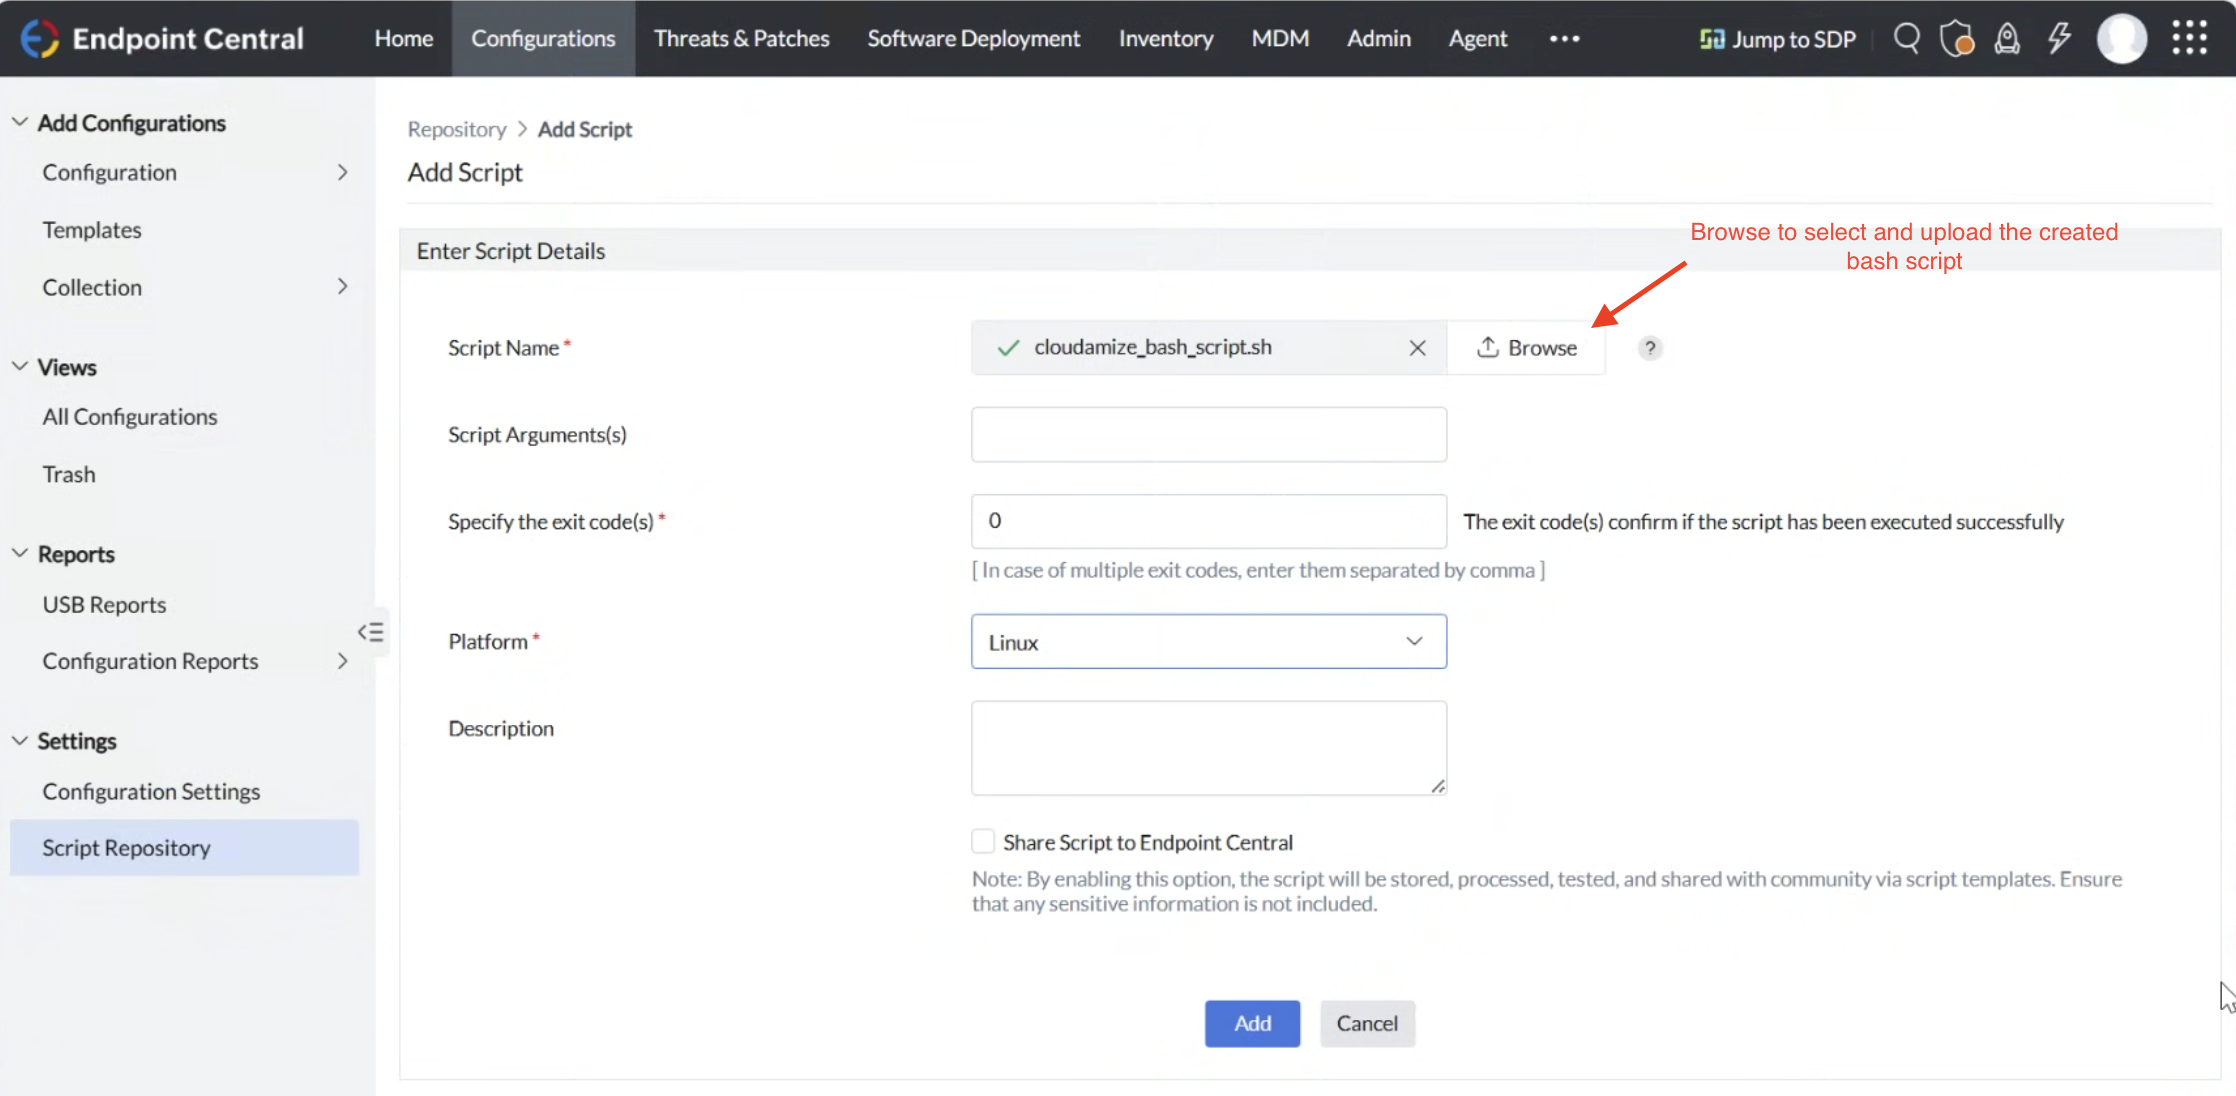
Sample Bash Script for Cloudamize Linux Agent
A sample Bash script for the Cloudamize Linux Agent installation using Endpoint Central has been attached hereCloudamizeLinuxAgentInstallScript.sh.
Note: The customerKey in the script is a placeholder and must be replaced with your actual key from the Cloudamize console. If needed, the linuxInstallerUrl can also be updated from the console to point to a different region's installer.
After successfully uploading the script file, its filename will appear in the Repository grid.
After successfully uploading the Bash script, go back to the configuration page. In the script selection section, choose the script you just added from the repository.

Deploying the Package/Configuration
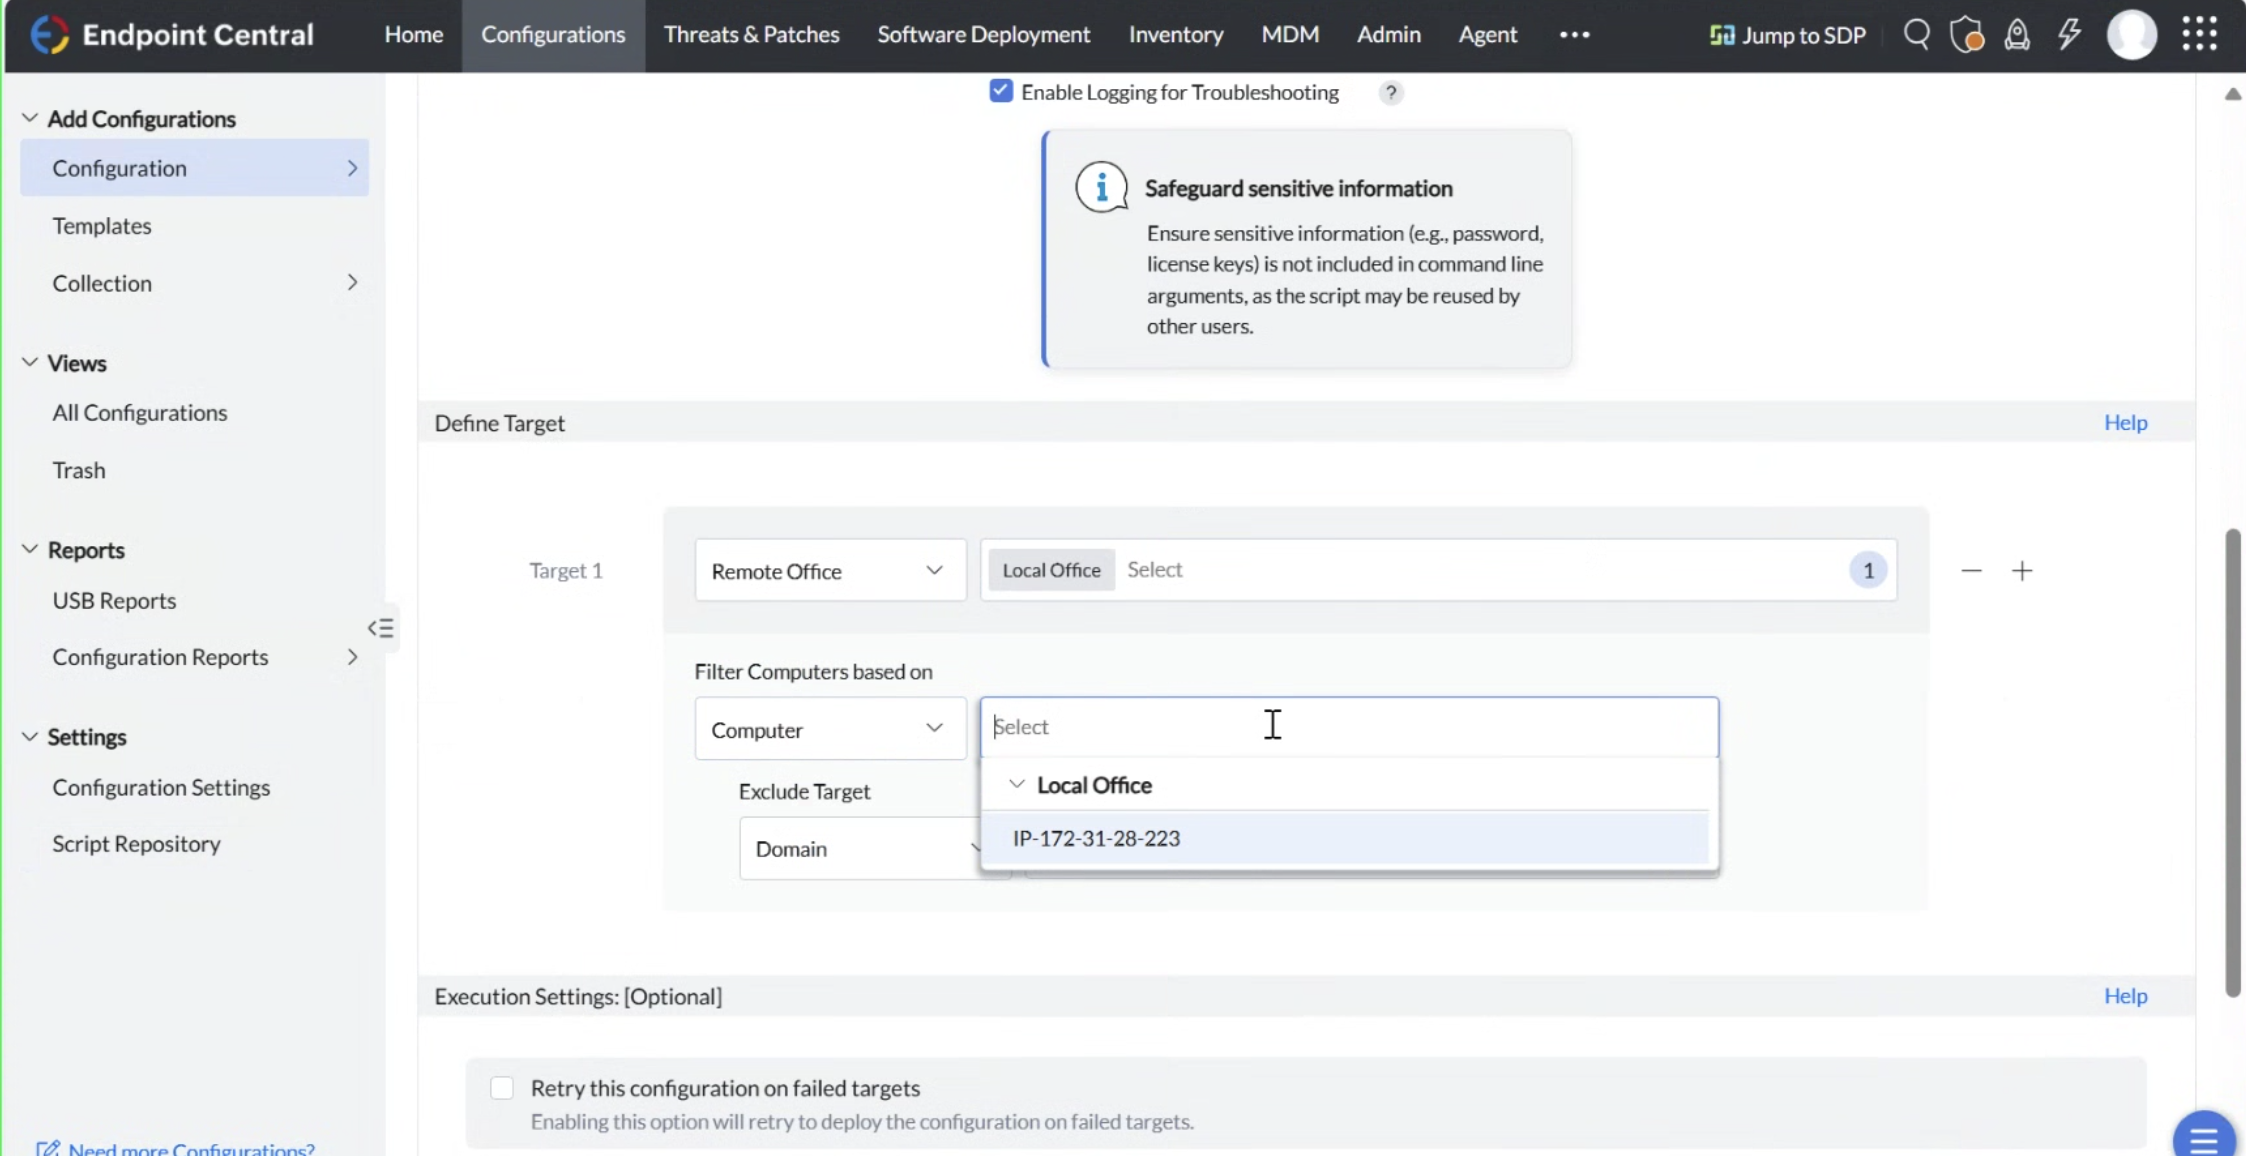
Selecting the Target Machine. Once the machine is detected, proceed to select the target machine for deployment.
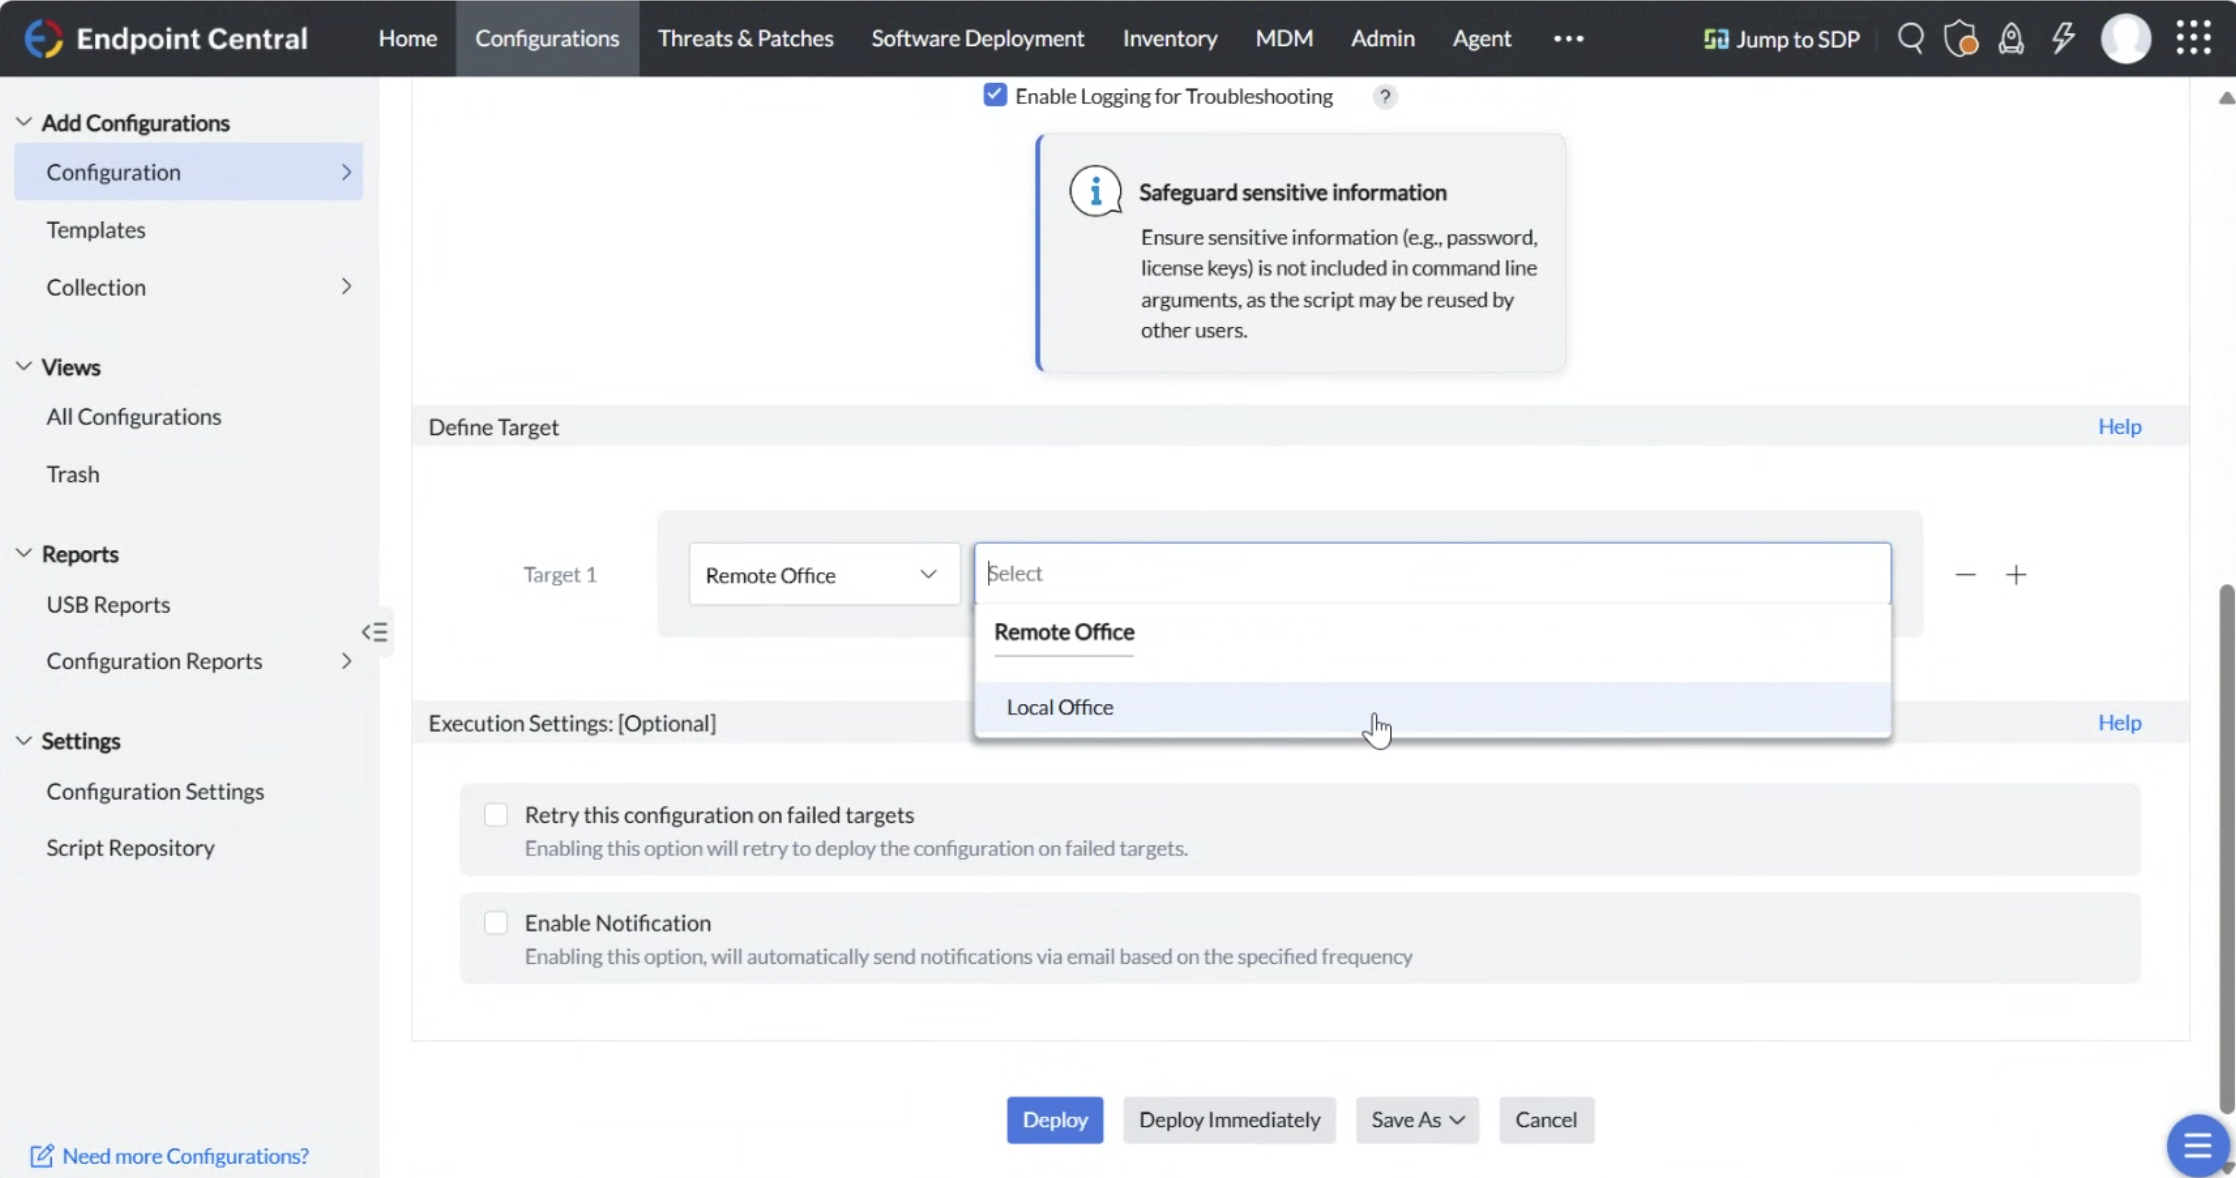
After selecting Local Office, choose Domain to view Linux machines that are part of the domain, or select Computers to view machines where the Endpoint Central agent has been installed.
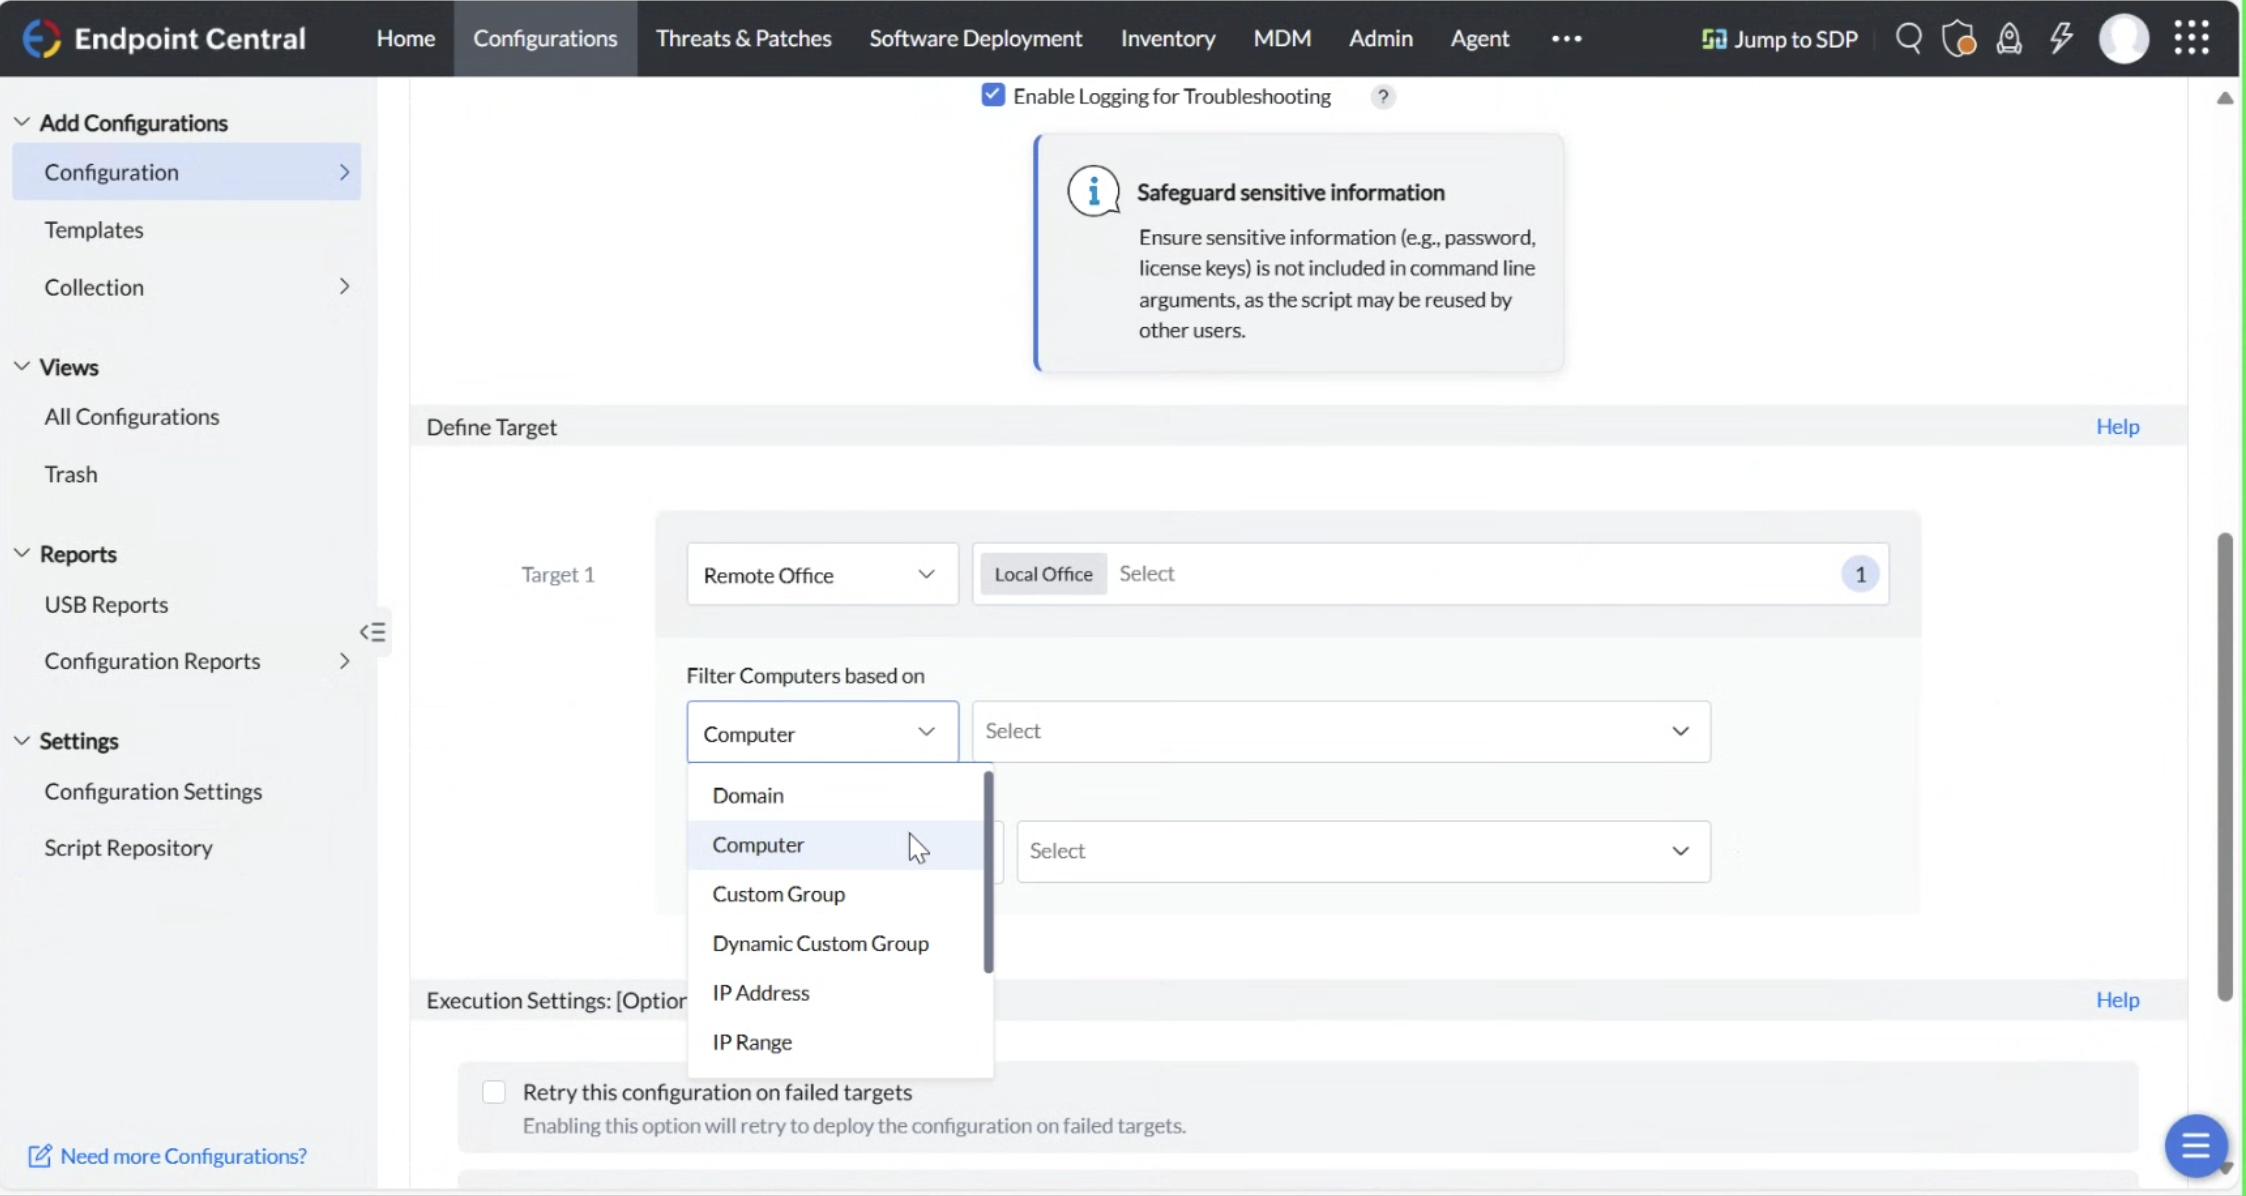
Select the target machine
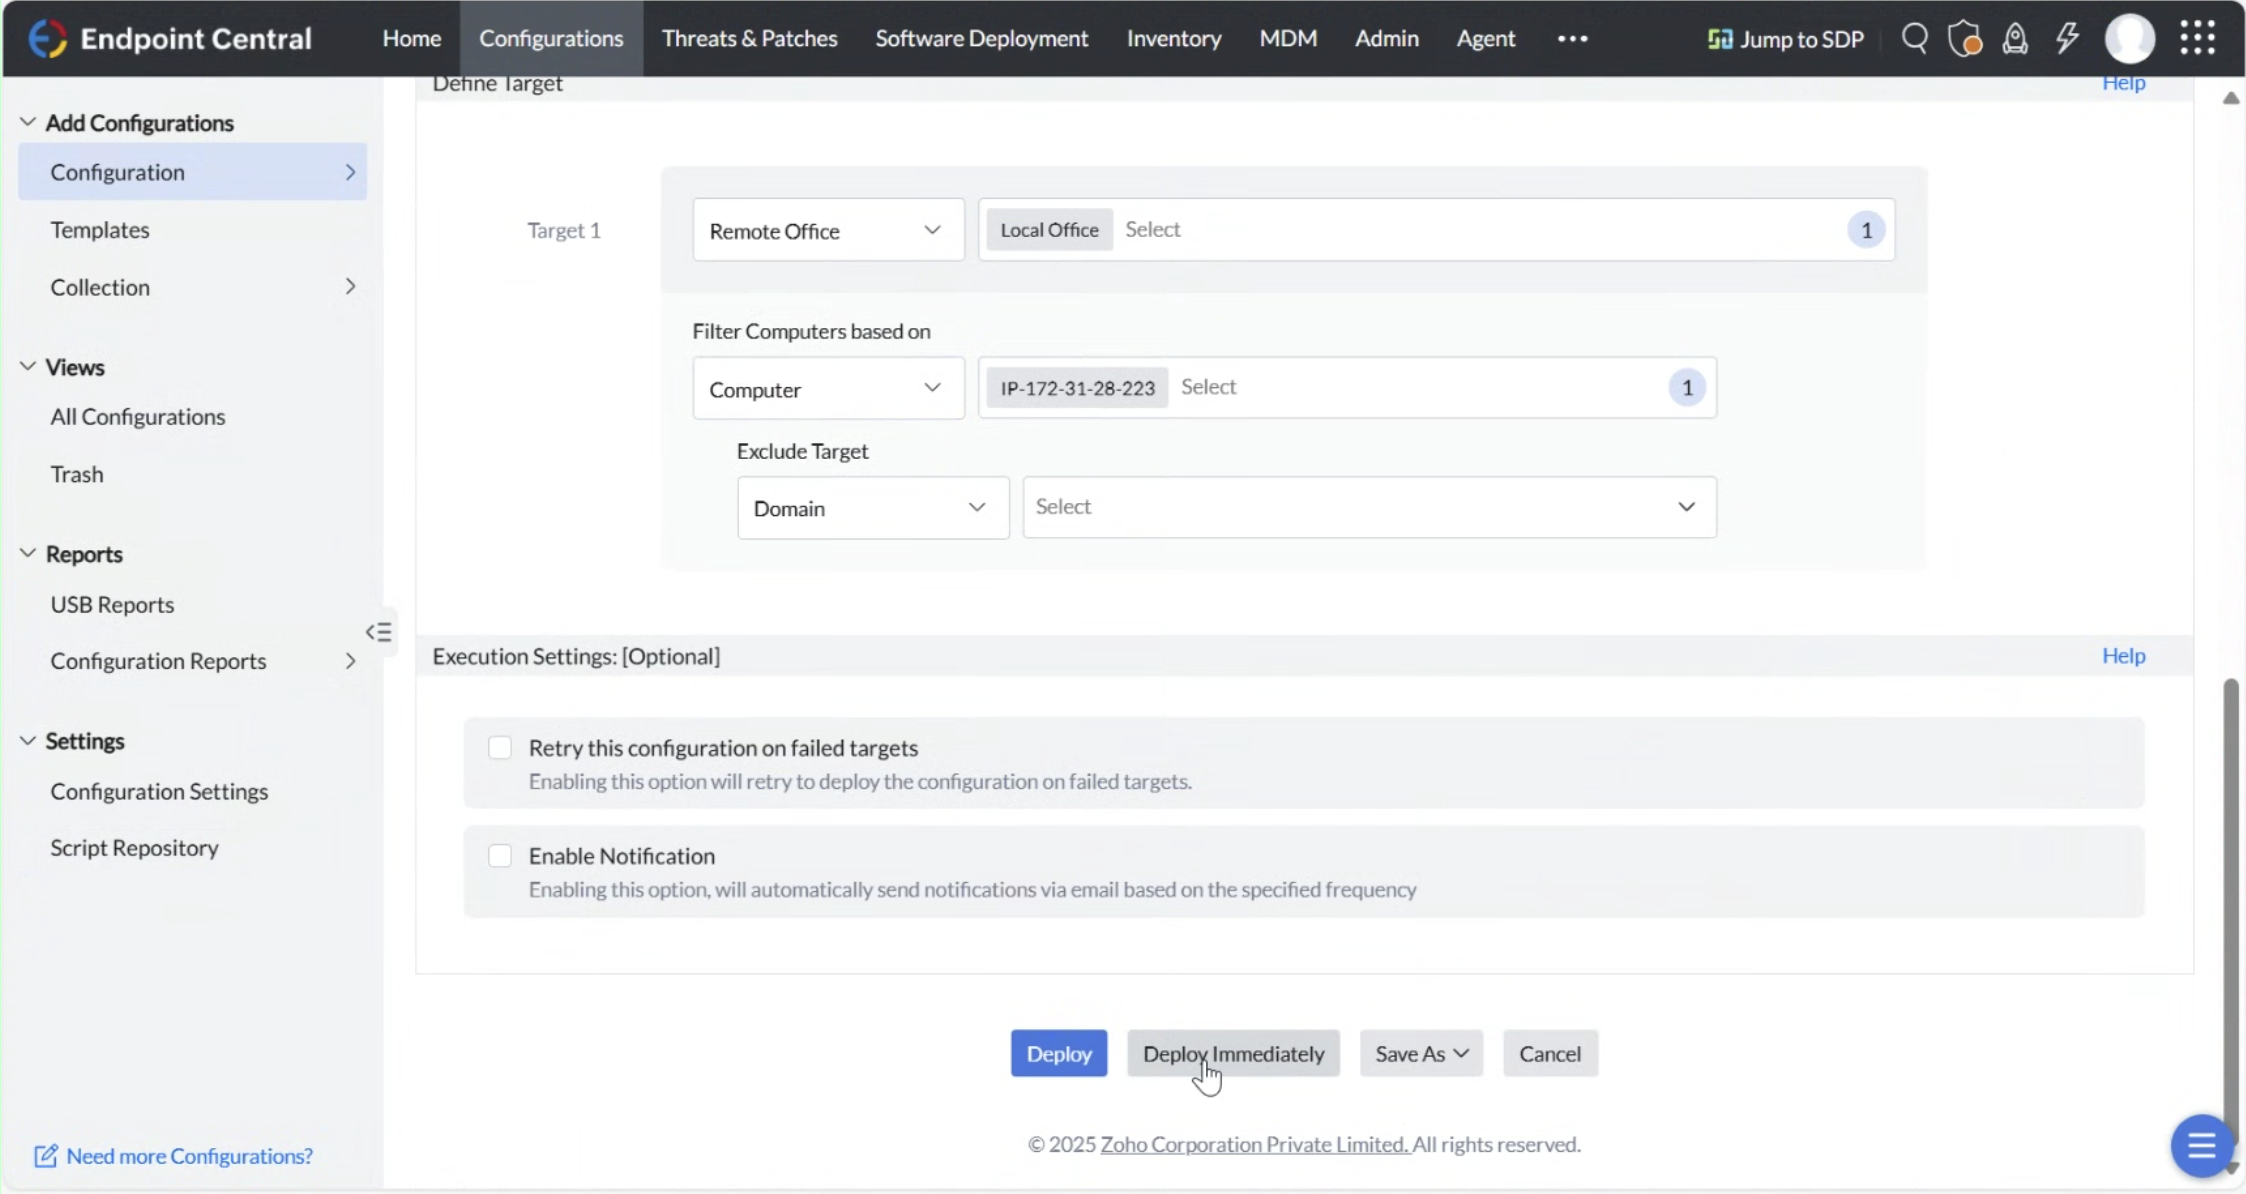
Click on the Deploy Immediately button to proceed with the installation.
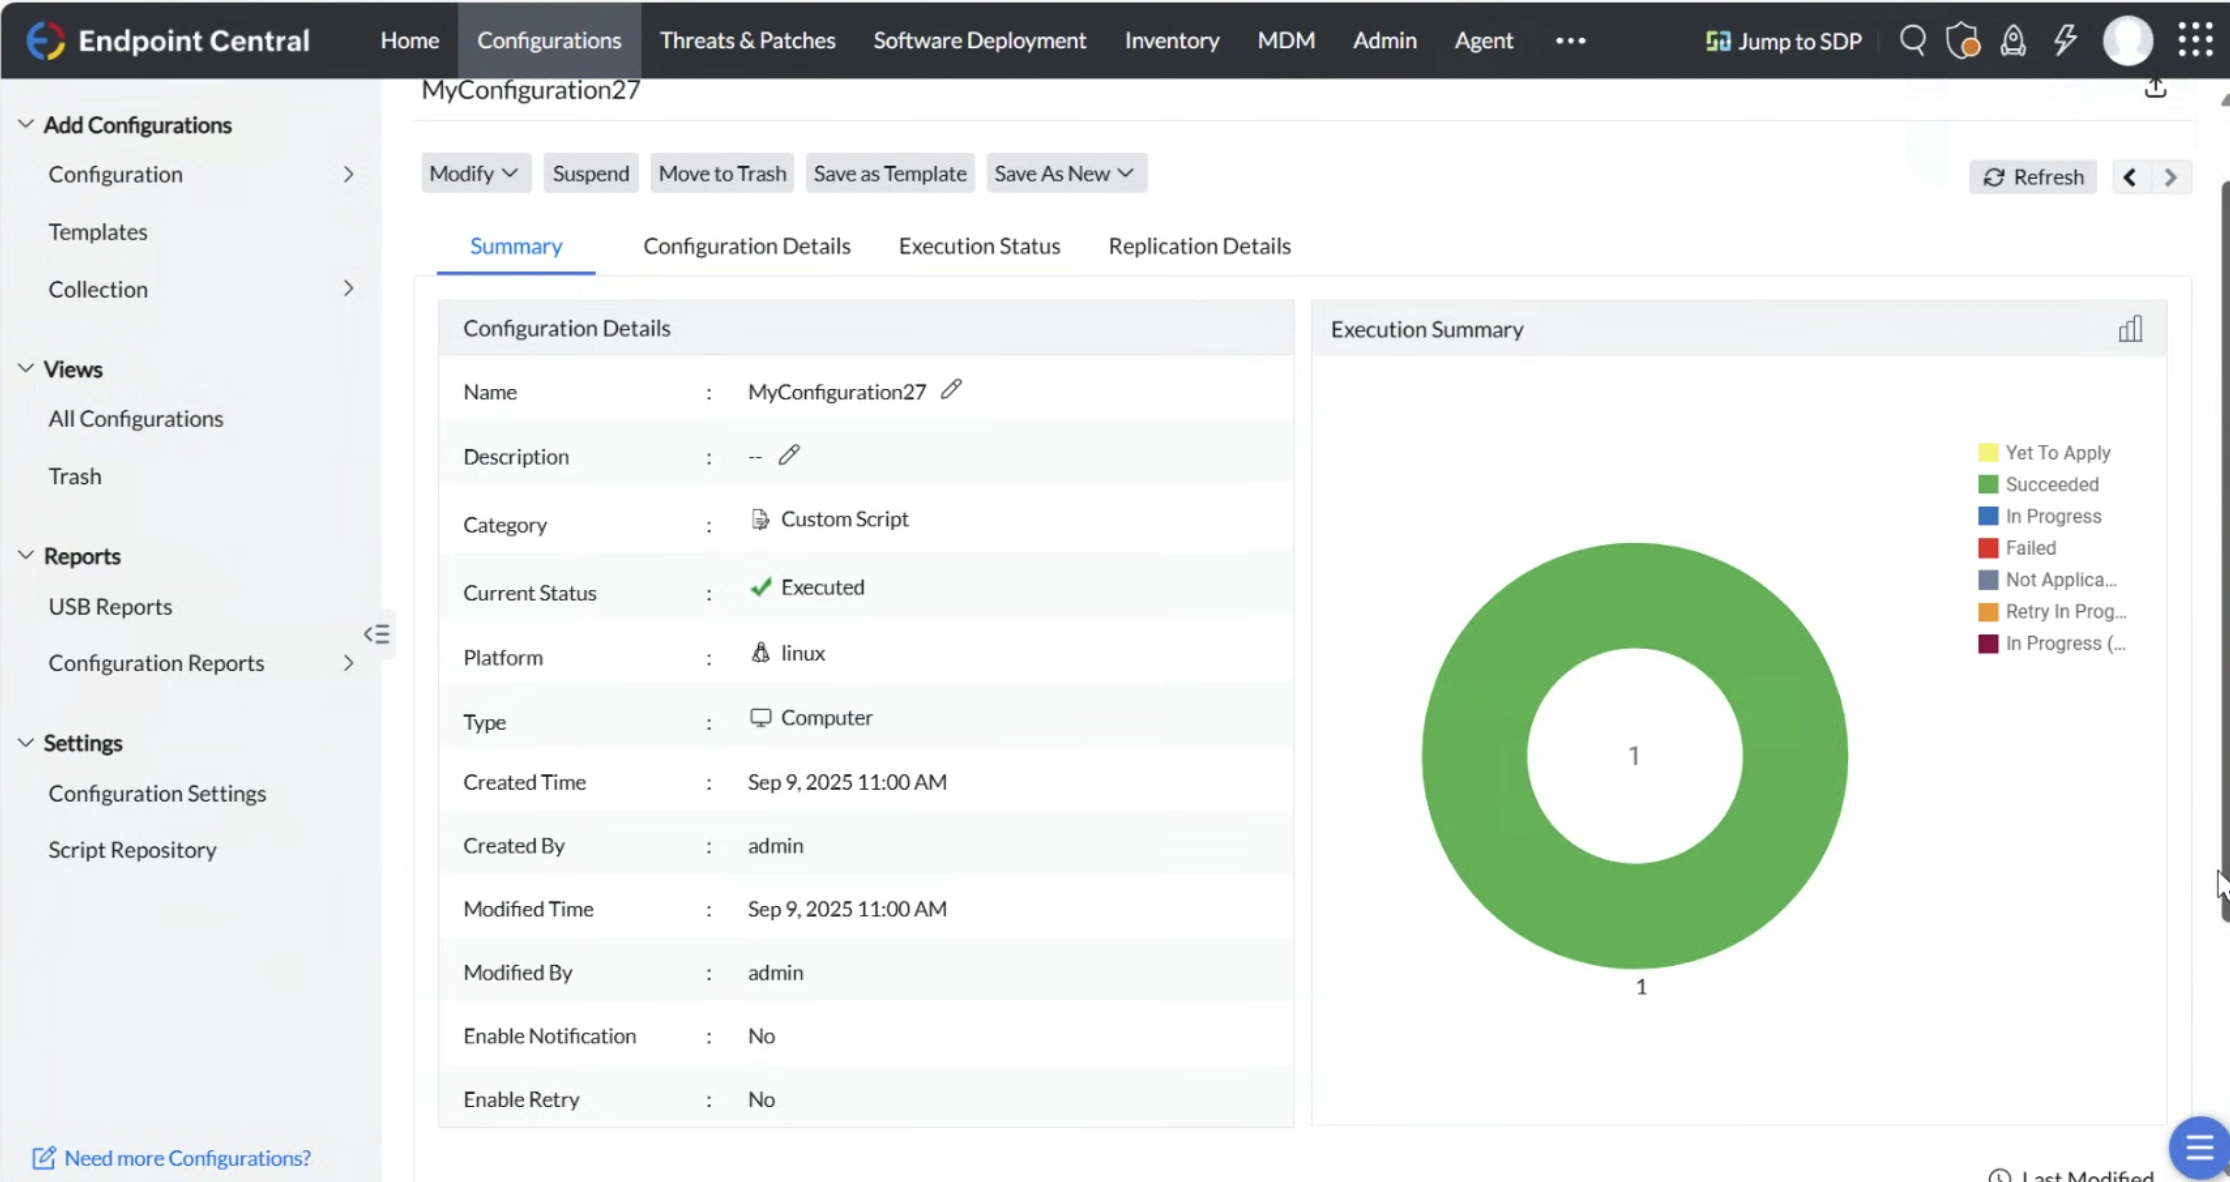
The Configuration Summary should reflect a status of Executed if the installation is successful.
Note: The Mass Agent Deployment Scripts are sample scripts created by Cloudamize, and they may or may not work in the customer environment. The working of the scripts will depend on the customer environment configuration on which the Mass deployment is being used. Also, please note that Cloudamize does not offer any support for the Mass Deployment option, since the software or the services used for Mass Deployment are not products of Cloudamize.
If you have any queries, please get in touch with the helpdesk via our Helpdesk Portal or by email at helpdesk@cloudamize.com.