

Overview:
This guide provides instructions on installing the Cloudomize agent on Linux using command-line commands. The agent is used to discover and assess physical and virtual machines.
Prerequisites:
-
The Install script requires wget to retrieve content and curl to test/verify access to our data collection servers at am.cloudamize.com for US infrastructure, am-de.cloudamize.com for EU infrastructure, or am-ae.cloudamize.com for UAE infrastructure over port 443, either directly or through a corporate proxy.
-
If your system locally caches DNS resolution, you may need to resolve am.cloudamize.com to 35.171.170.26 or am-de.cloudamize.com to 18.194.12.63 to allow egress traffic. This feature is not currently available for our UAE region.
-
-
Root and/or wheel access
-
One of the following OSes:
-
Red Hat Enterprise Linux Server release 7.0 or higher
-
Oracle Linux 6.5 or higher
-
Ubuntu 16.04 or higher
-
CentOS release 7 or higher
-
Debian GNU/Linux 8.0 or higher
-
Amazon Linux AMI release 2013.03 or higher
-
Fedora release 12 or higher
-
Suse Linux 11 or higher
-
-
A supported version of OpenSSL
-
The Cloudamize Agent can be installed on RHEL 7.0 or higher systems that have OpenSSL version 1.0.2k and are capable of handling the TLS 1.2 secure communication protocol.
-
Root and/or wheel access
-
350 MB persistent storage
-
The Install script requires wget to retrieve content, and curl to test/verify access to our data collection servers (see above) over port 443, either directly or through a corporate proxy
The Cloudamize Linux Agent requires 3% of available CPU and 5% of memory while running. If the agent takes more than the allotted CPU and memory, the watchdog process will stop the agent process and begin again once it's able to run below the thresholds.
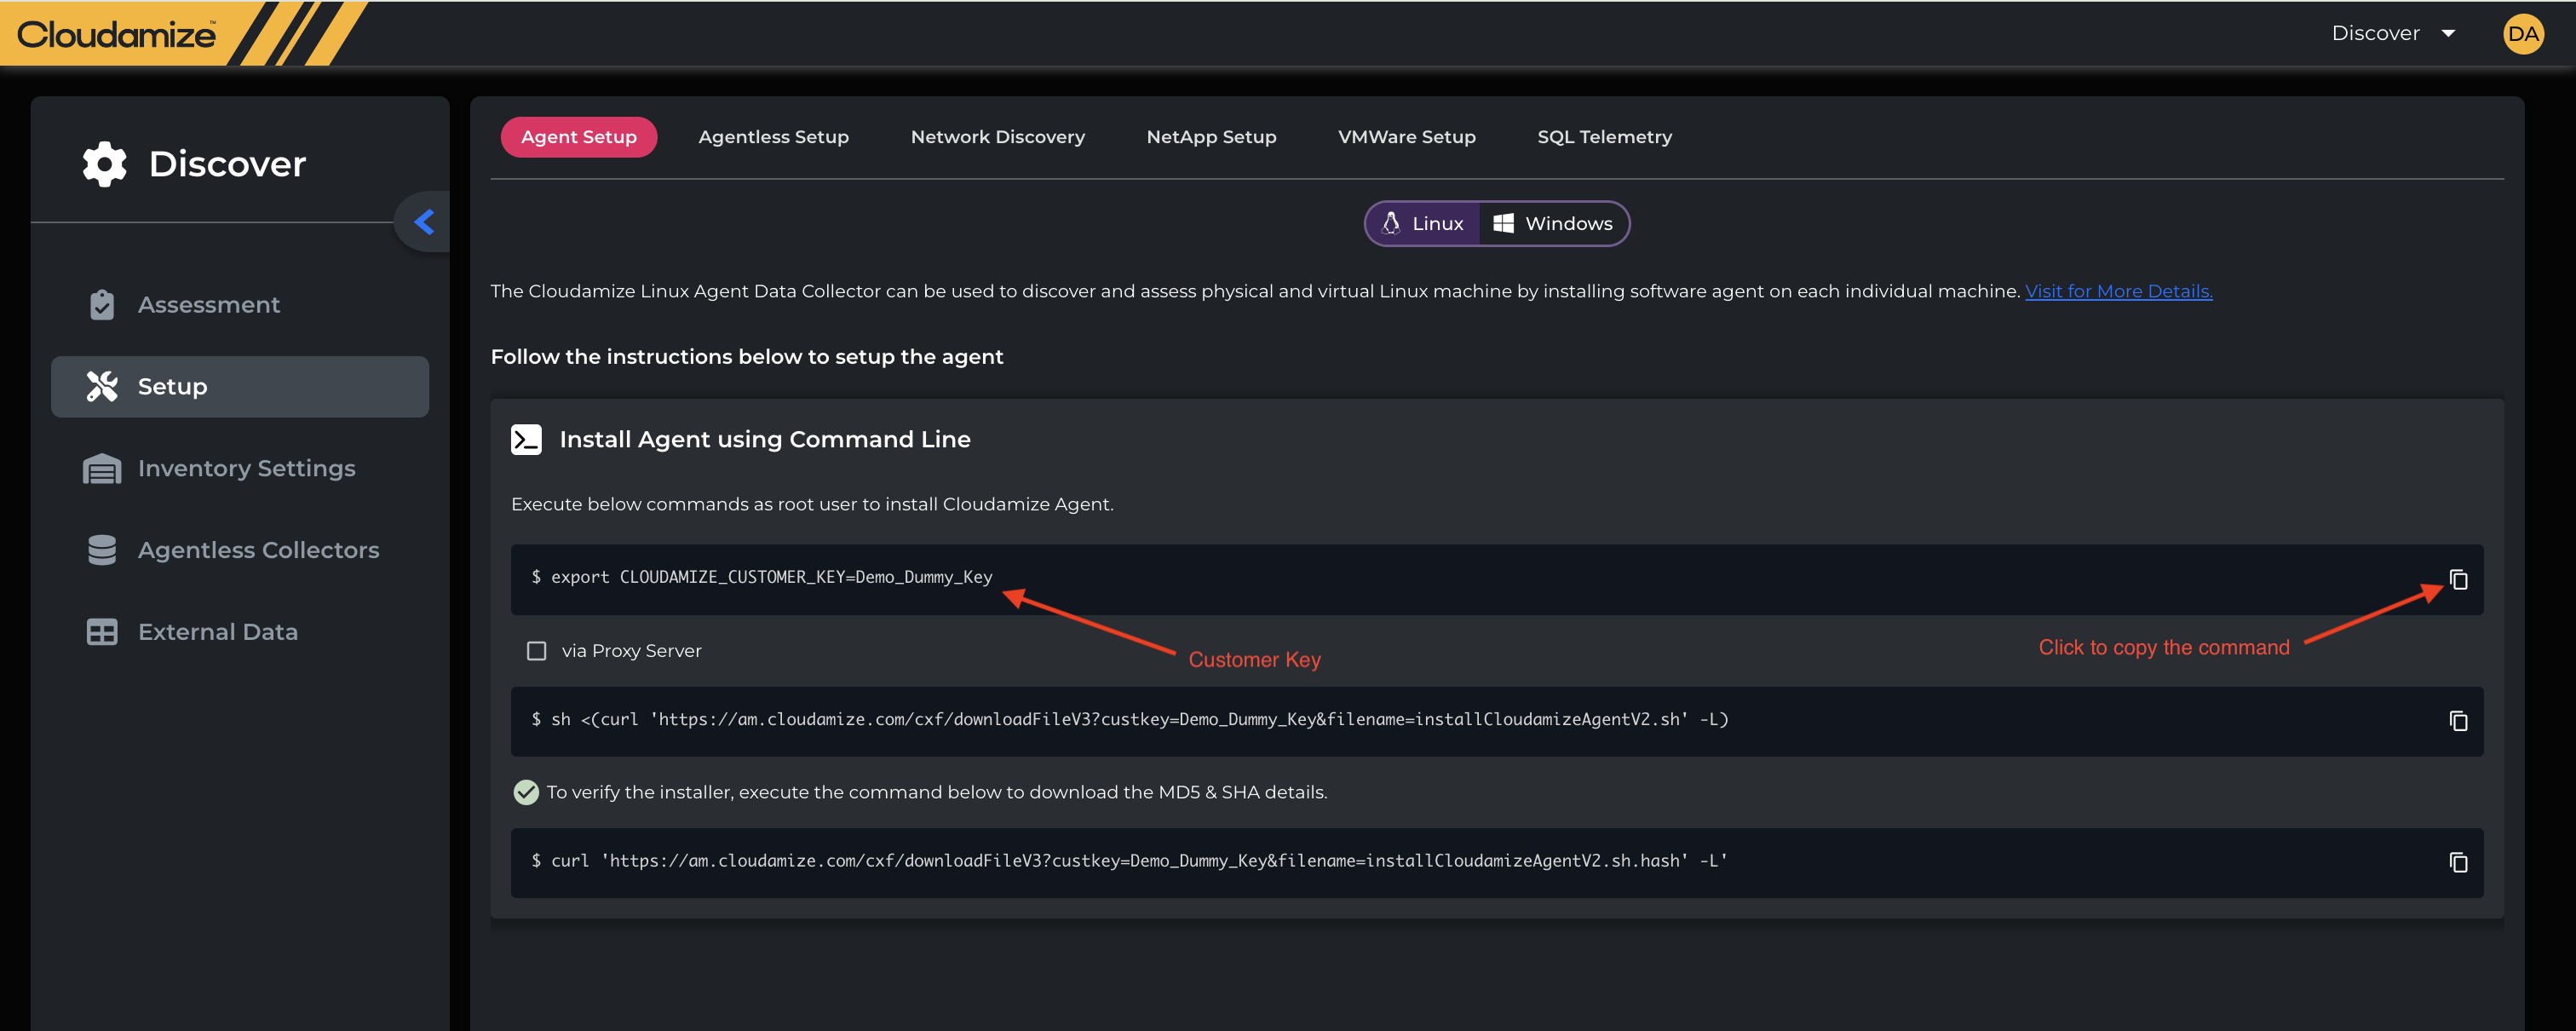
Set the Cloudomize Customer Key
Before running the installation command, you must export your unique customer key. This key links your machine to your Cloudomize account.
-
Execute the following command, replacing
<Your_Customer_Key>with your actual Cloudomize Customer Key:
Bash
export CLOUDMIZE_CUSTOMER_KEY=<Your_Customer_Key> -
The Key is available under the Linux Tab under the Setup option
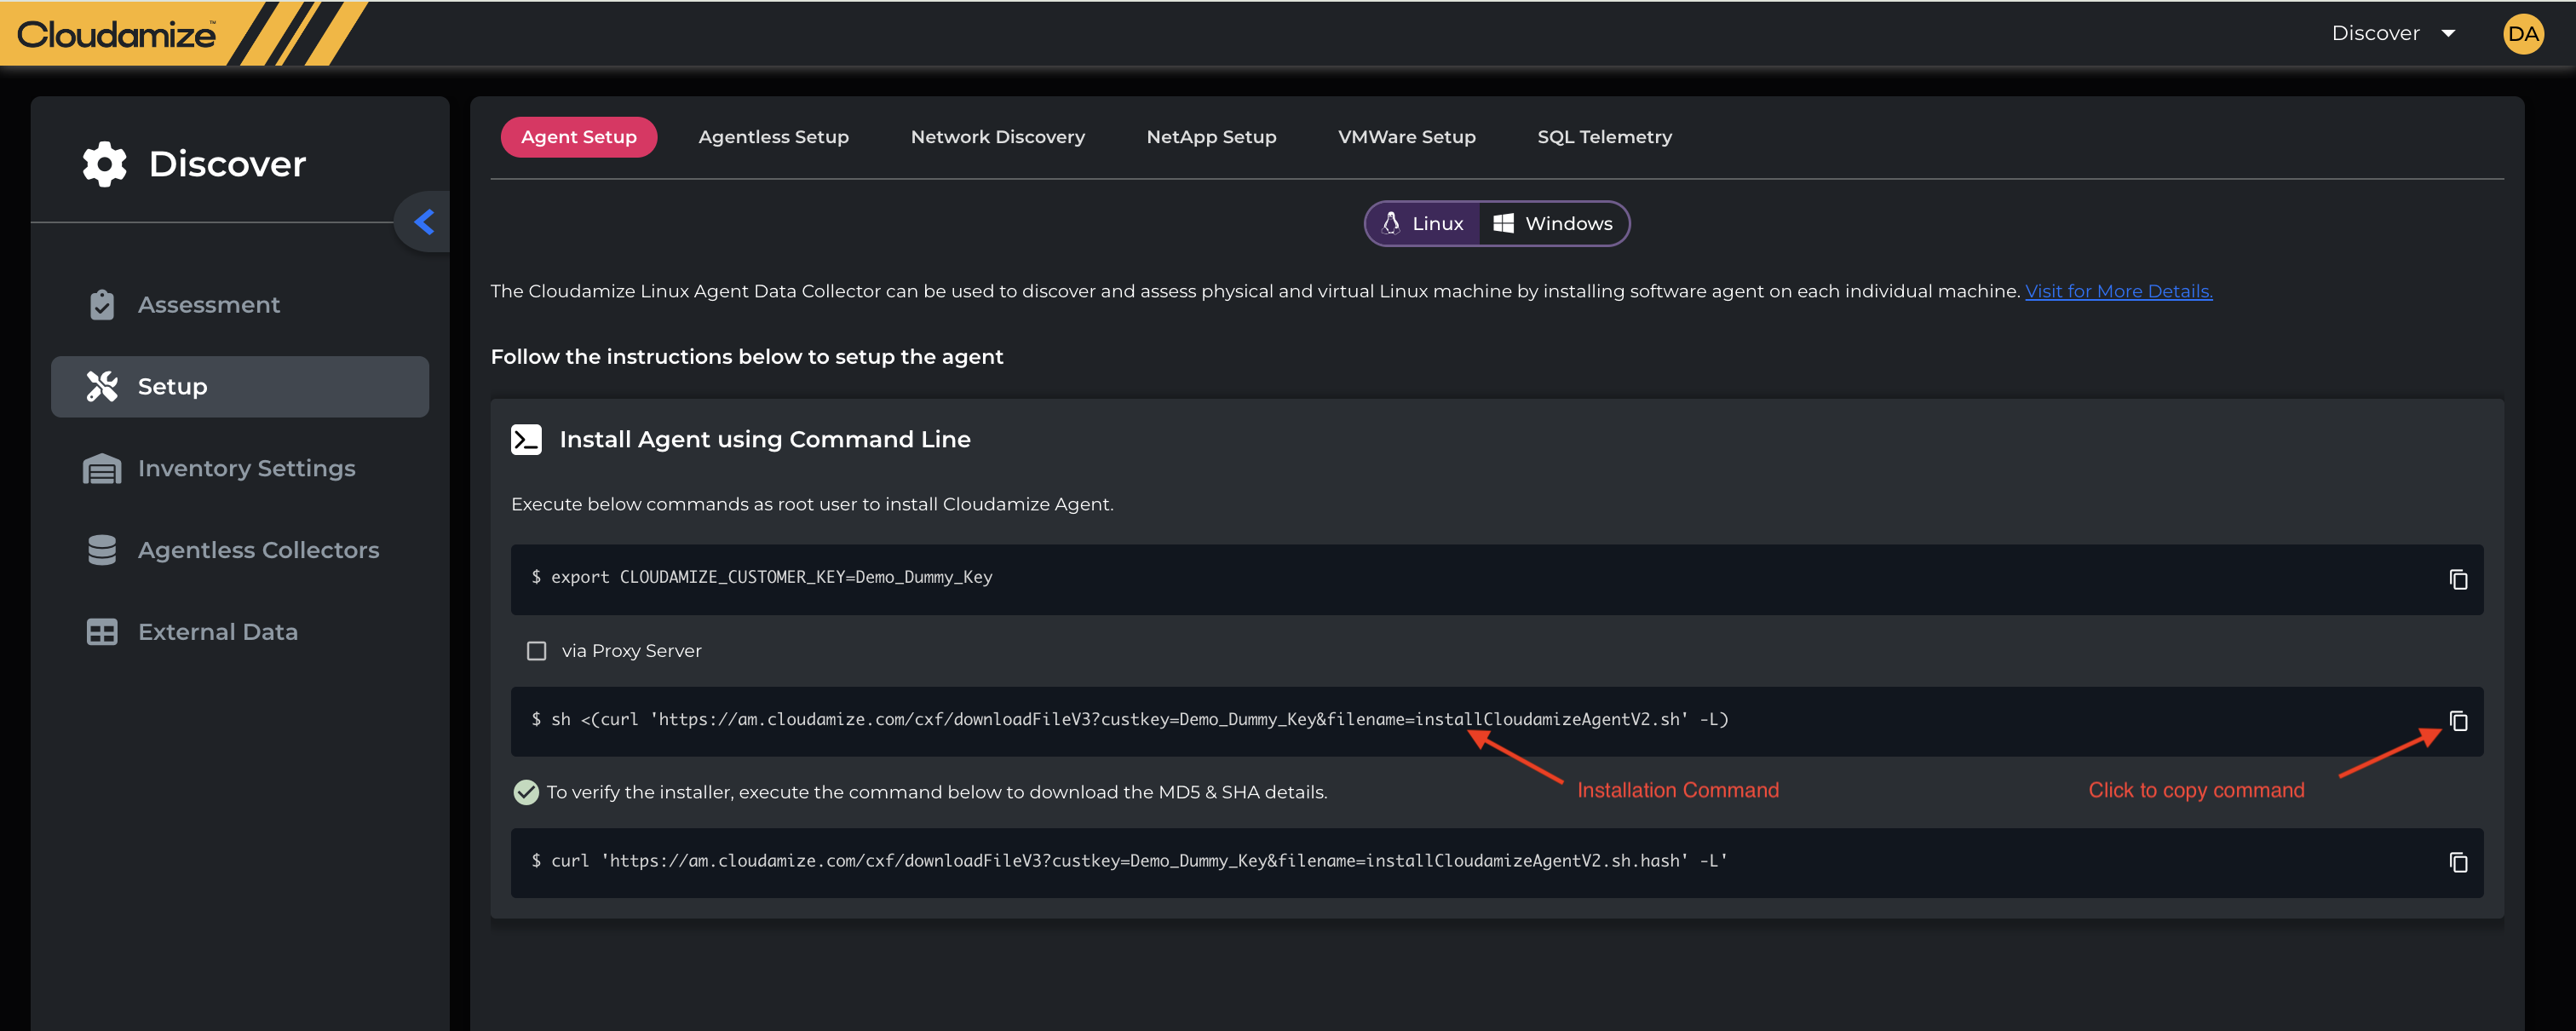
Install the Agent
There are two primary methods for installation: direct download and via a proxy server.
Method A: Direct Installation
To install the agent directly, execute the curl command to download and run the installer script.
-
Run the following command in your terminal:
Bash
curl 'https://ap.cloudomize.com/cxf/downloadFile?customerKey=Dummy_Key&fileName=installCloudomizeAgentv2.sh' | bash -l -
The command is also available under the Linux Tab under the Setup option
Method B: Via a Proxy Server (Optional)
If your network requires a proxy to access the internet, you can use the following command. The specific proxy configuration details would need to be added to this command.
-
The command structure for this method is shown in the screenshot. You would use the command for direct installation, but would need to configure your environment to use the proxy, such as by setting
http_proxyandhttps_proxyenvironment variables.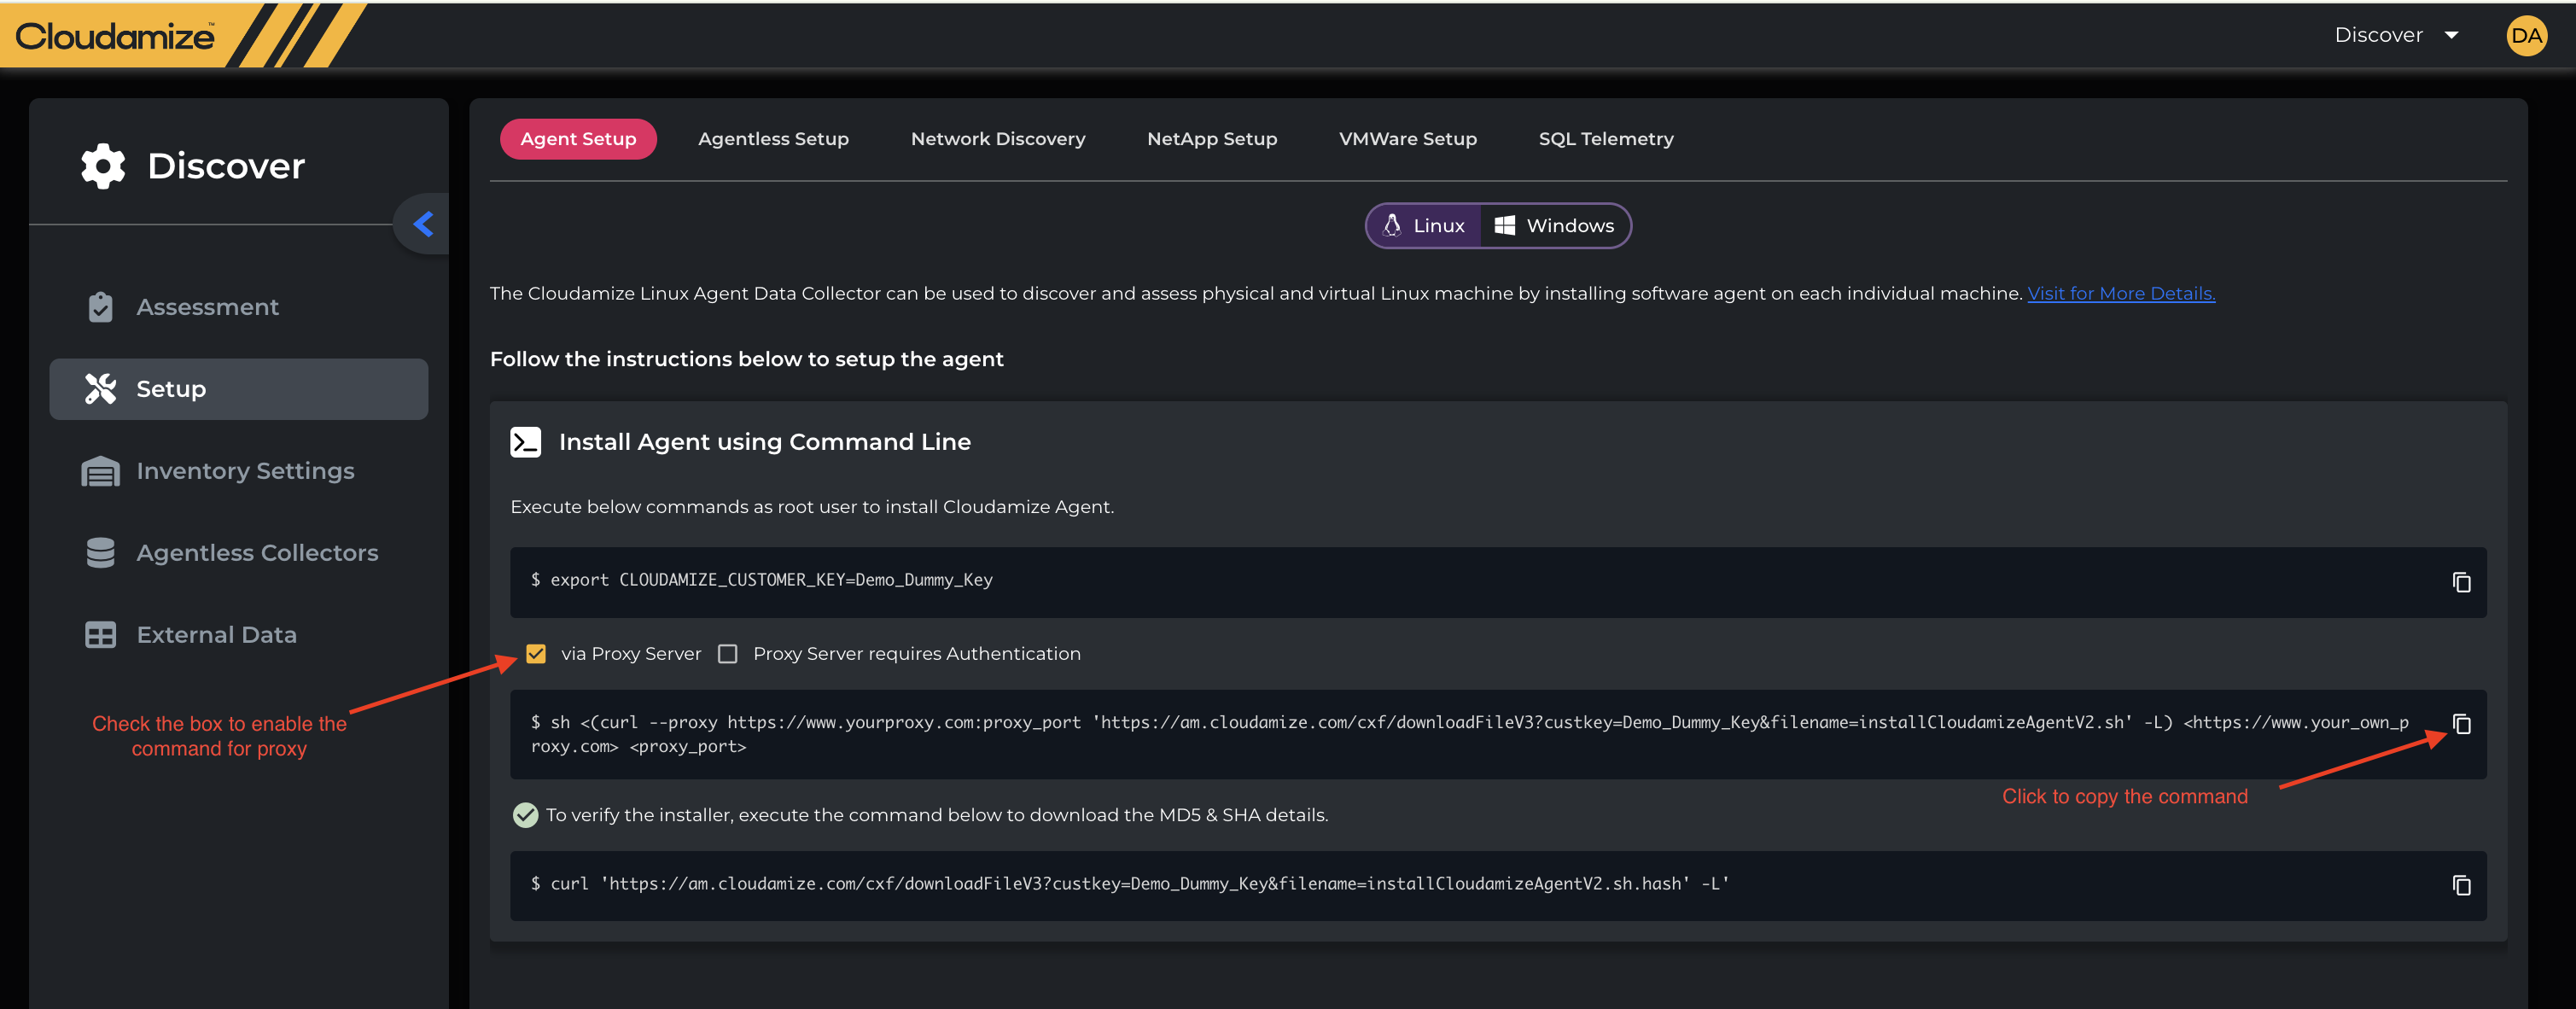
Verify the Installer
For added security, you can verify the integrity of the downloaded installer using its MD5 and SHA details.
-
To download the installer and get its hash details, execute the following
curlcommand:
Bash
curl 'https://ap.cloudomize.com/cxf/downloadFile?customerKey=Dummy_Key&fileName=installCloudomizeAgentv2.sh.hash' | bash -l
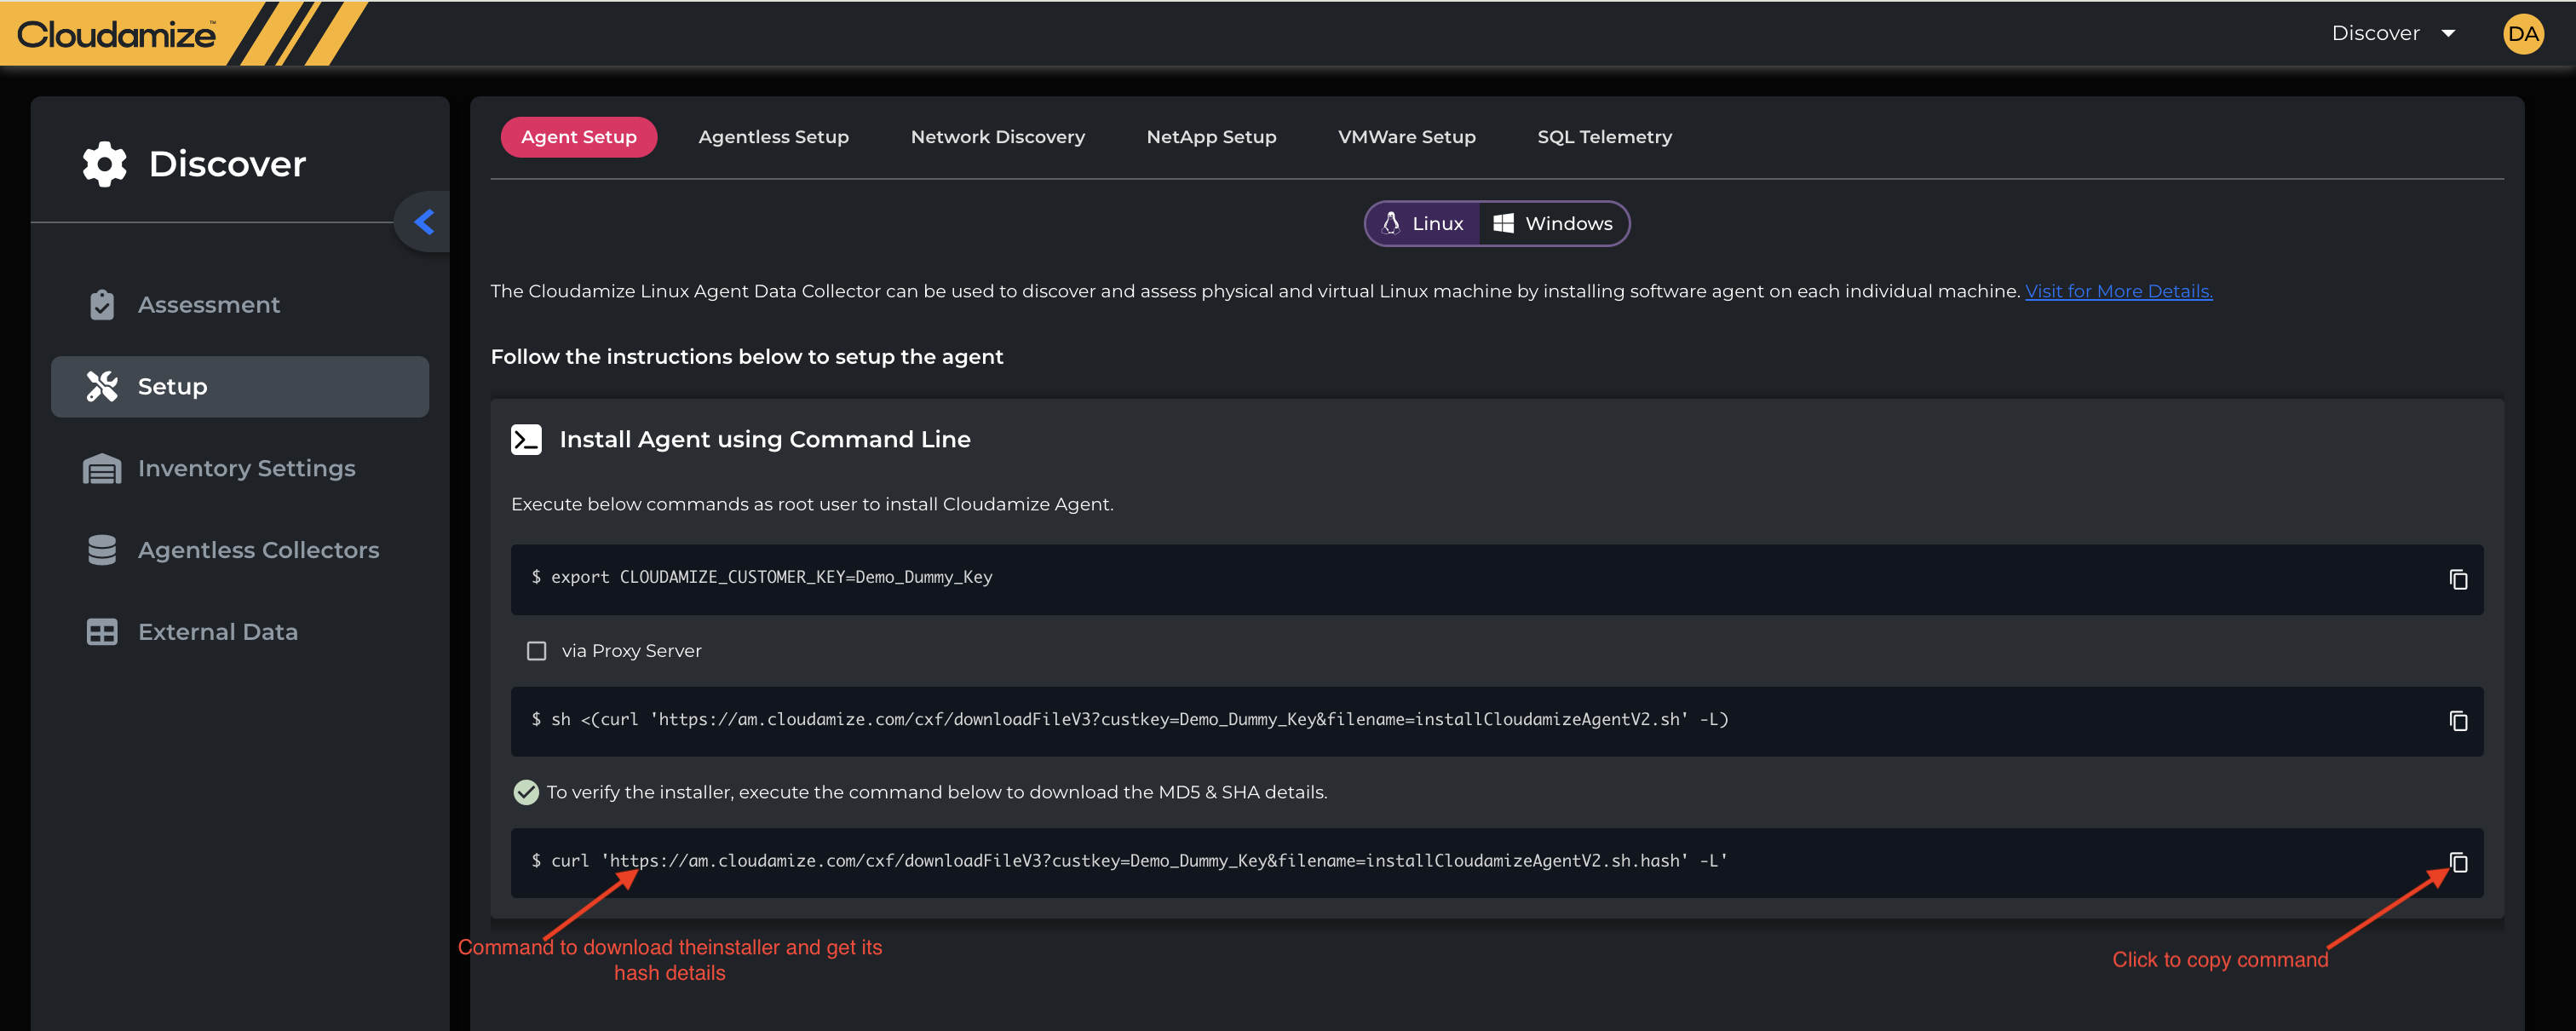
Note: This command downloads a file containing the hash values that you can use to check the integrity of the installer script. You would then compare these hash values against the file you downloaded in Step 2.
If you have any queries, please get in touch with the helpdesk via our Helpdesk Portal or by email at helpdesk@cloudamize.com.