

Overview
This guide provides instructions on how to set up the Agentless Data Collector to gather performance data from your NetApp ONTAP systems.
The data for the NetApp Detached Storage Report and FSx Recommendation for NetApp is collected via the Cloudamize Agentless Data Collector (ADC). You can install the Agentless DC from its own tab in the Setup page of the Discover section of the portal, using our existing guides: Agentless
Prerequisites
-
You must be an administrator on the system where the data collector will be installed.
-
The system must have access to your NetApp ONTAP systems.
NetApp ONTAP Requirements:
To ensure successful data collection, your NetApp ONTAP system must meet these requirements:
-
Minimum ONTAP Version: The minimum required version is 9.6.
-
User Permissions: It's recommended to create or use a read-only user for the Cloudamize connection, as admin/write permissions are not necessary.
-
User Login Method: The user account used for Cloudomize must have HTTP added as a "User Login Method."
Setup Method 1: Install Using GUI
-
Download the Installer: Click the "Download the Cloudomize Agentless Data Collector Windows Installer" link to download the
.msifile. -
Verify the Download: For security and integrity, you can download the MD5 & SHA details and verify the installer file.
-
Run the Installer: Execute the downloaded Agentless Data Collector as an administrator.
-
Enter Customer Key: When prompted, enter your unique customer key.
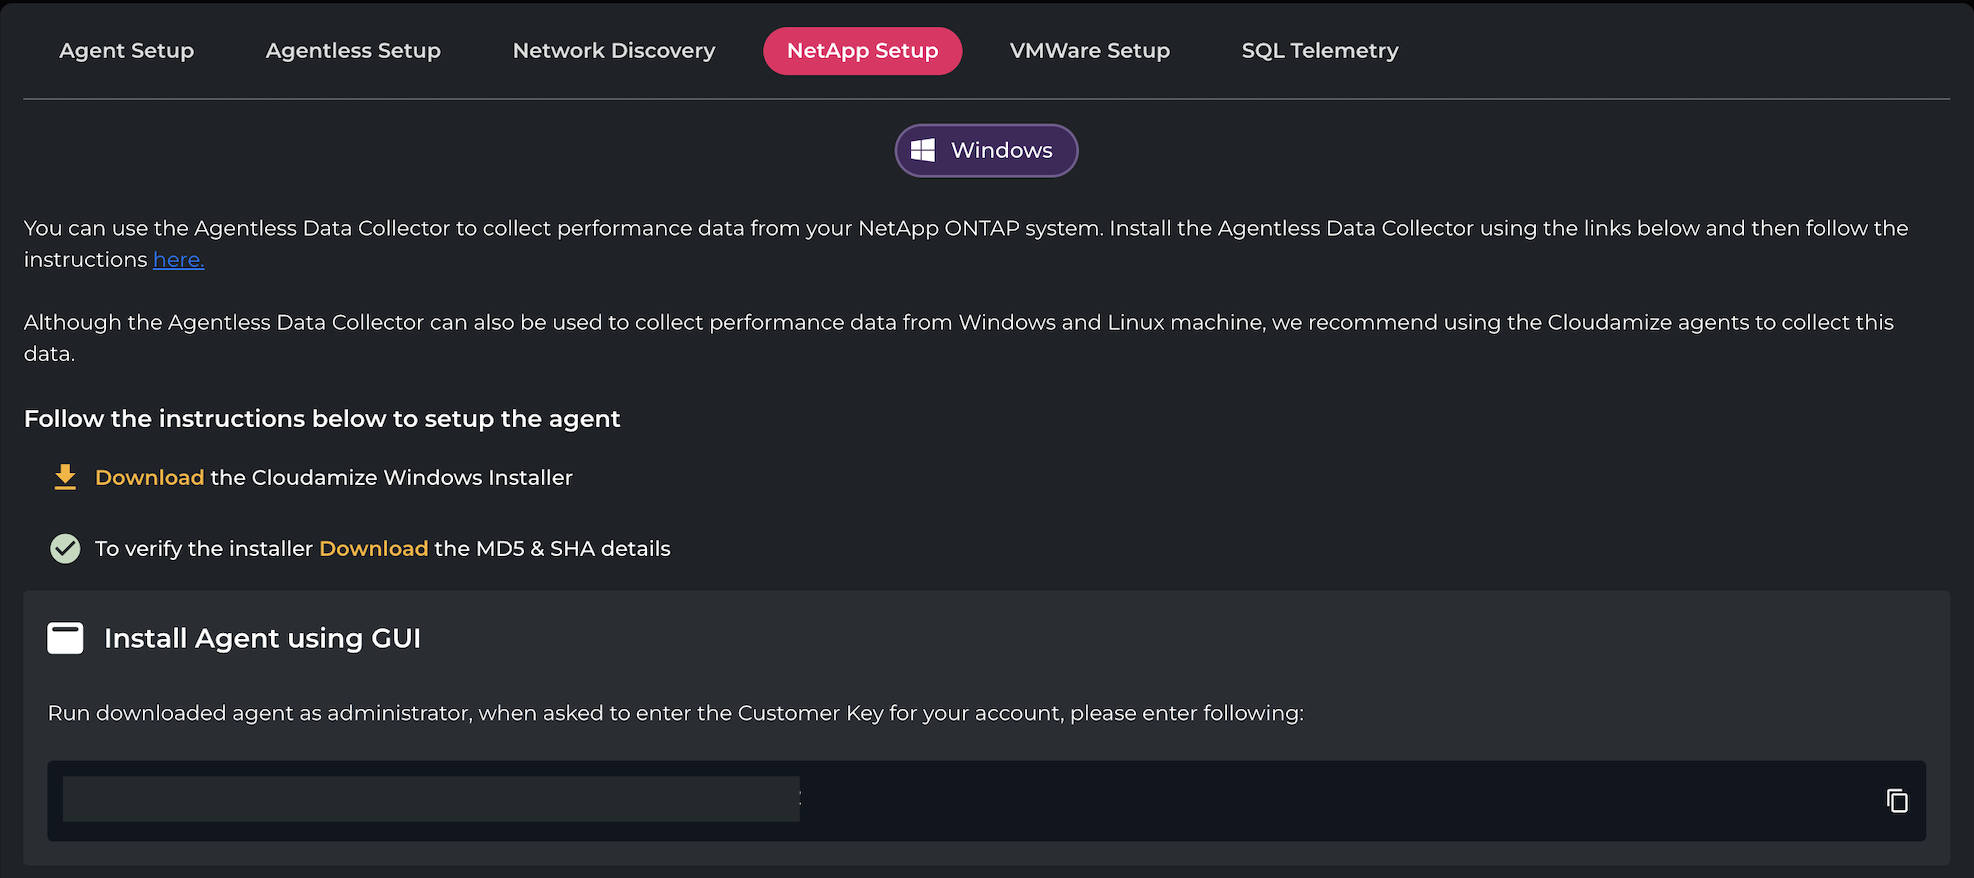
NetApp Setup Tab, located in Discover > Setup
Setup Method 2: Install Using Command Line
-
Open Command Prompt: Run Command Prompt as an administrator.
-
Navigate to the Installer Directory: Change the directory to where you downloaded the
.msifile. -
Run the Command: Execute the following command, making sure to replace
[filename].msiwith the actual name of the file you downloaded andDemo_Dummy_Keywith your specific customer key. -
msiexec /i C:\cloudomizeAgentlessDC-[filename].msi CustomerKey="Demo_Dummy_key" /qn -
Optional: Via Proxy Server: If you need to install via a proxy server, check the "Via Proxy Server" checkbox for additional instructions or parameters.

Important Note: The installation command uses /qn, which stands for "quiet mode," meaning the installer will run without displaying a user interface.
Please refer to the guides linked above for full details on installing the Agentless DC.
Once the ADC is installed, you can add NetApp systems to the collector UI using the “Add NetApp Host” option. You must specify the URL or IP address of your NetApp system(s) and NetApp credentials. The ADC will collect the actual capacity, IOPS, throughput, etc. via the NetApp ONTAP API.
You can add a NetApp system using the drop-down menu in the Agentless Data Collector by selecting “Add NetApp Host”:
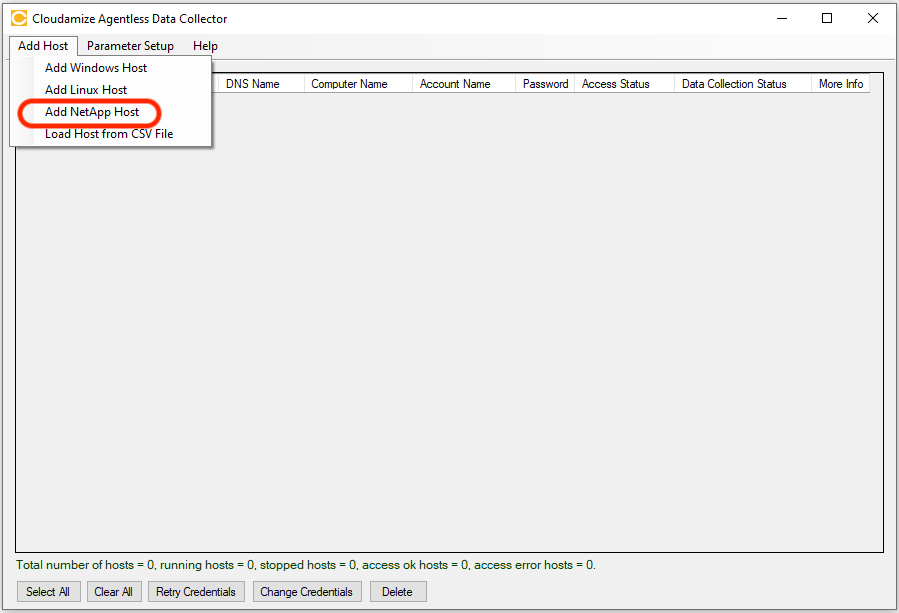
NOTE: NetApp hosts added to the ADC appear only under the Remote Hosts tab in the Agentless Collectors section and not under Inventory Settings.
If you have any queries, please get in touch with the helpdesk via our Helpdesk Portal or by email at helpdesk@cloudamize.com.