

The Partner Dashboard is used as a single console to manage all Assessments. On the Partner
dashboard, you can create new orders, access all assessments, review training resources, and submit support tickets. An Order needs to be created to set up an assessment. Below are the steps to create a new order.
Note: If a user doesn't see the Add New Order button, the logged-in user lacks admin permissions. In such cases, they should contact their dashboard admin or contact Cloudamize support for assistance in creating the order.
Order Creation
Plan Edition

Note: All fields must be completed to create an order.
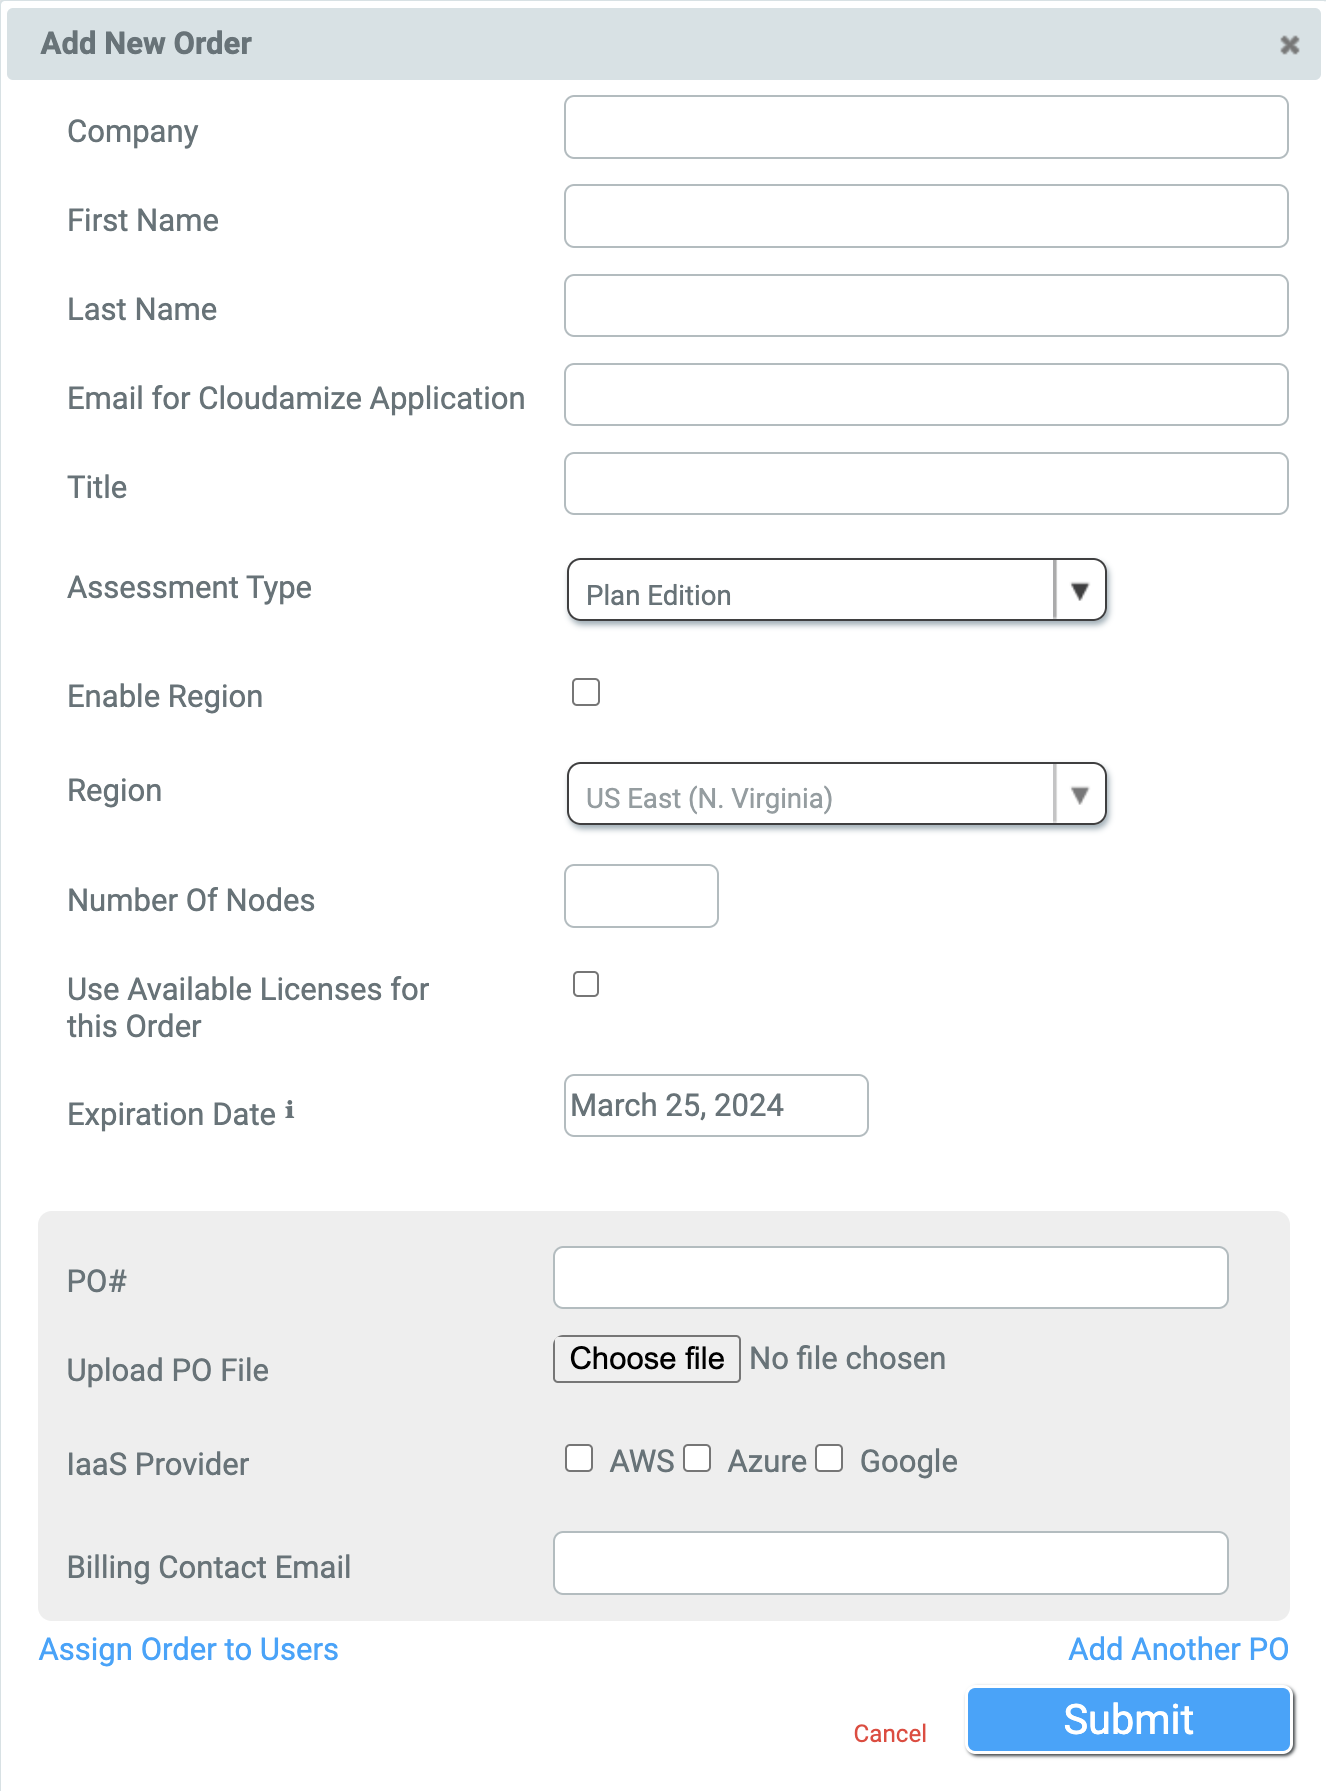
On the Partner Dashboard, select
Add New Order in the upper-right corner. 2. Fill out the following fields and press Submit:
Company
Client company name
First Name
Client first name
Last Name
Client's’s last name
Email for Cloudamize Application
Use the following example to create an alias for the account: clientcompanyname@partnerdomain.com
Title
Client contact’s title
Assessment Type
Please select Plan Edition, which includes access to Discover, Analyze, Plan, & Migrate
Please note that selecting Network Discovery will only provide access to the Network Discovery tool.
Number of Nodes
The maximum number of machines included in the project
Data Locality
Select the region that you'd like your data to be processed and stored in.
Use Available Licenses for this Order
If this order will use licenses from a bulk purchase, check the box and select the bucket from which to pull the licenses.
Expiration Date
The default expiration date is set to 81 days. You can select a date between 30 days to 2 years.
PO#
The number is listed on the PO or order form. If a PO is unavailable, please enter a stand-in number and upload a text file to act as a placeholder.
Upload PO File
Upload appropriate documentation associated with the order.
Cloud Recommendations
Select the cloud(s) that you'd like recommendations produced for.
Billing Contact Email
Enter your email address unless otherwise specified.
Assign Order to Users
Enables the order assignment to all users associated with the Partner Dashboard. A new window will open, showing both.
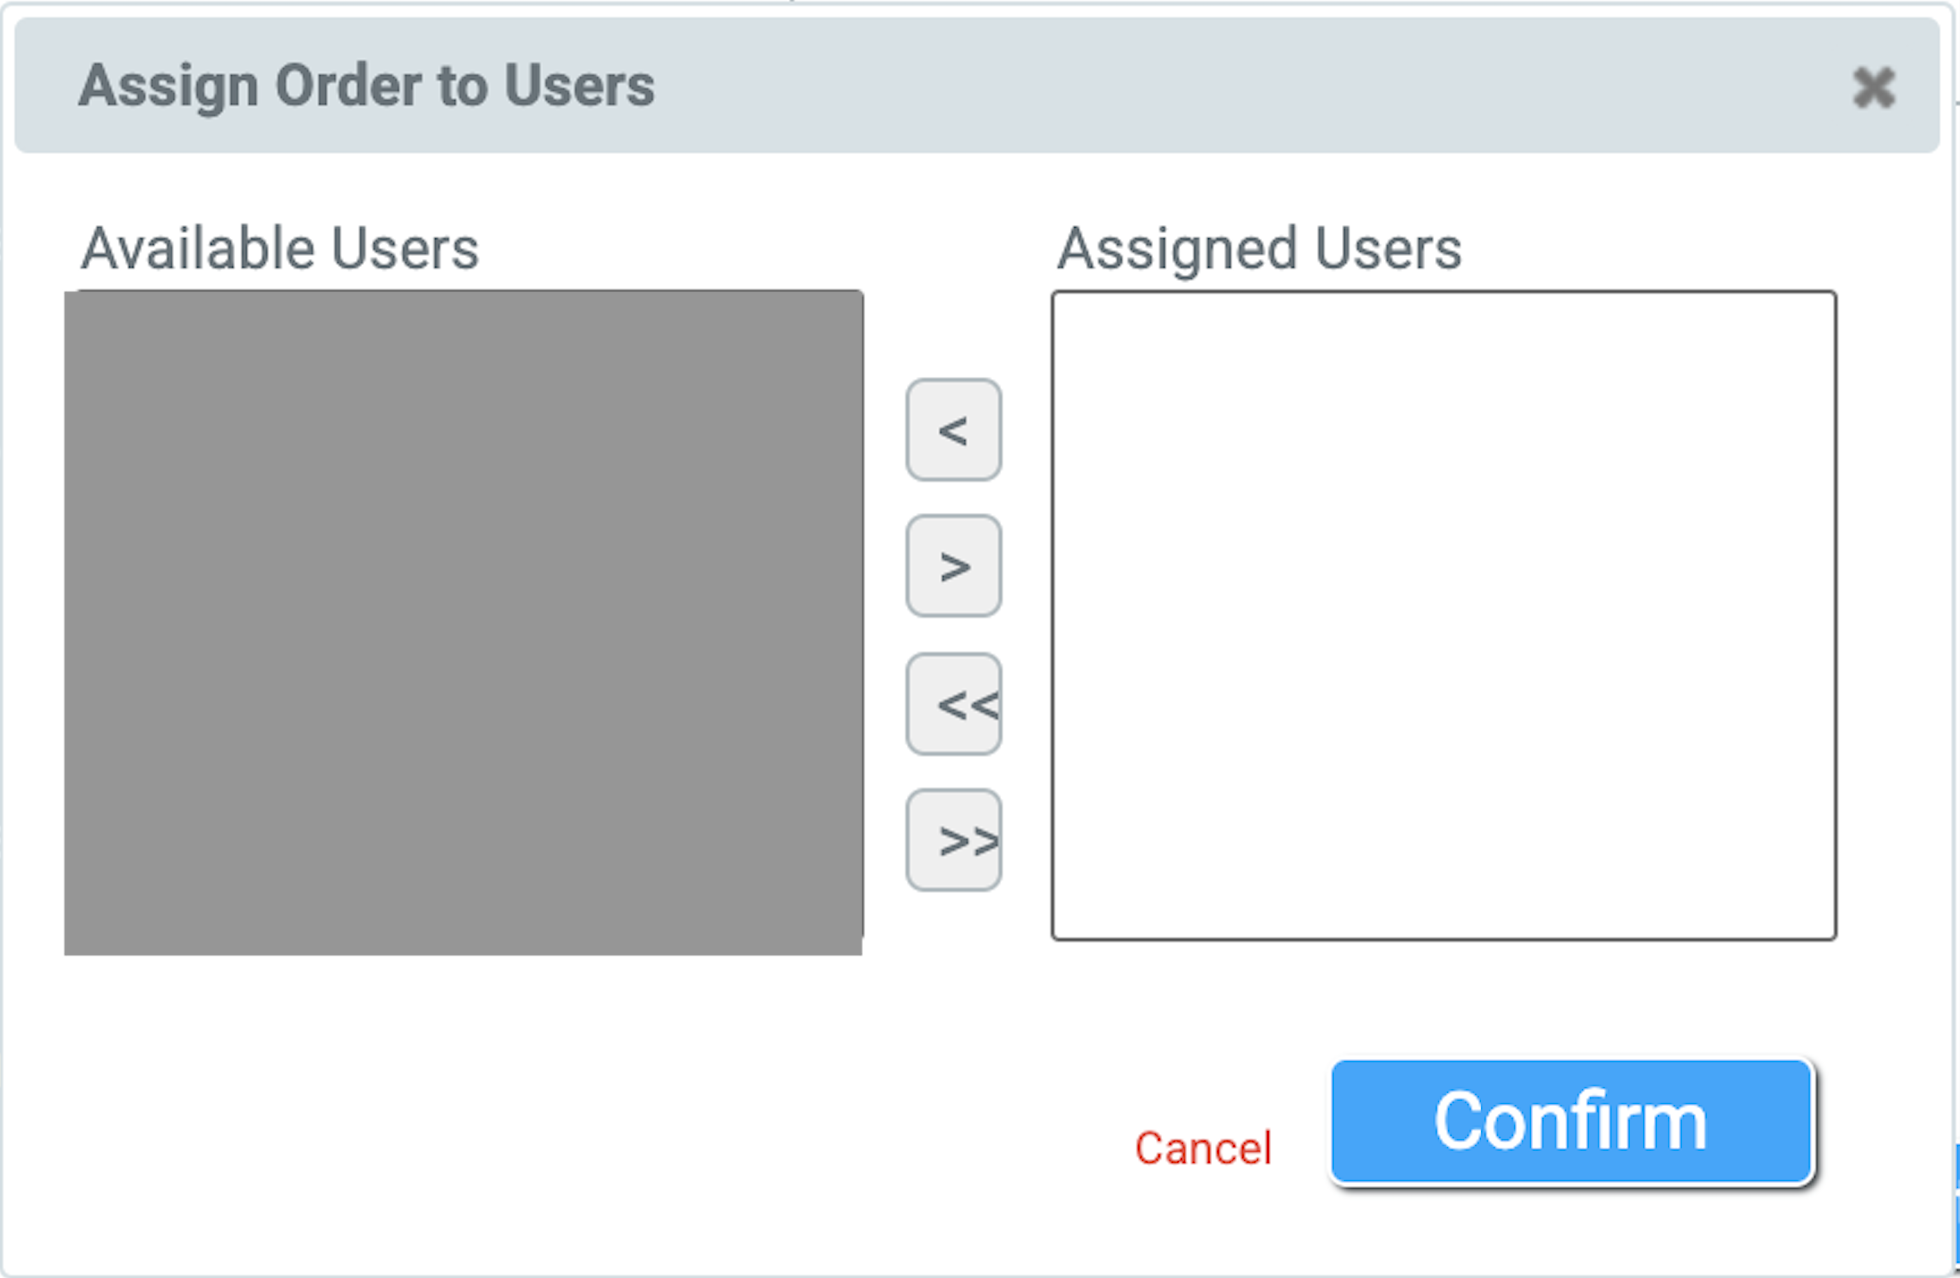
Available Users and Assigned Users. Use the arrows to move users from one category to another, and click Confirm to save the changes.
Order Creation
Network Discovery

Note: All fields must be filled in to create an order.
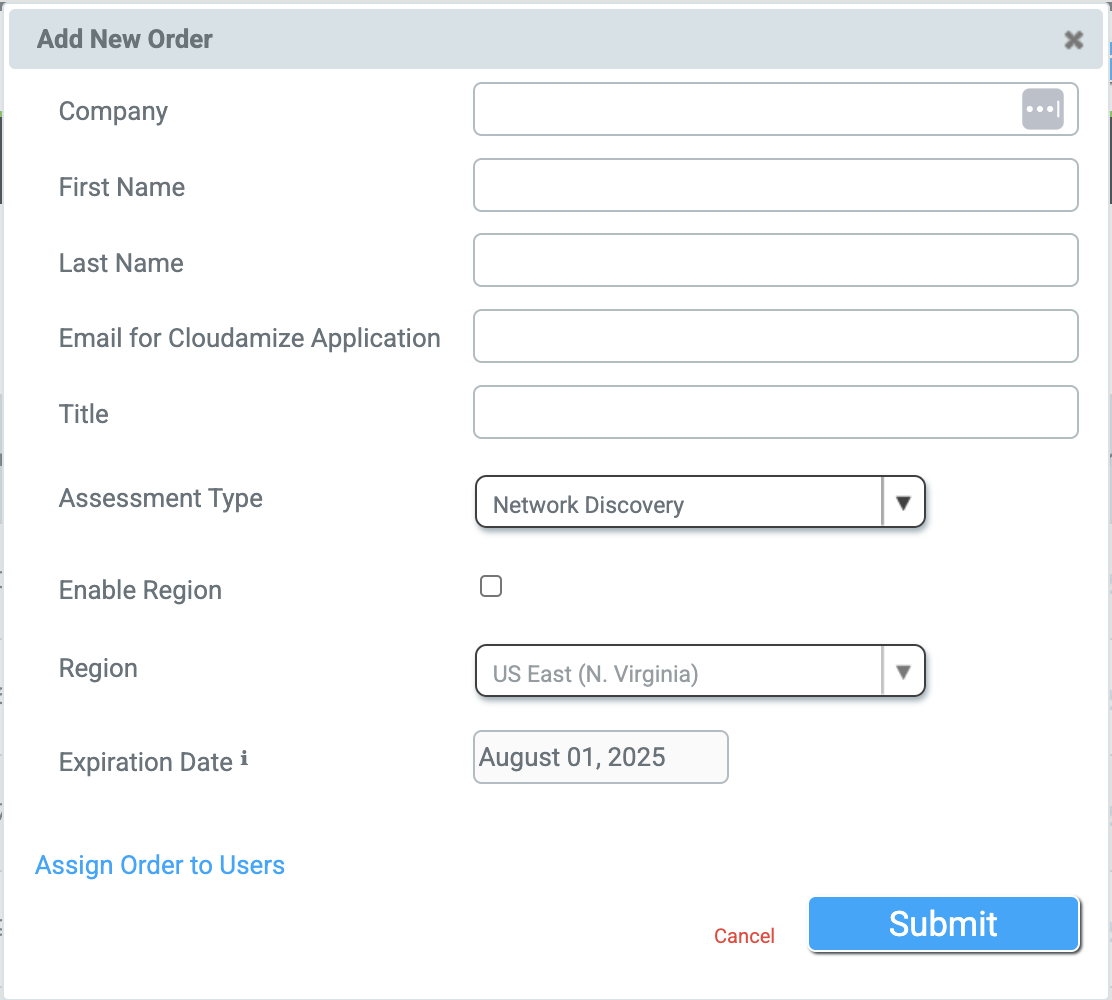
On the Partner Dashboard, select
Add New Order in the upper-right corner. 2. Fill out the following fields and press Submit:
Company
Client company name
First Name
Client first name
Last Name
Client's’s last name
Email for Cloudamize Application
Use the following example to create an alias for the account: clientcompanyname@partnerdomain.com
Title
Client contact’s title
Assessment Type
Please select Network Discovery, which will only provide access to the Network Discovery tool.
Assign Order to Users
Enables the order assignment to all users associated with the Partner Dashboard. A new window will open, showing both.
Available Users and Assigned Users. Use the arrows to move users from one category to another, and click Confirm to save the changes.
If you have any queries, please get in touch with the helpdesk via our Helpdesk Portal or by email at helpdesk@cloudamize.com.