

Overview
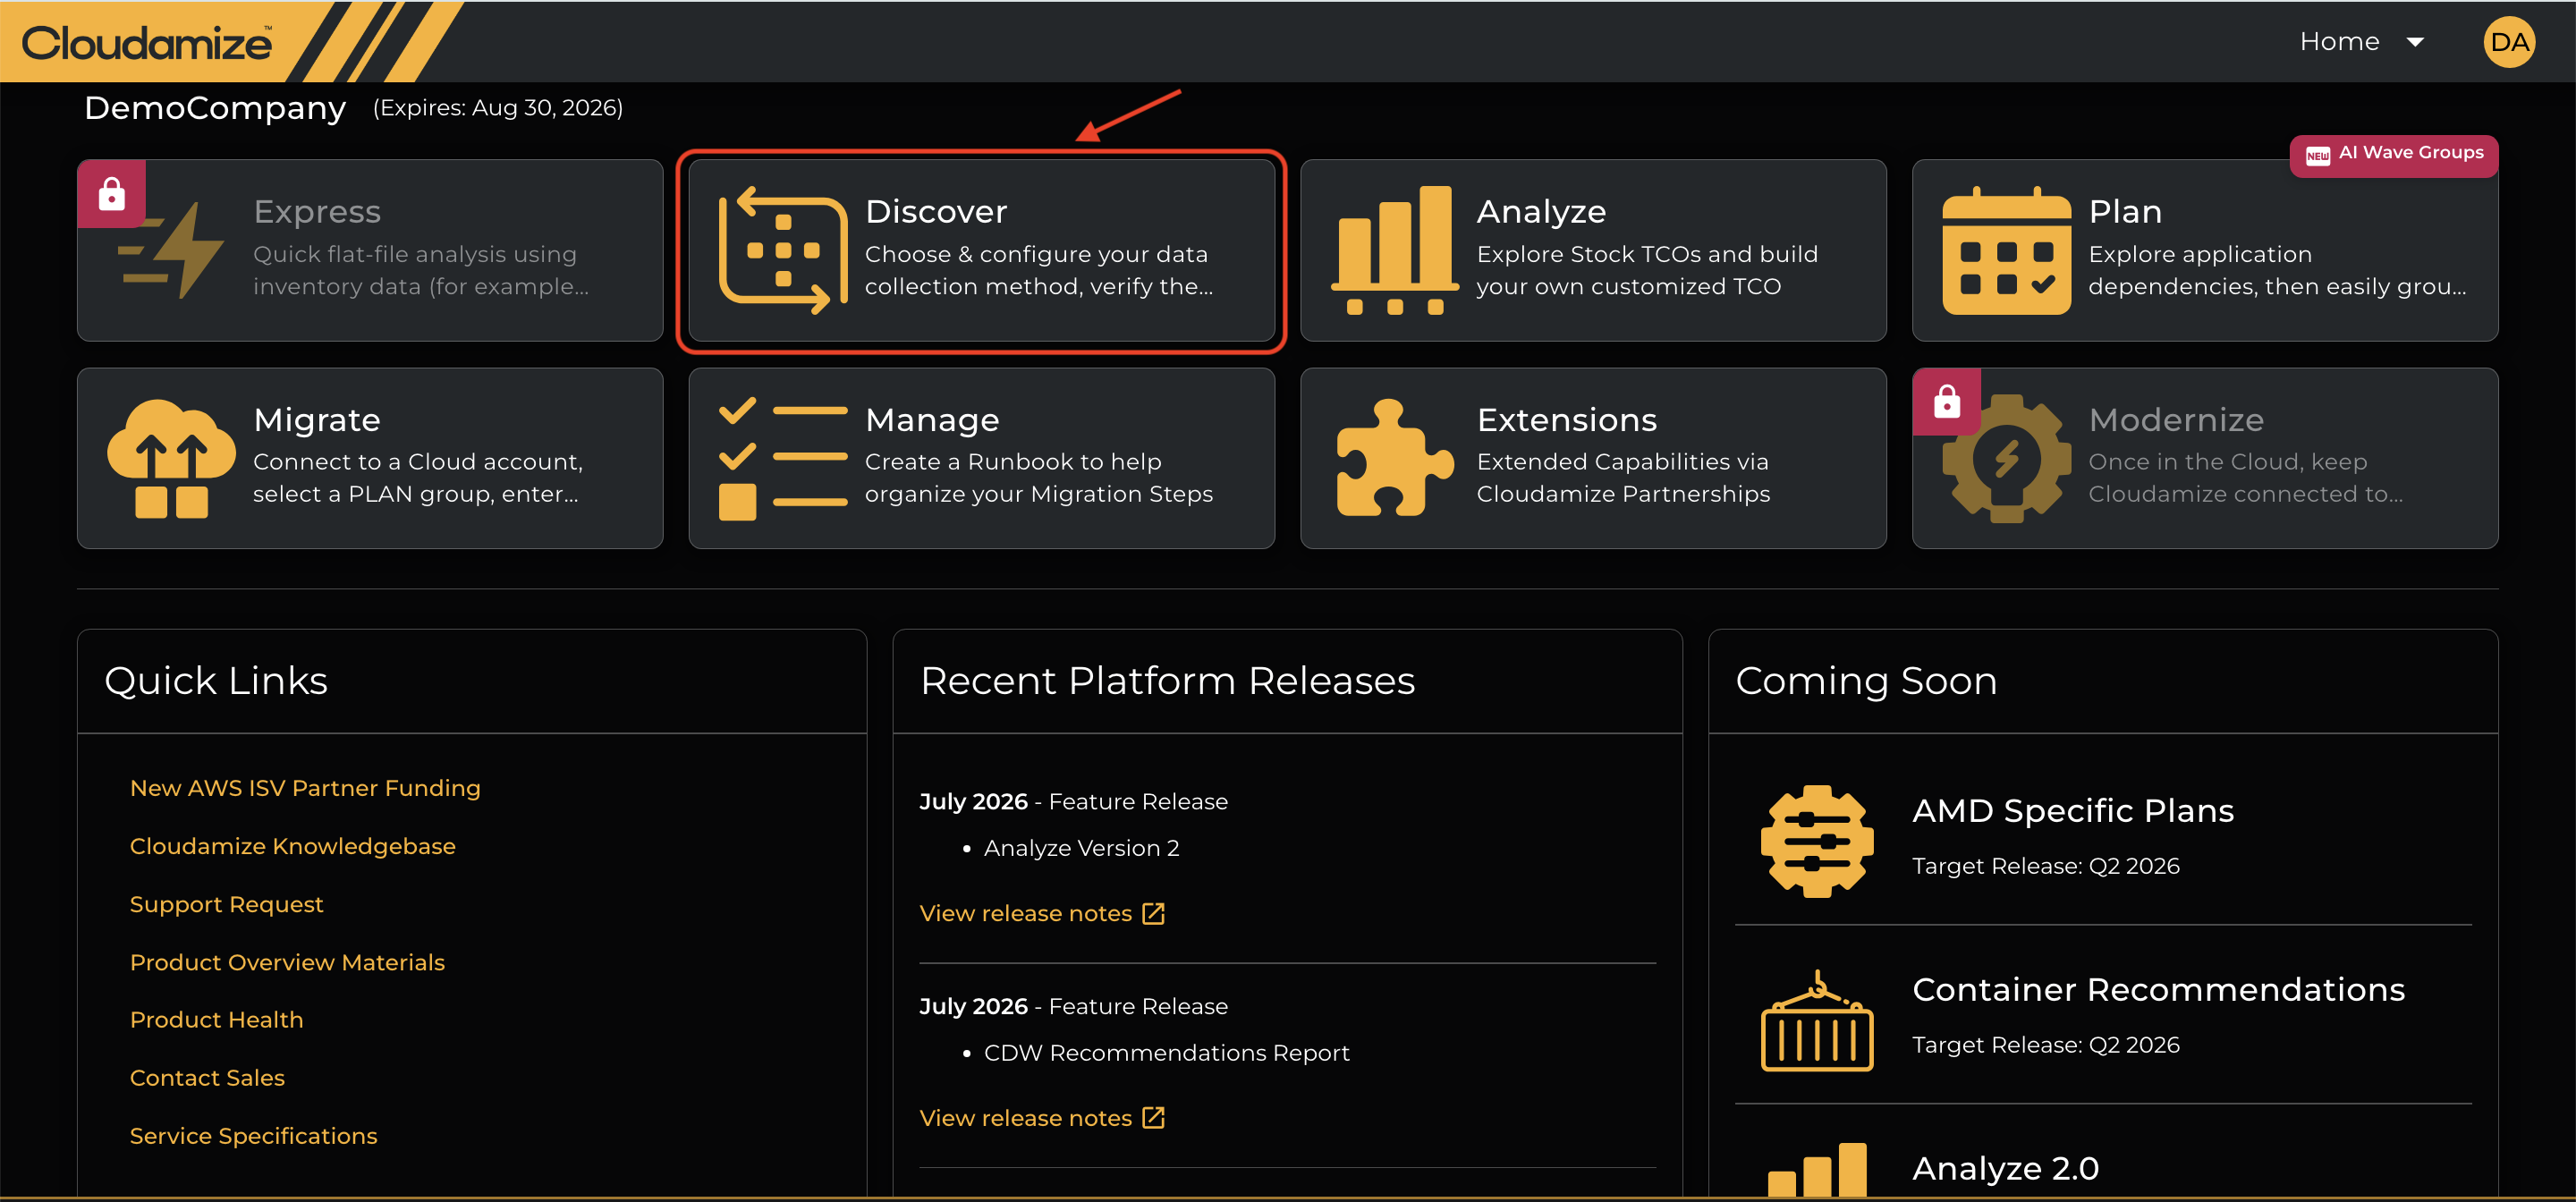
Once you have configured your assessment and added all the necessary infrastructure, you are ready to start collecting data. To access the Assessment tab, click on the “Discover” option on the Cloudamize Landing Page.
The Assessment tab will provide you with the Start Assessment option, which will look like this:
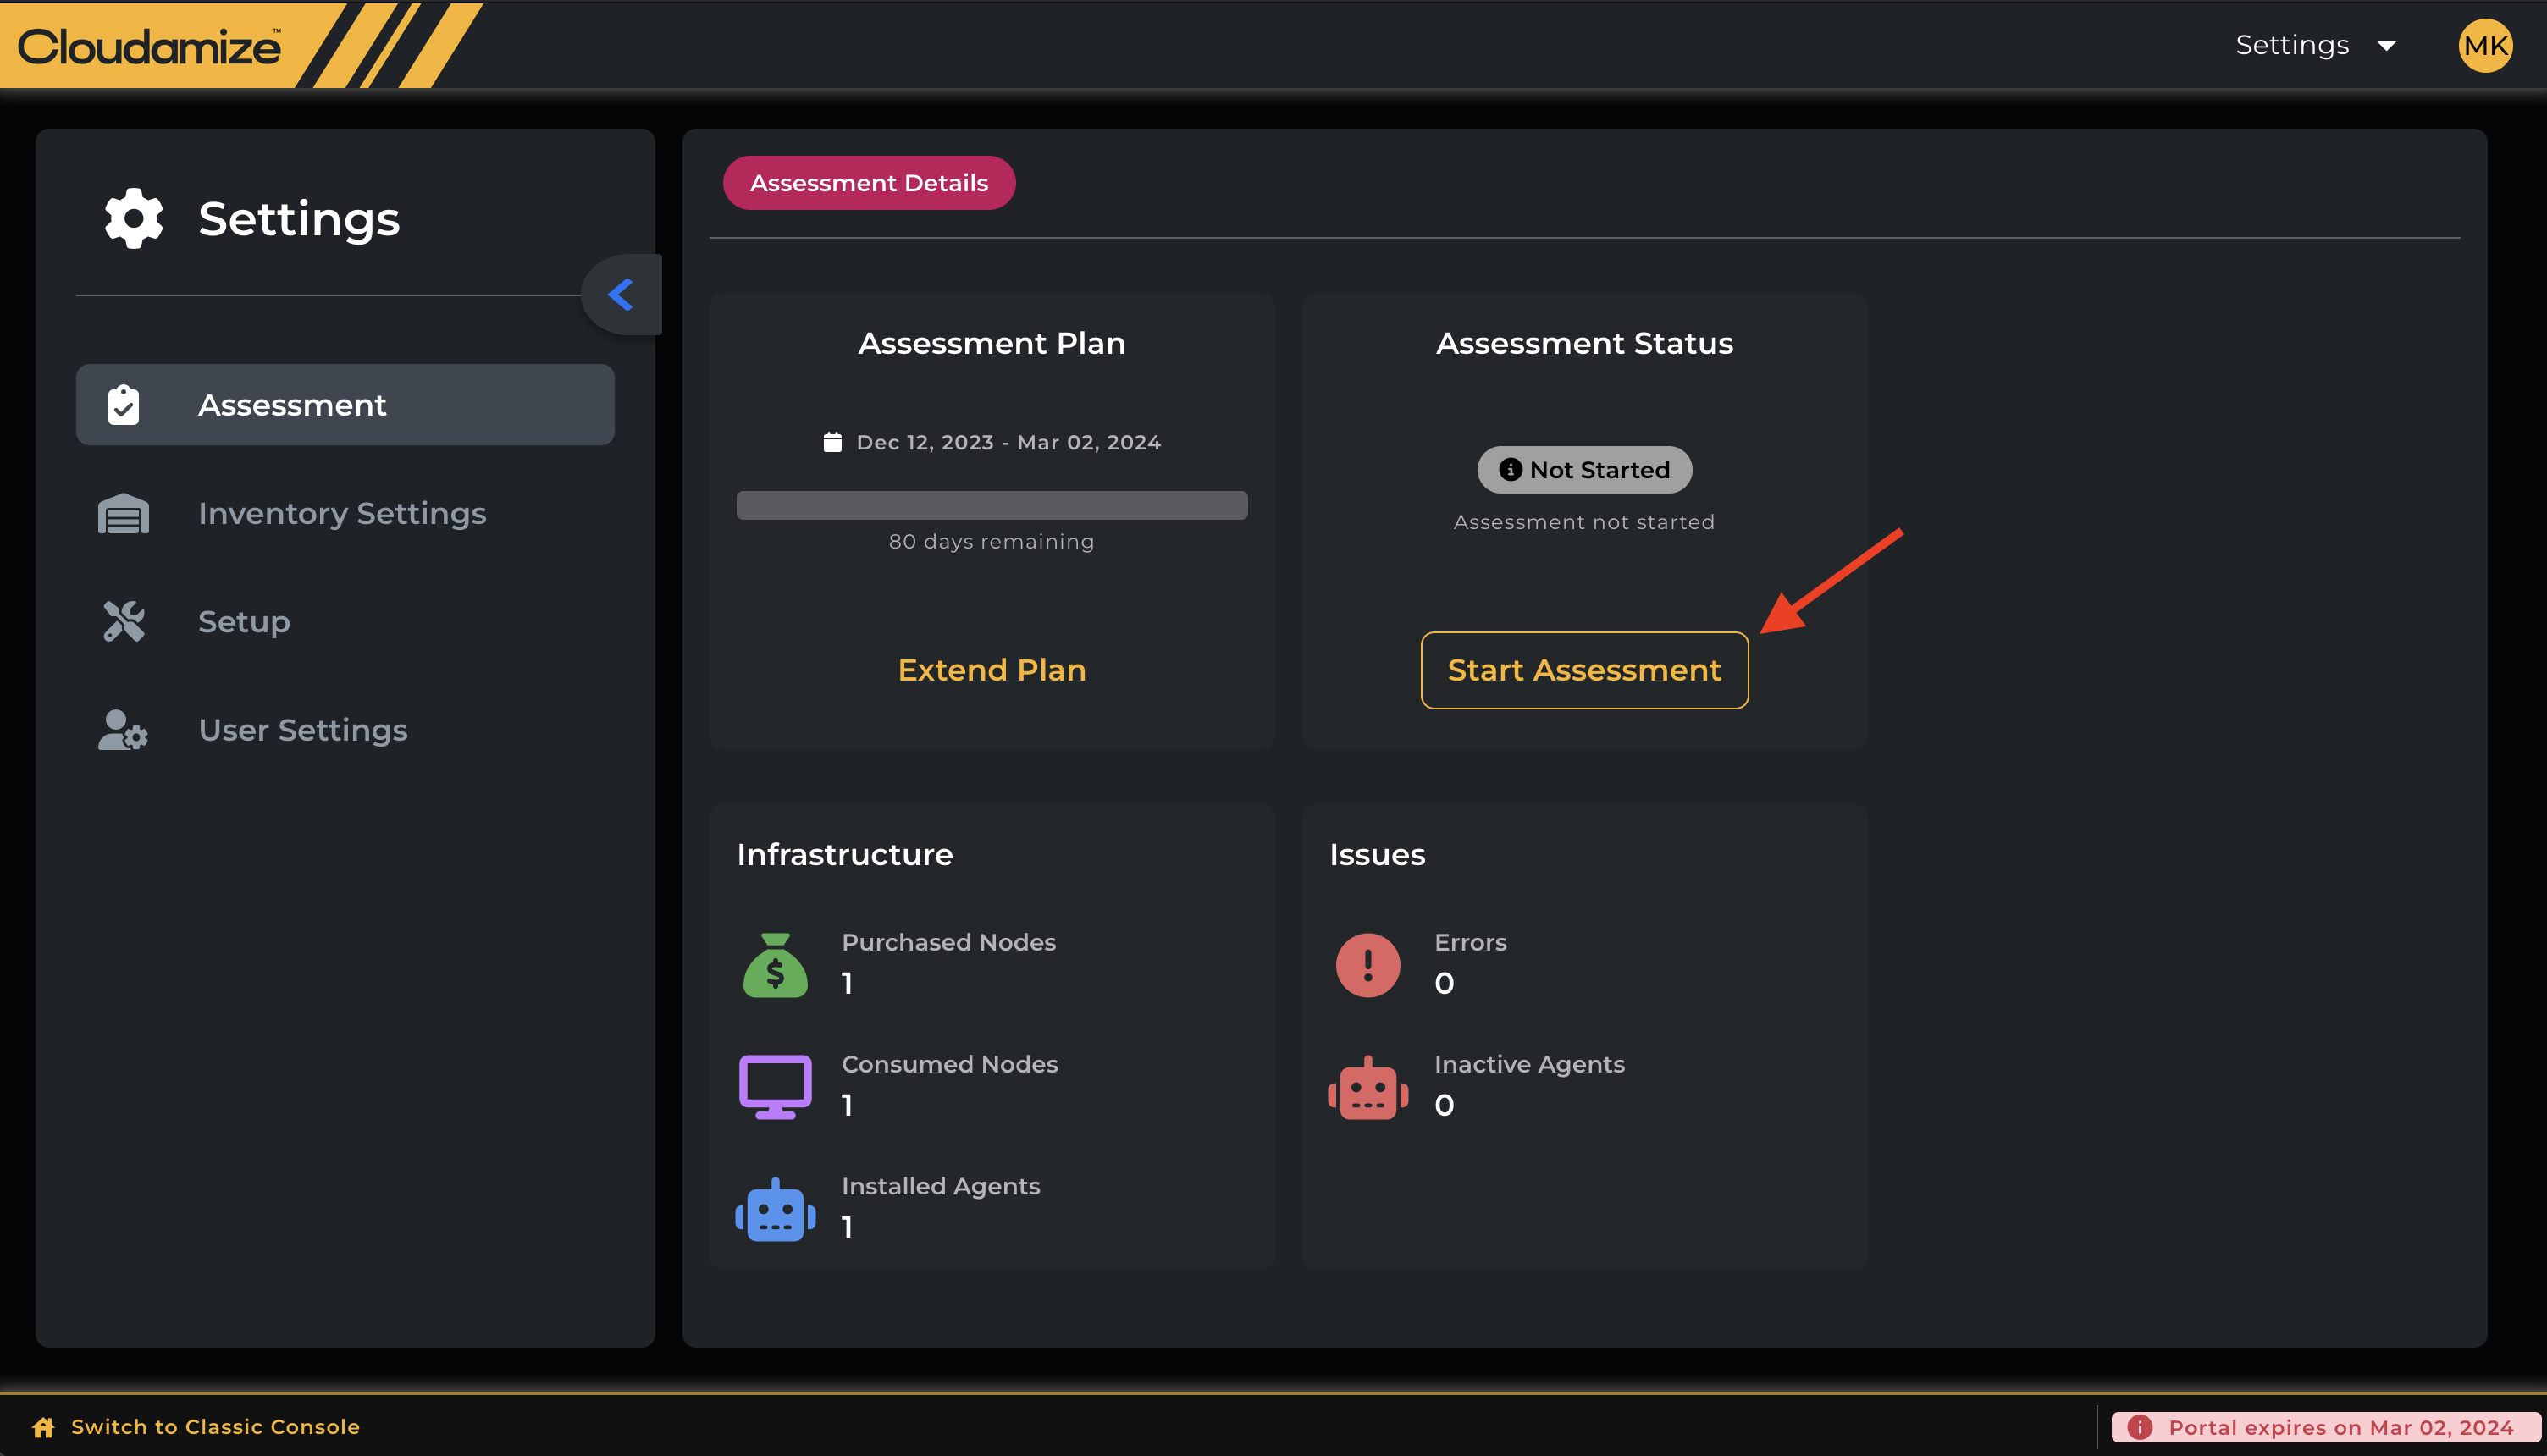
Click on the Start Assessment button (highlighted above) to begin the process of starting data collection.
Note: The Start Assessment option will be enabled only after a minimum of 6 nodes have been added to the console.
Starting the Assessment, Step-by-Step
Starting the Assessment consists of three stages:
Stage 1: Review Node Counts
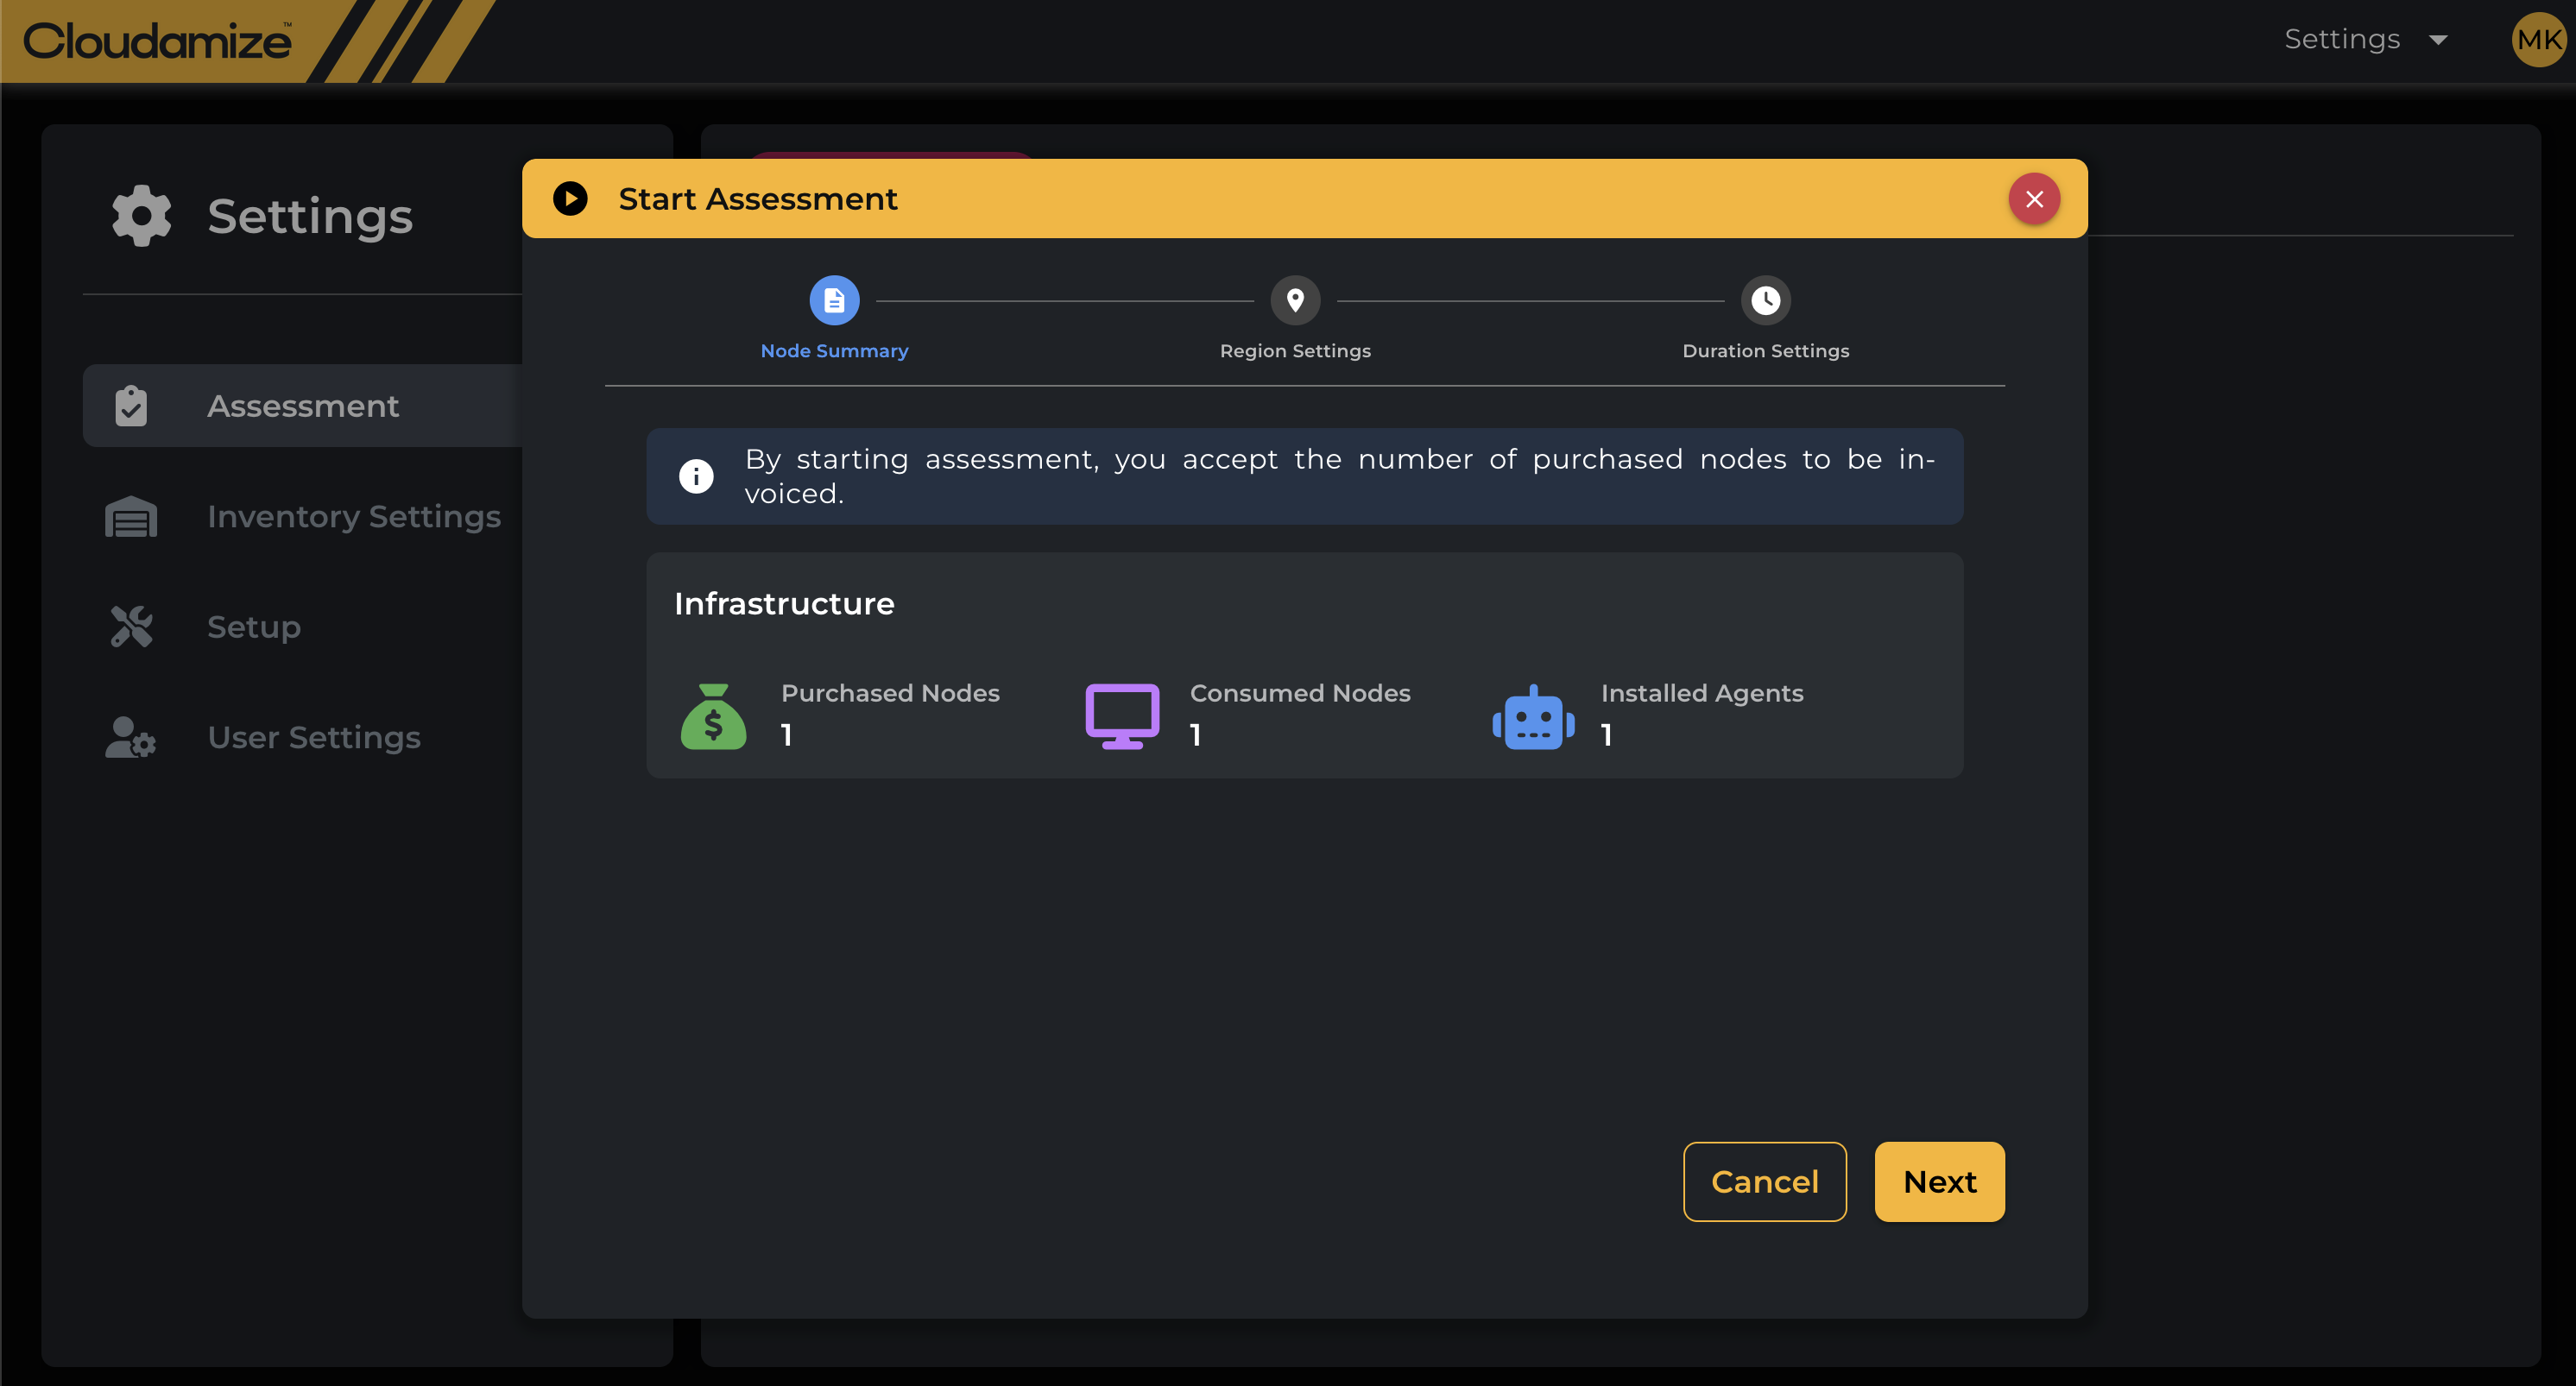
Cloudamize refers to servers you have added to the Assessment as “nodes”. In this first stage, you can review the following values:
-
Purchased Nodes: The total number of licenses purchased for this Assessment, i.e., the maximum number of servers that can have assessment results published in this Assessment.
-
Consumed Nodes: The current number of licenses that will be used with the given settings, i.e., the number of servers that are included in the Assessment scope.
-
Installed Agents: The current number of servers added to the Assessment via one or more data collection methods (Agent, Agentless, etc). This includes both in-scope and out-of-scope servers.
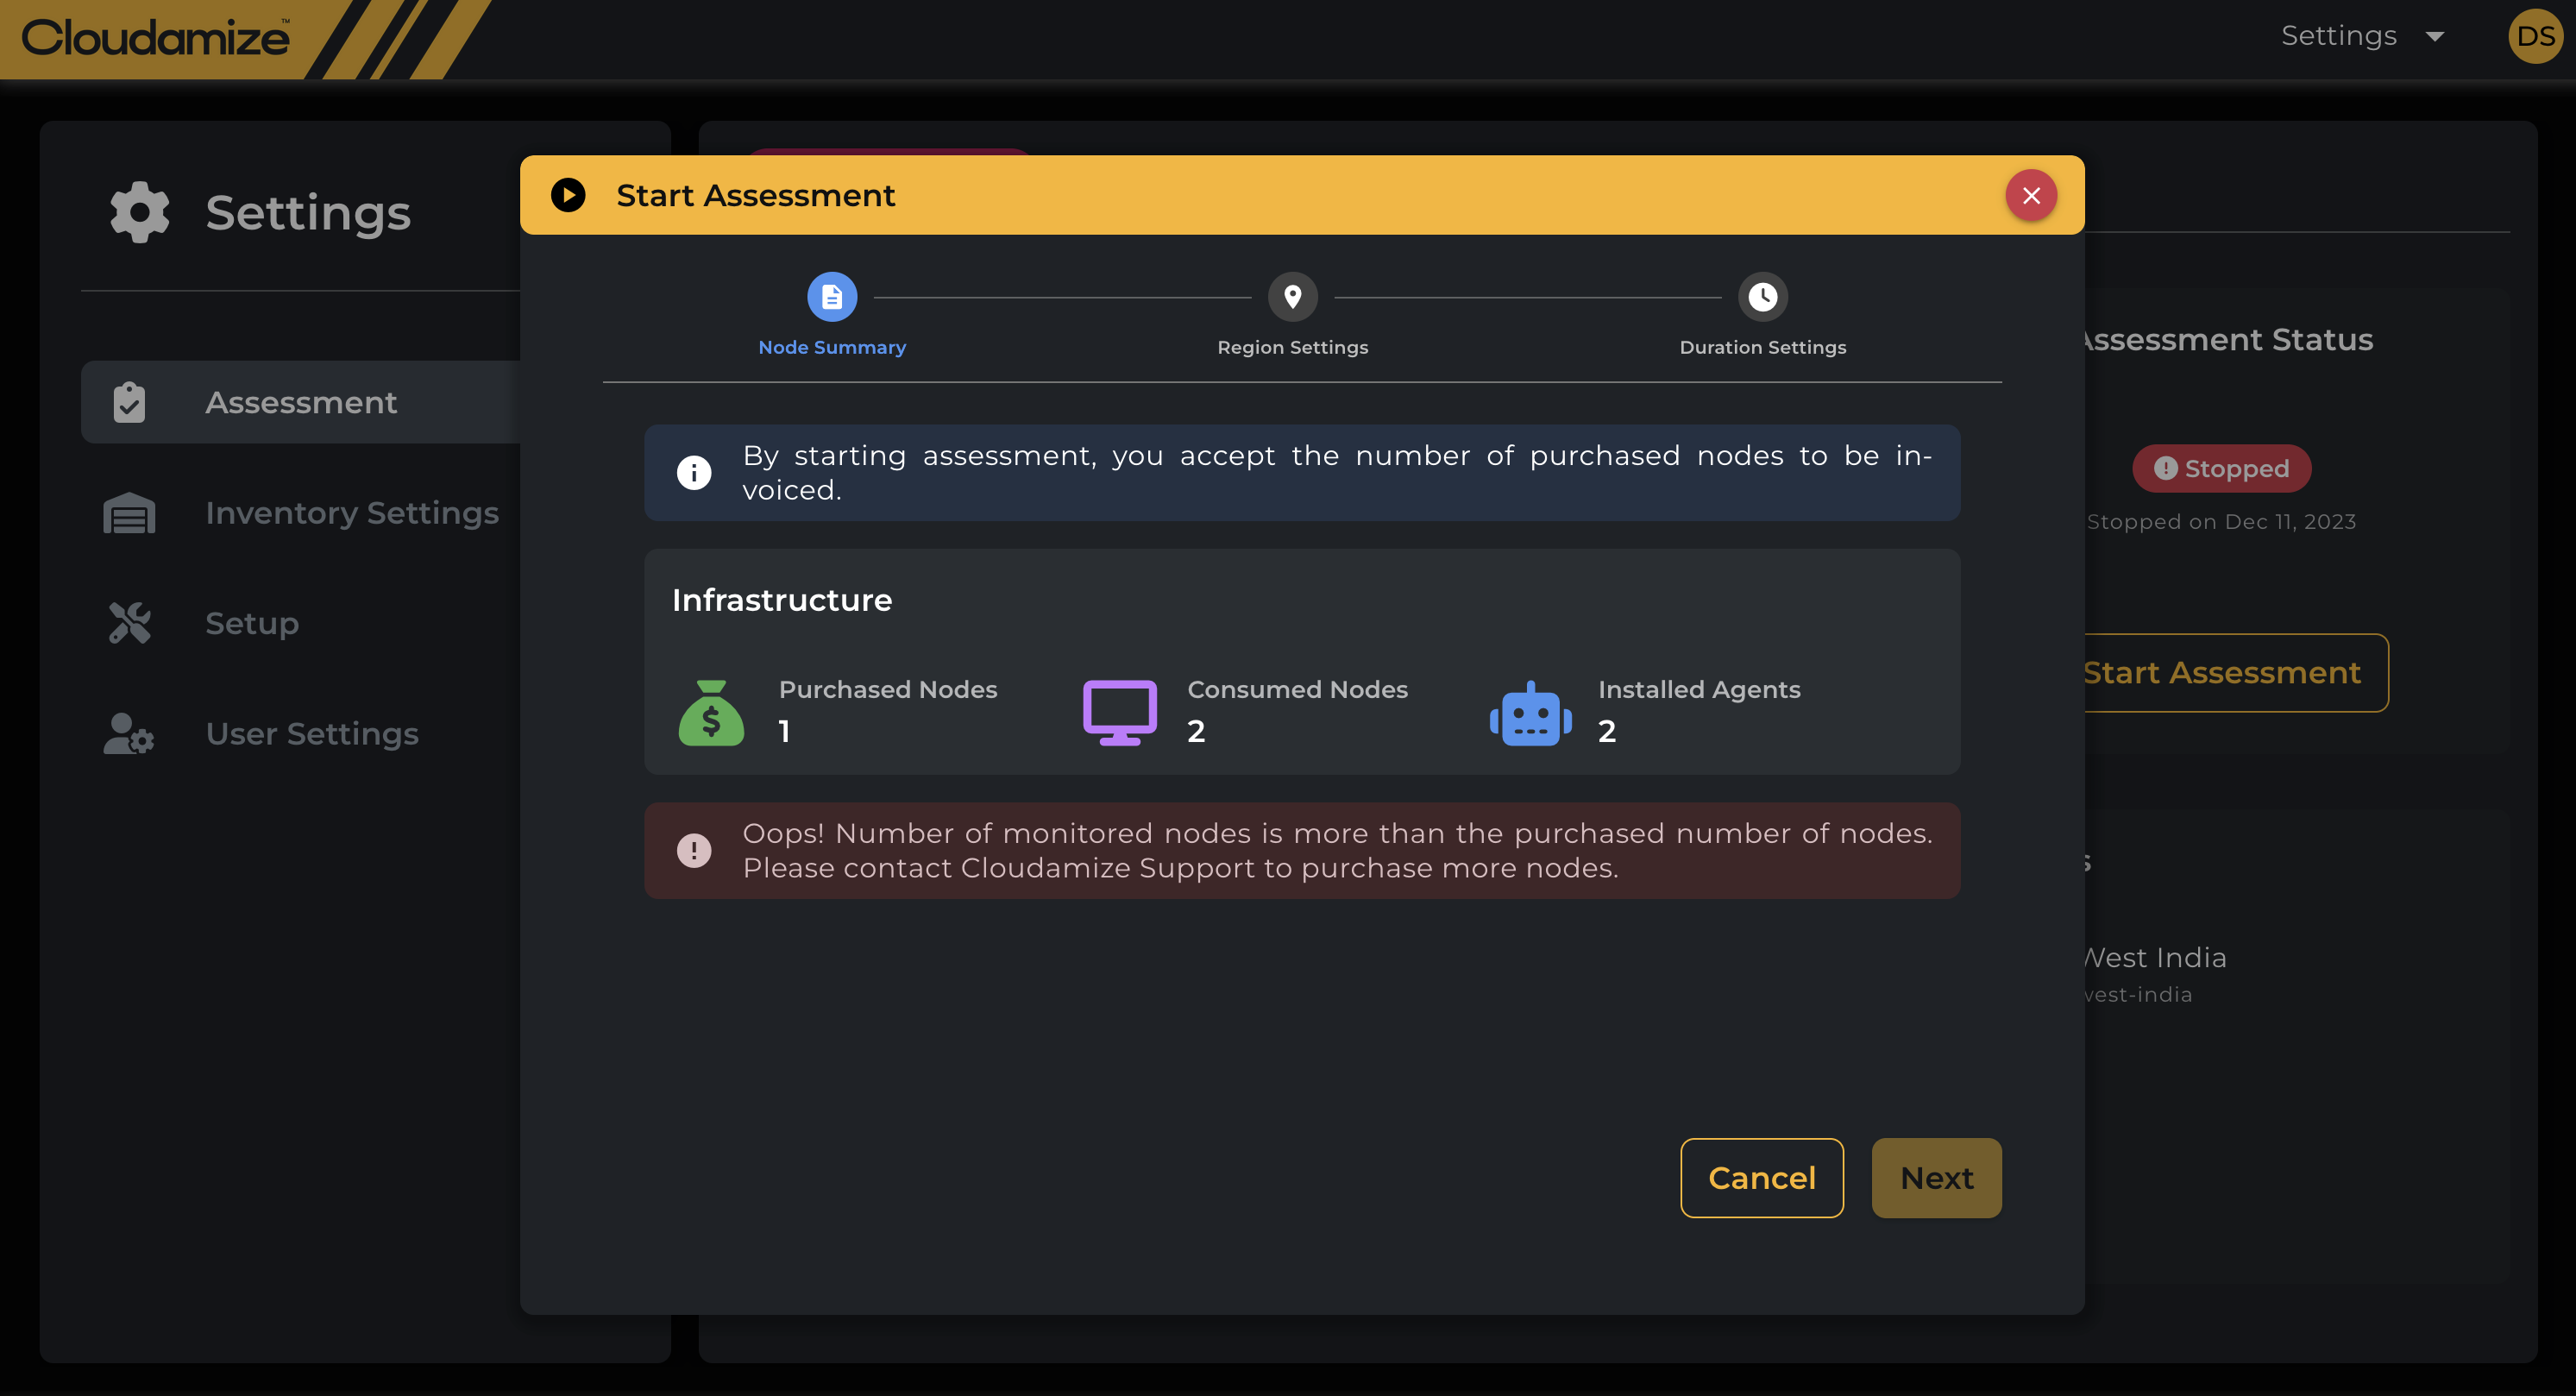
If the number of Consumed Nodes is greater than the number of Purchased Nodes, you won’t be able to move to the next step, and the “Next” button will be disabled:
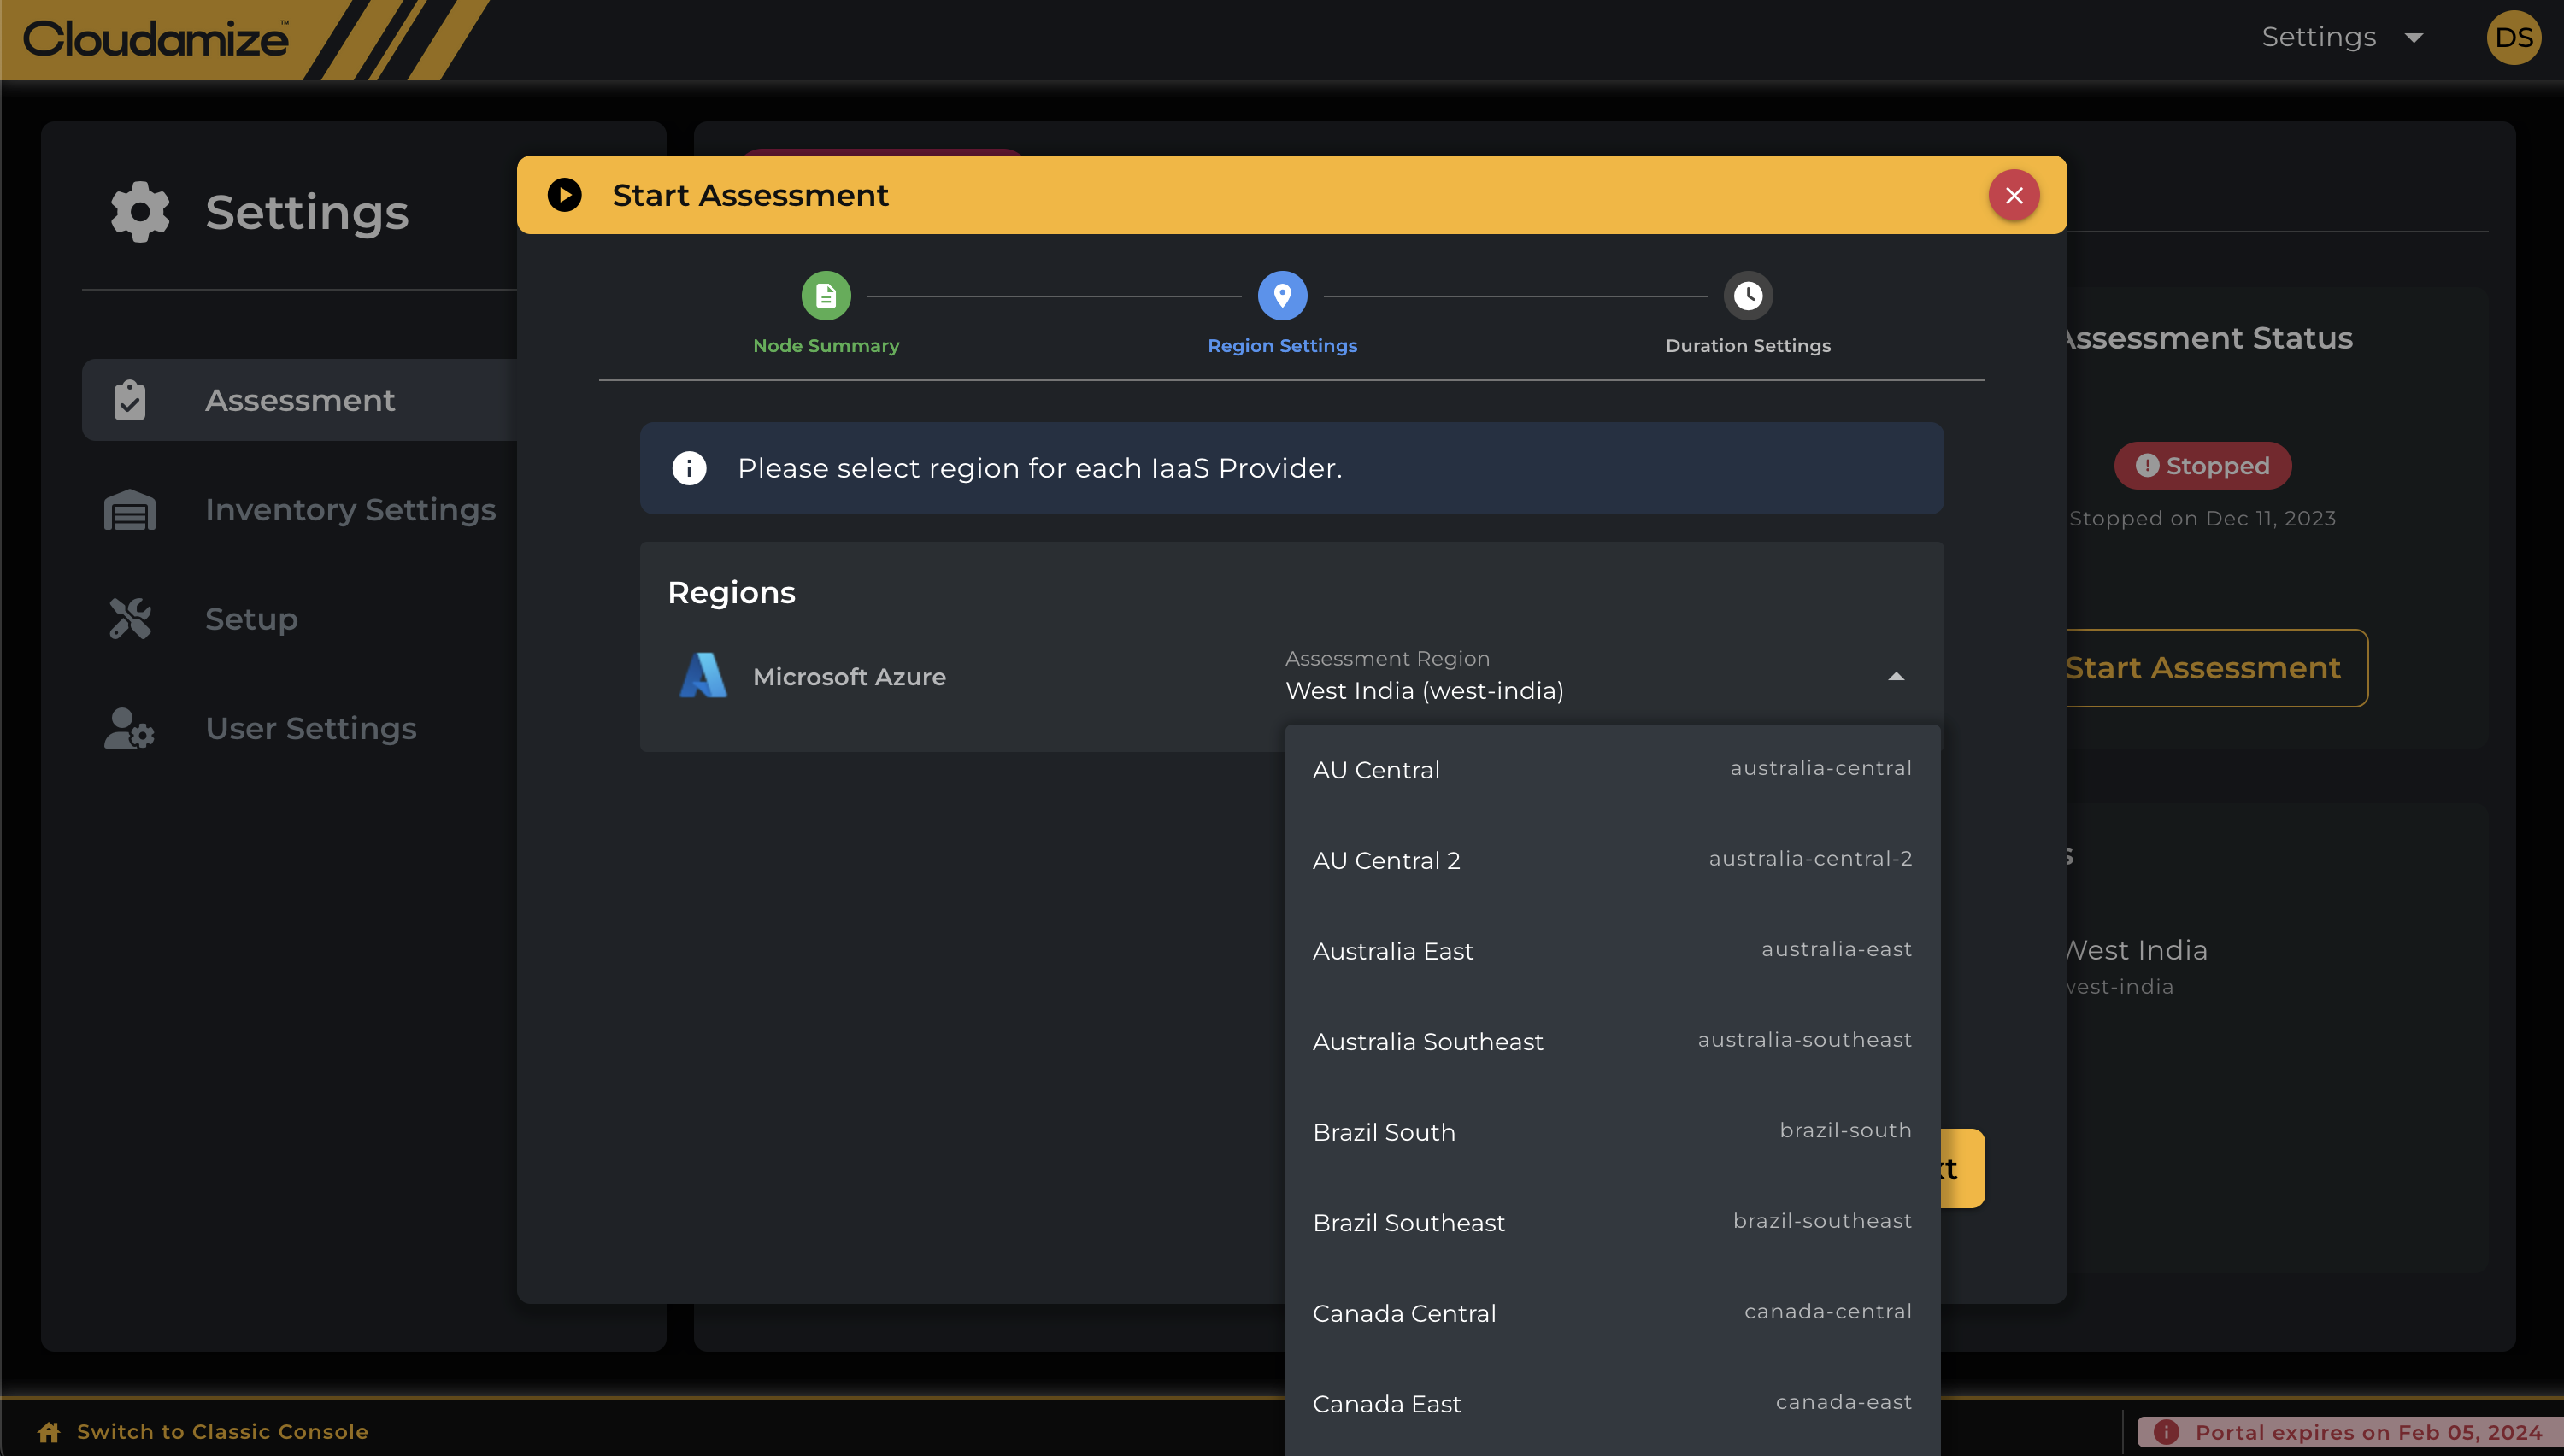
Stage 2: Select Assessment Regions
On this screen, you will see a list of Cloud Services Providers (CSP) that are available for this Assessment, and a Region dropdown menu will be visible next to each of them.
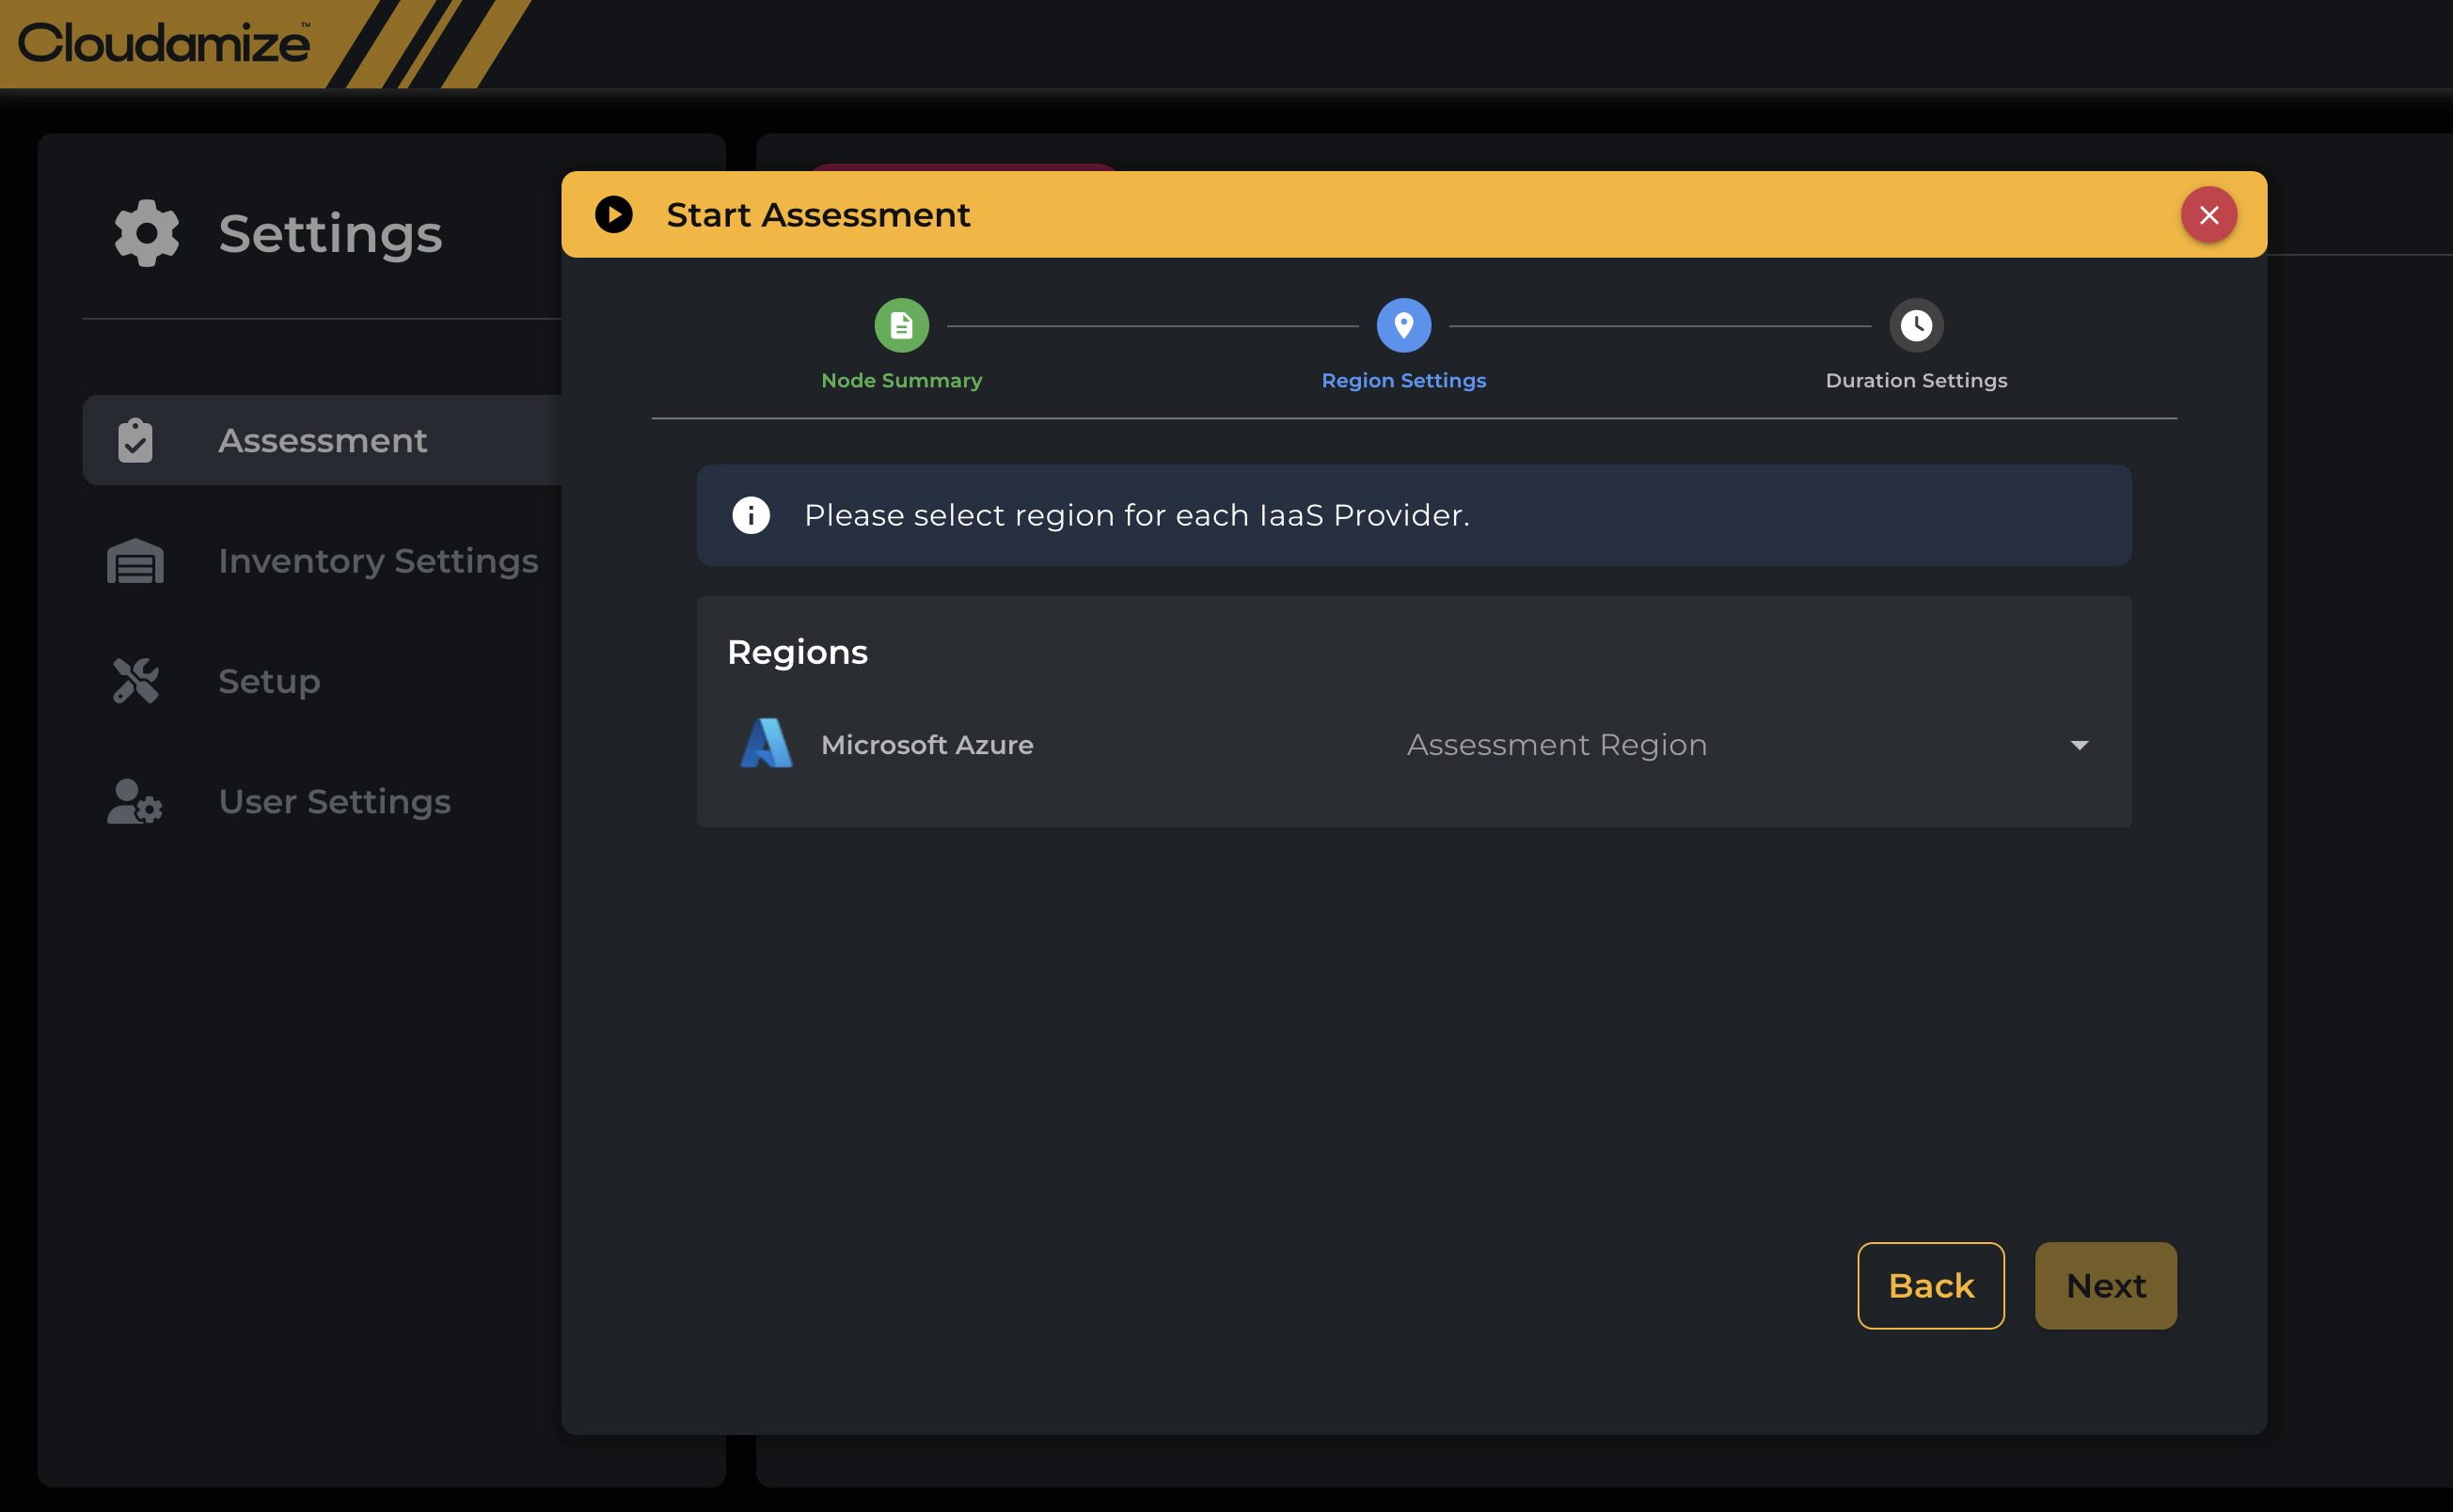
You should select the default region for cloud recommendations to be based on for each CSP. The Total Cost of Ownership (TCO) and cloud instance recommendations (i.e., the assessment deliverables) will be built using the selected region, basing results on the availability and cost of cloud instance types in that region.
Stage 3: Set Collection Duration and Delivery Date
Cloudamize will, typically, collect data over a period set by you before processing final results following the end of this data collection period, then deliver those results on a final date. At this stage, you can set these dates:
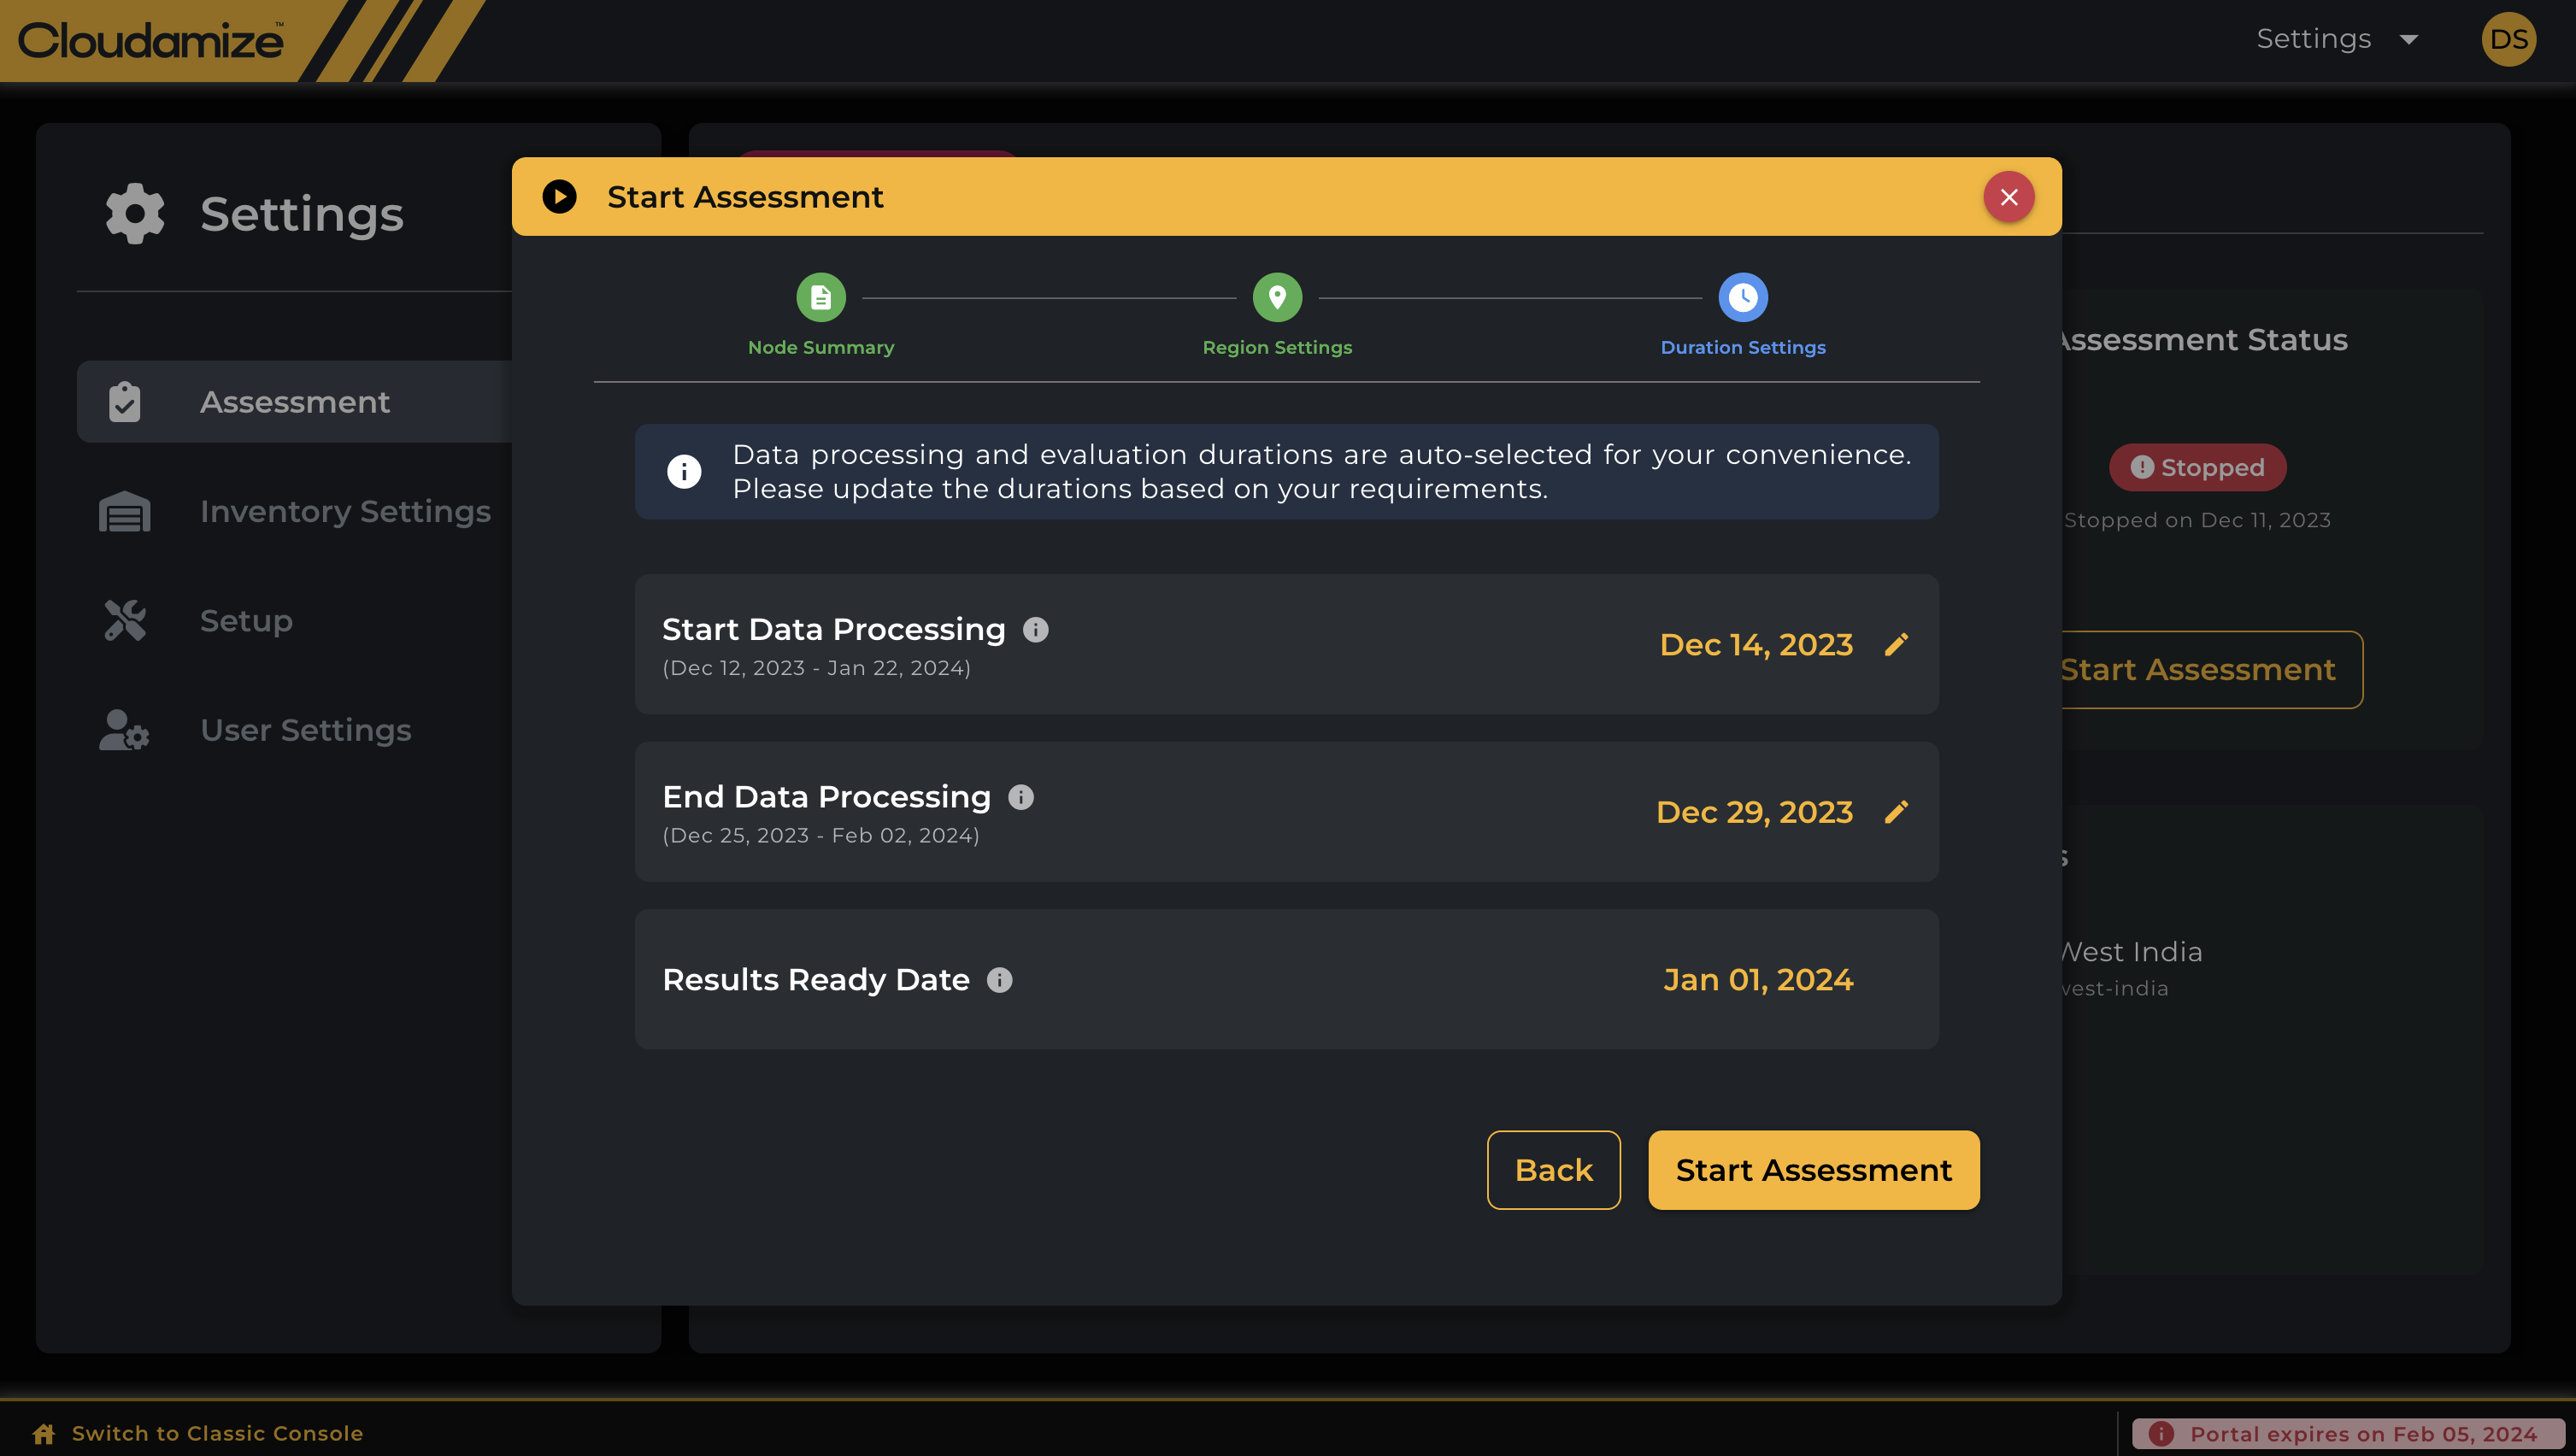
There are three dates here:
-
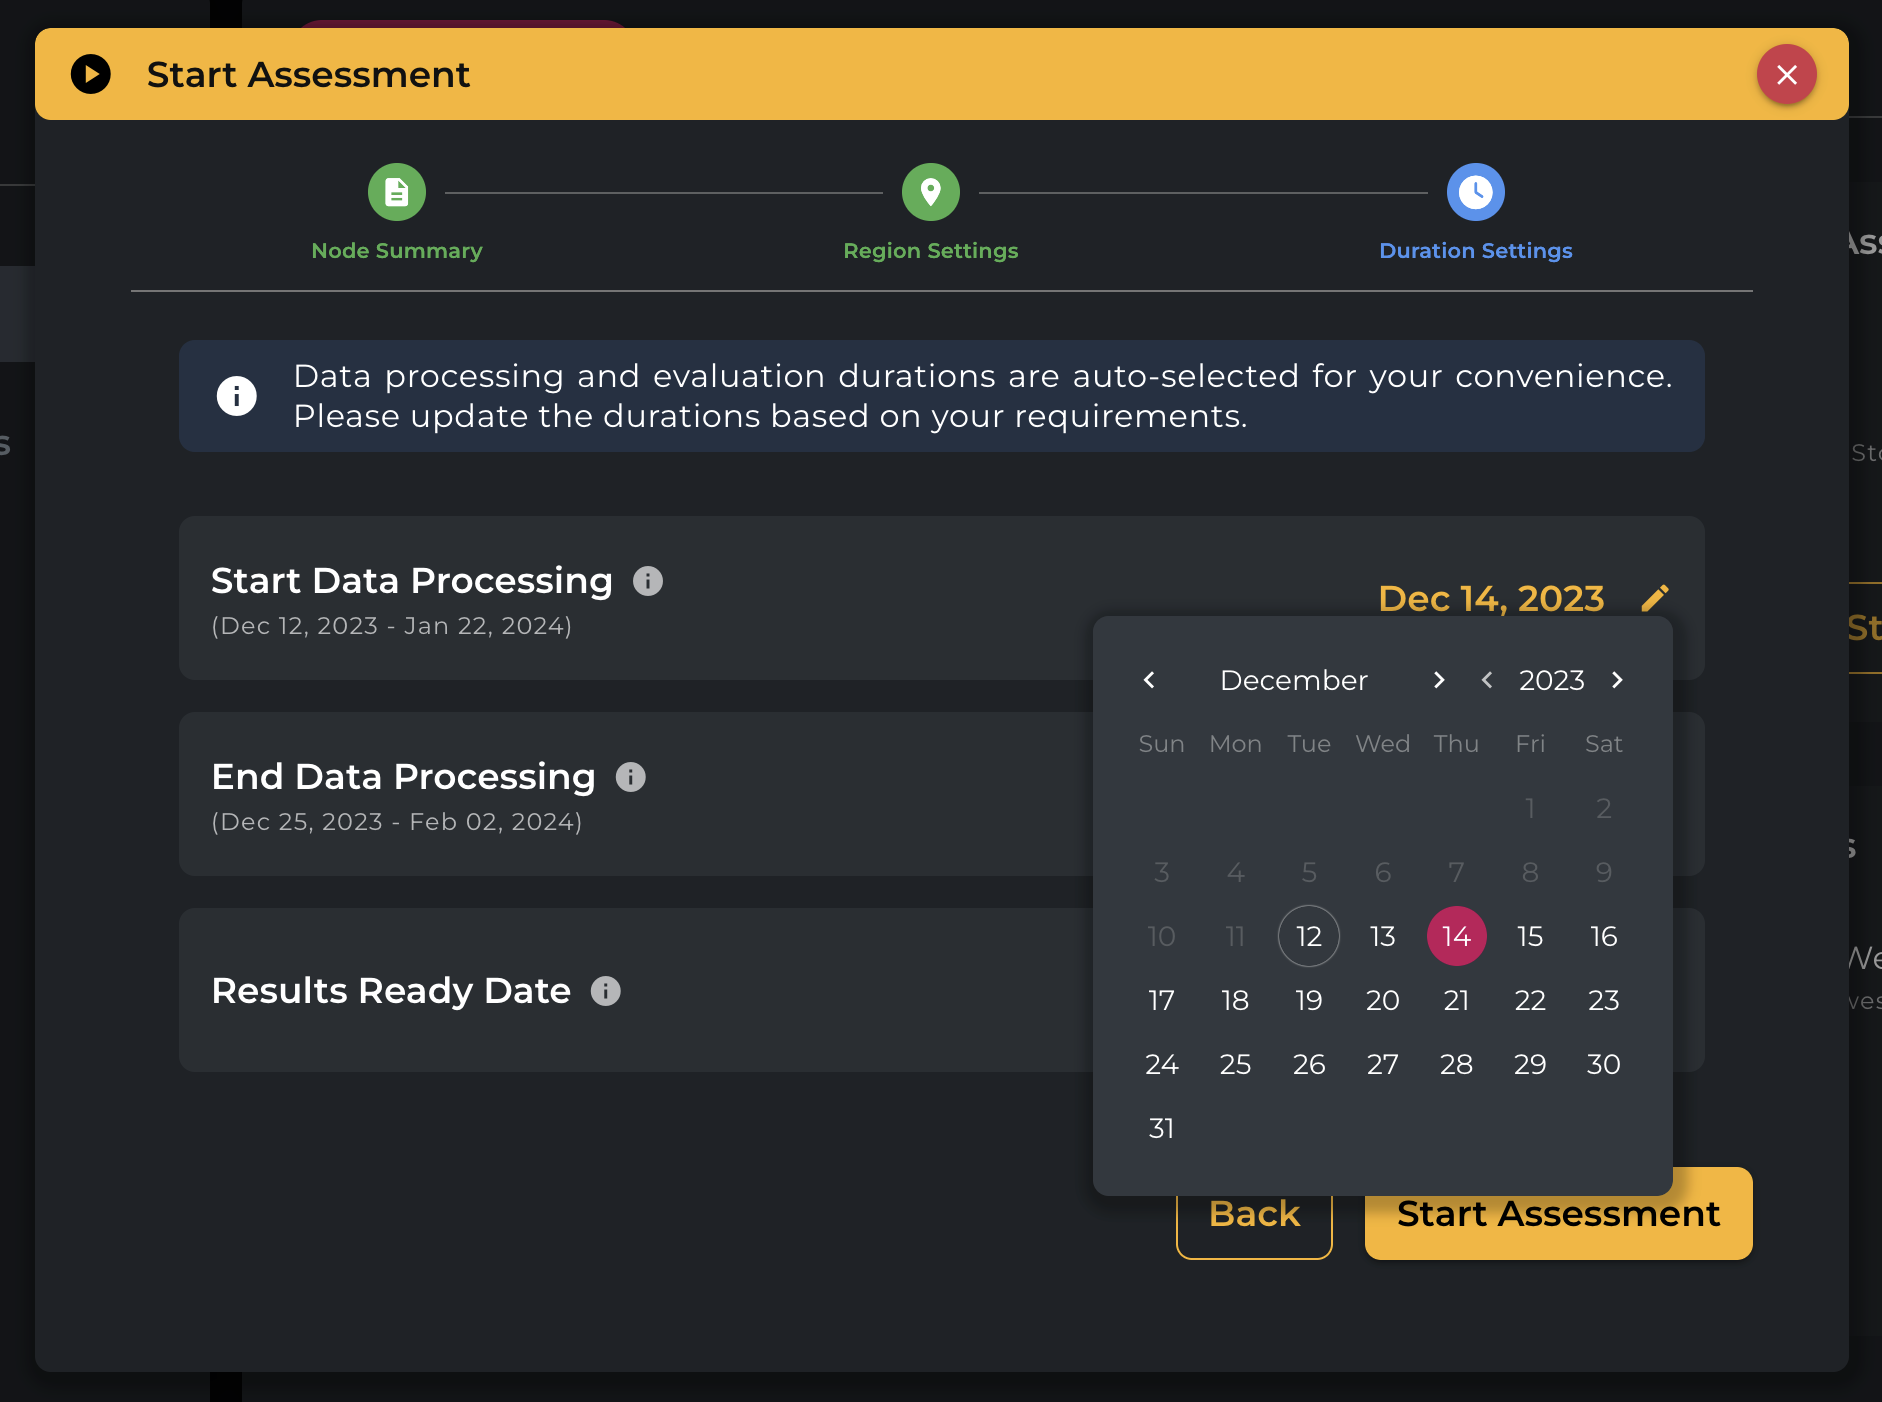
Start Data Processing: The date to begin collecting data that you wish to include in the Assessment results (defaults to today).
-
End Data Processing: The date to cease collecting data that you wish to include in the Assessment results (defaults to 11 calendar days from today, may vary based on availability).
-
Results Ready Date: The date that final results will be released and available to view. Defaults to 3 working days from the End Data Processing Date, may vary based on availability.
You may customize the Start and End Data Processing dates, though a minimum period of 11 days between them is enforced to allow sufficient data collection. You should aim to include any period of particular interest in this range (e.g., typical heavy usage periods, spikes, etc.) to allow for the most accurate results.
The Results Ready Date cannot be customized and is fixed to a minimum of 3 working days after the End Data Processing date (adjusted for availability). The cases in which this might be longer are as follows:
-
We might add additional days based on the size of your infrastructure and our current delivery load.
-
If we have intentionally blocked days for any reason, that might also add to delivery days.
-
No deliveries take place on Weekends, being delayed to the start of the following week instead.
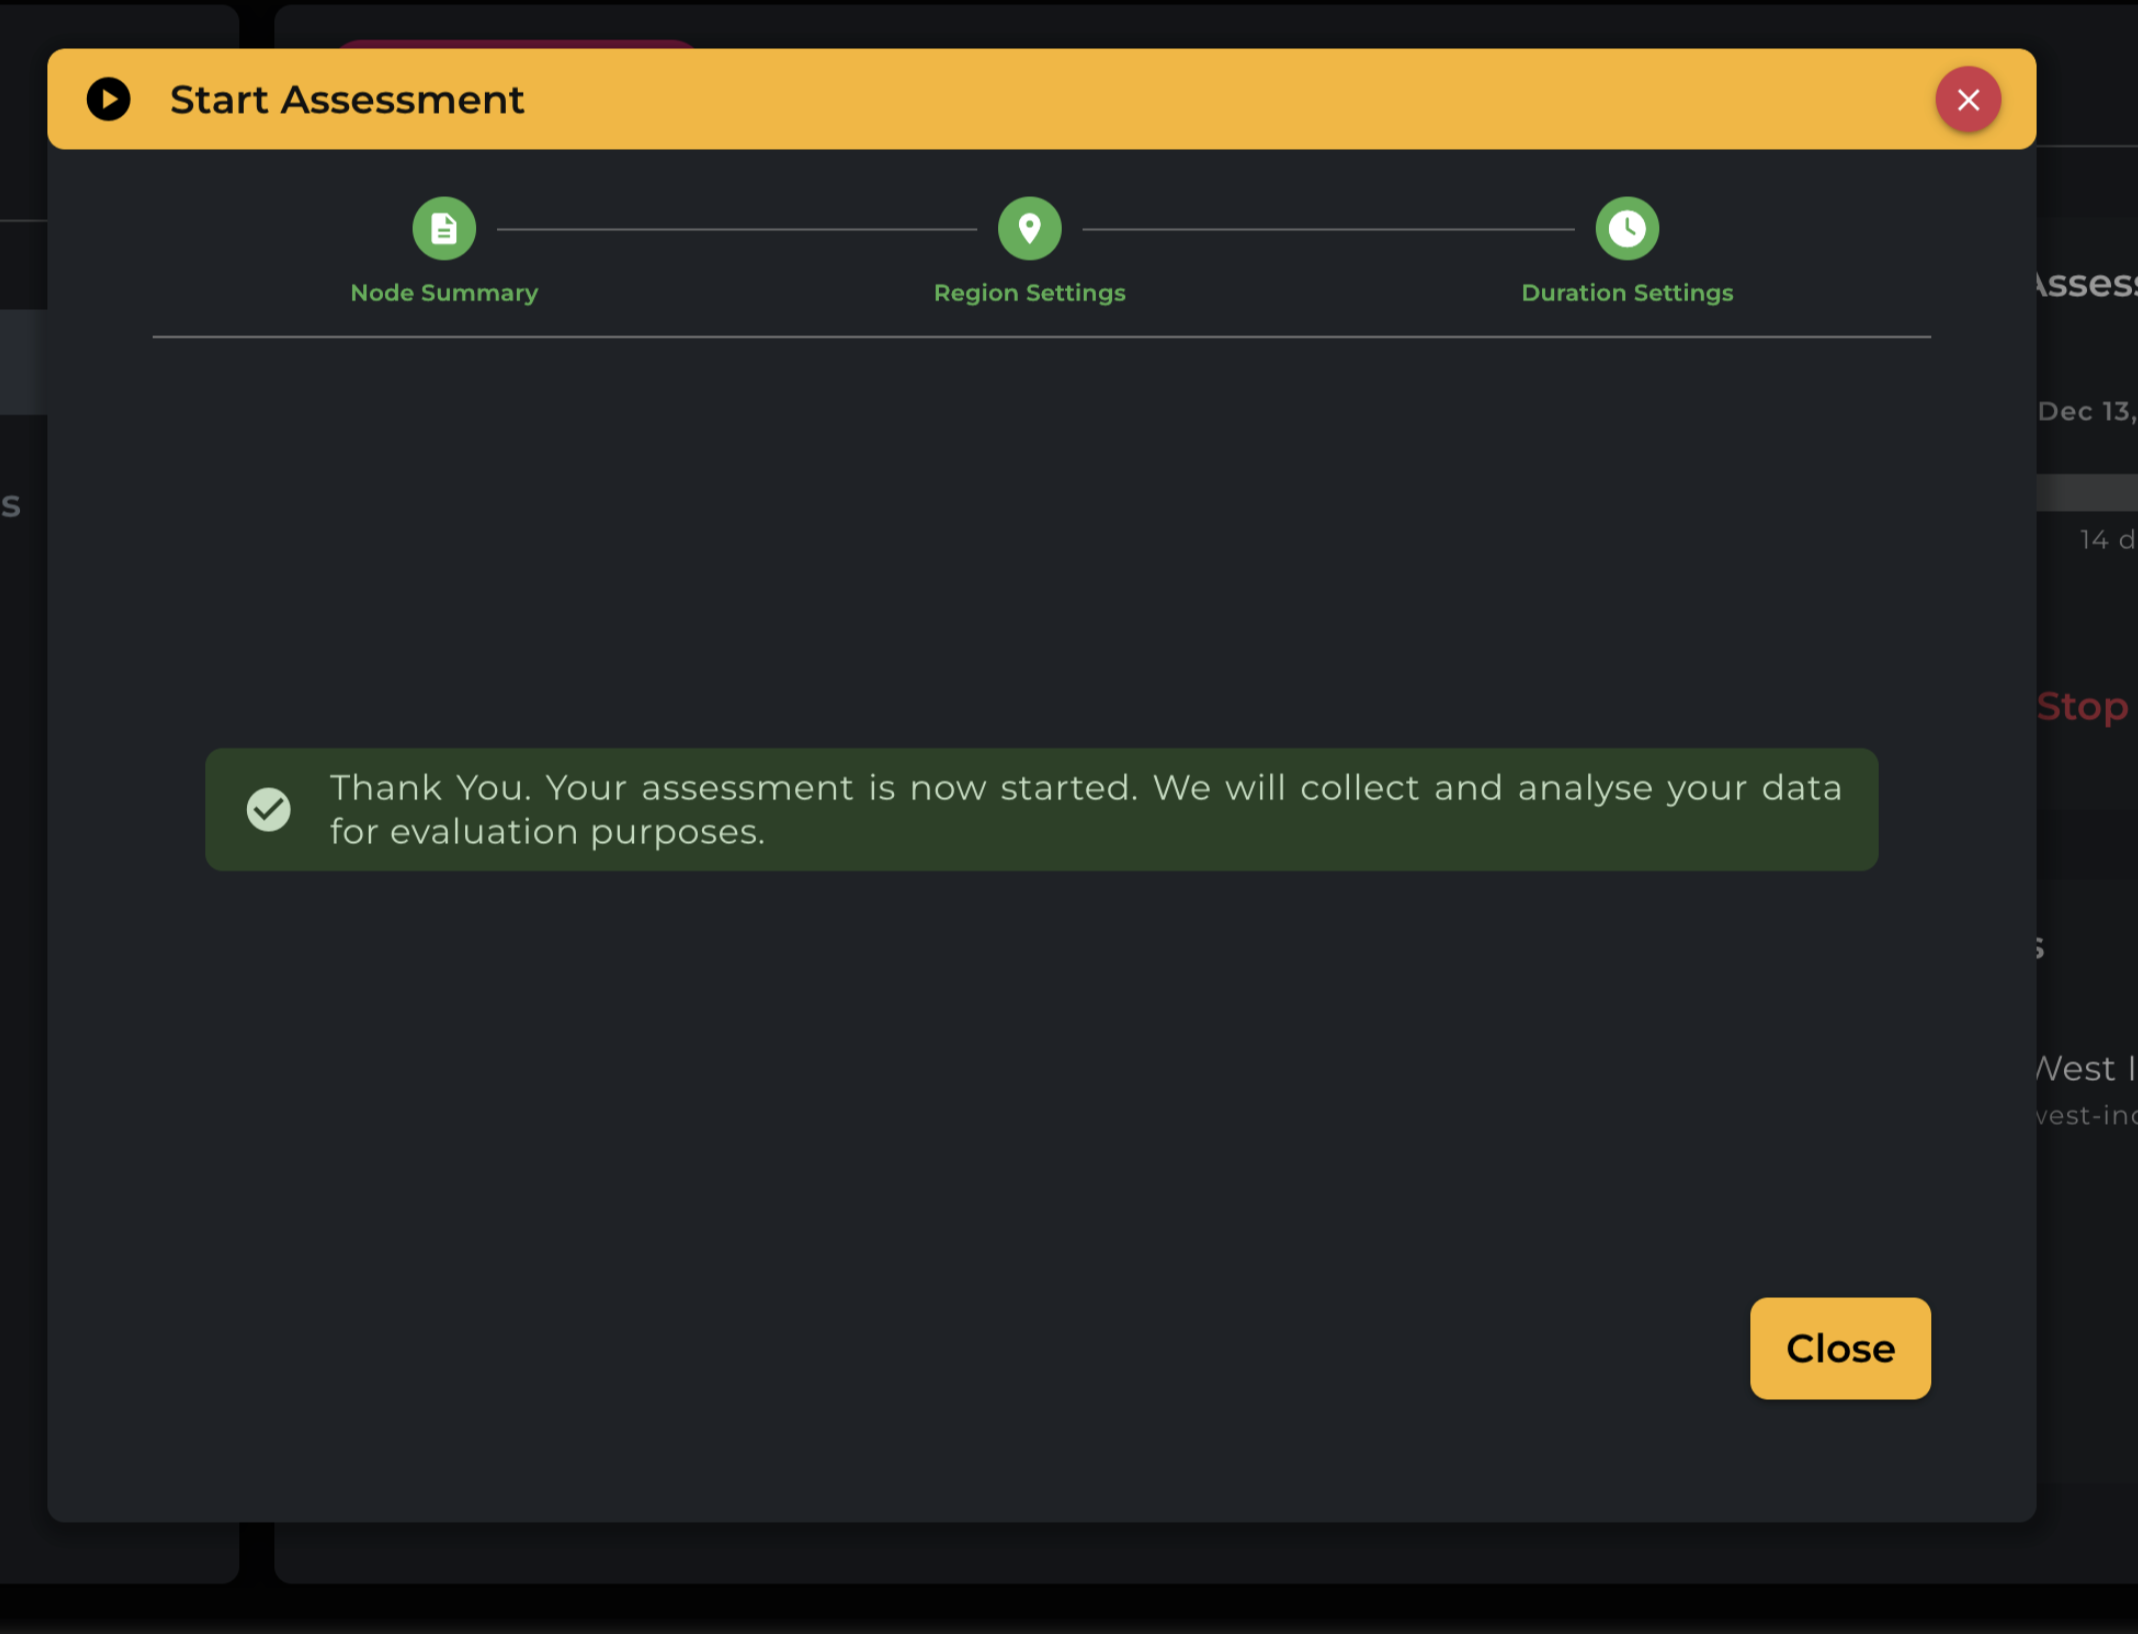
Assessment Successfully Started
Once your Assessment is successfully started, you will see a confirmation screen:
Queued State:
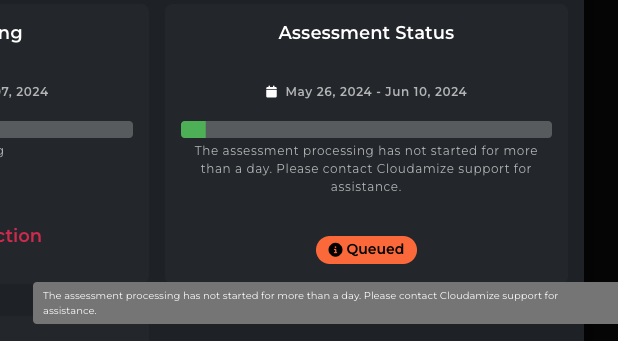
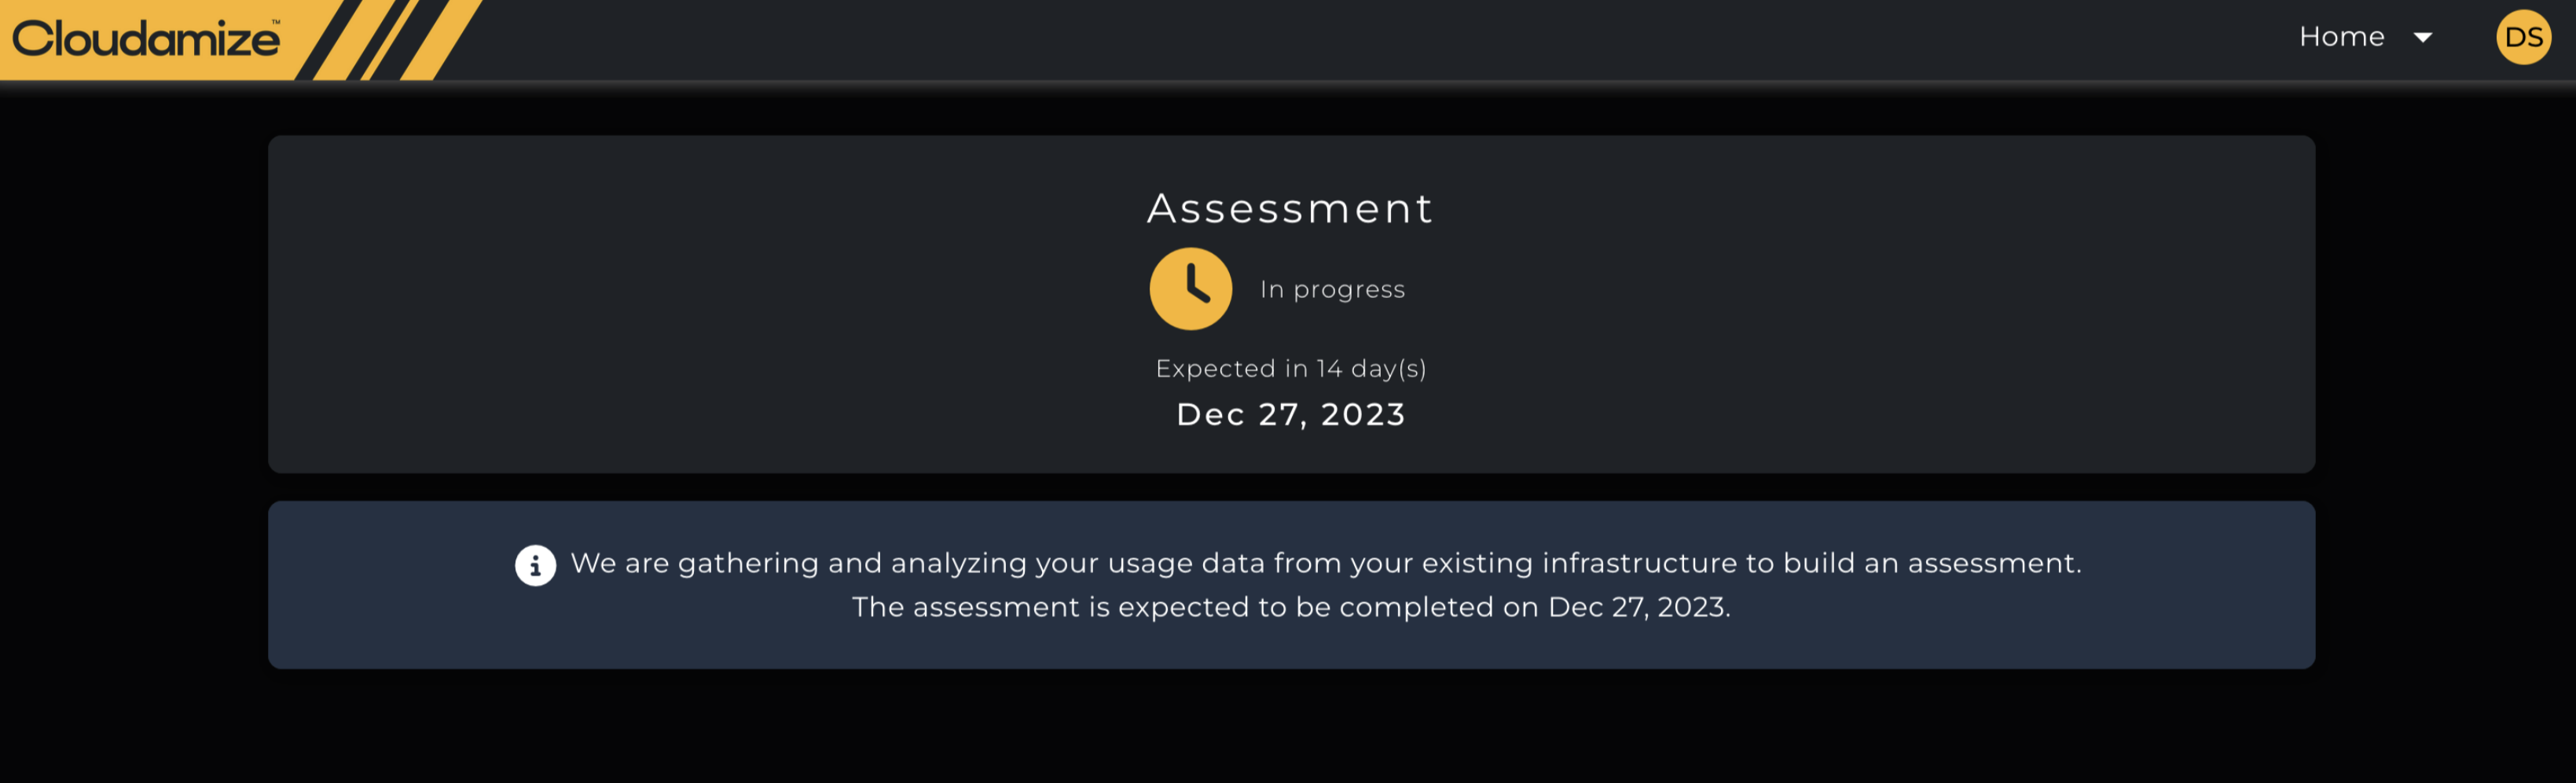
As soon as the assessment starts, you will see the screen below, showing the status as “queued” with the message “The assessment has started, and processing will start soon.” This Queued status will remain while the assessment is processed for preliminary results.

If preliminary results are not processed within 24 hours after starting the assessment, you will see the message “The assessment processing has not started for more than a day. Please contact Cloudamize support for assistance”. If you see this message, please send an email to helpdesk@cloudamize.com.
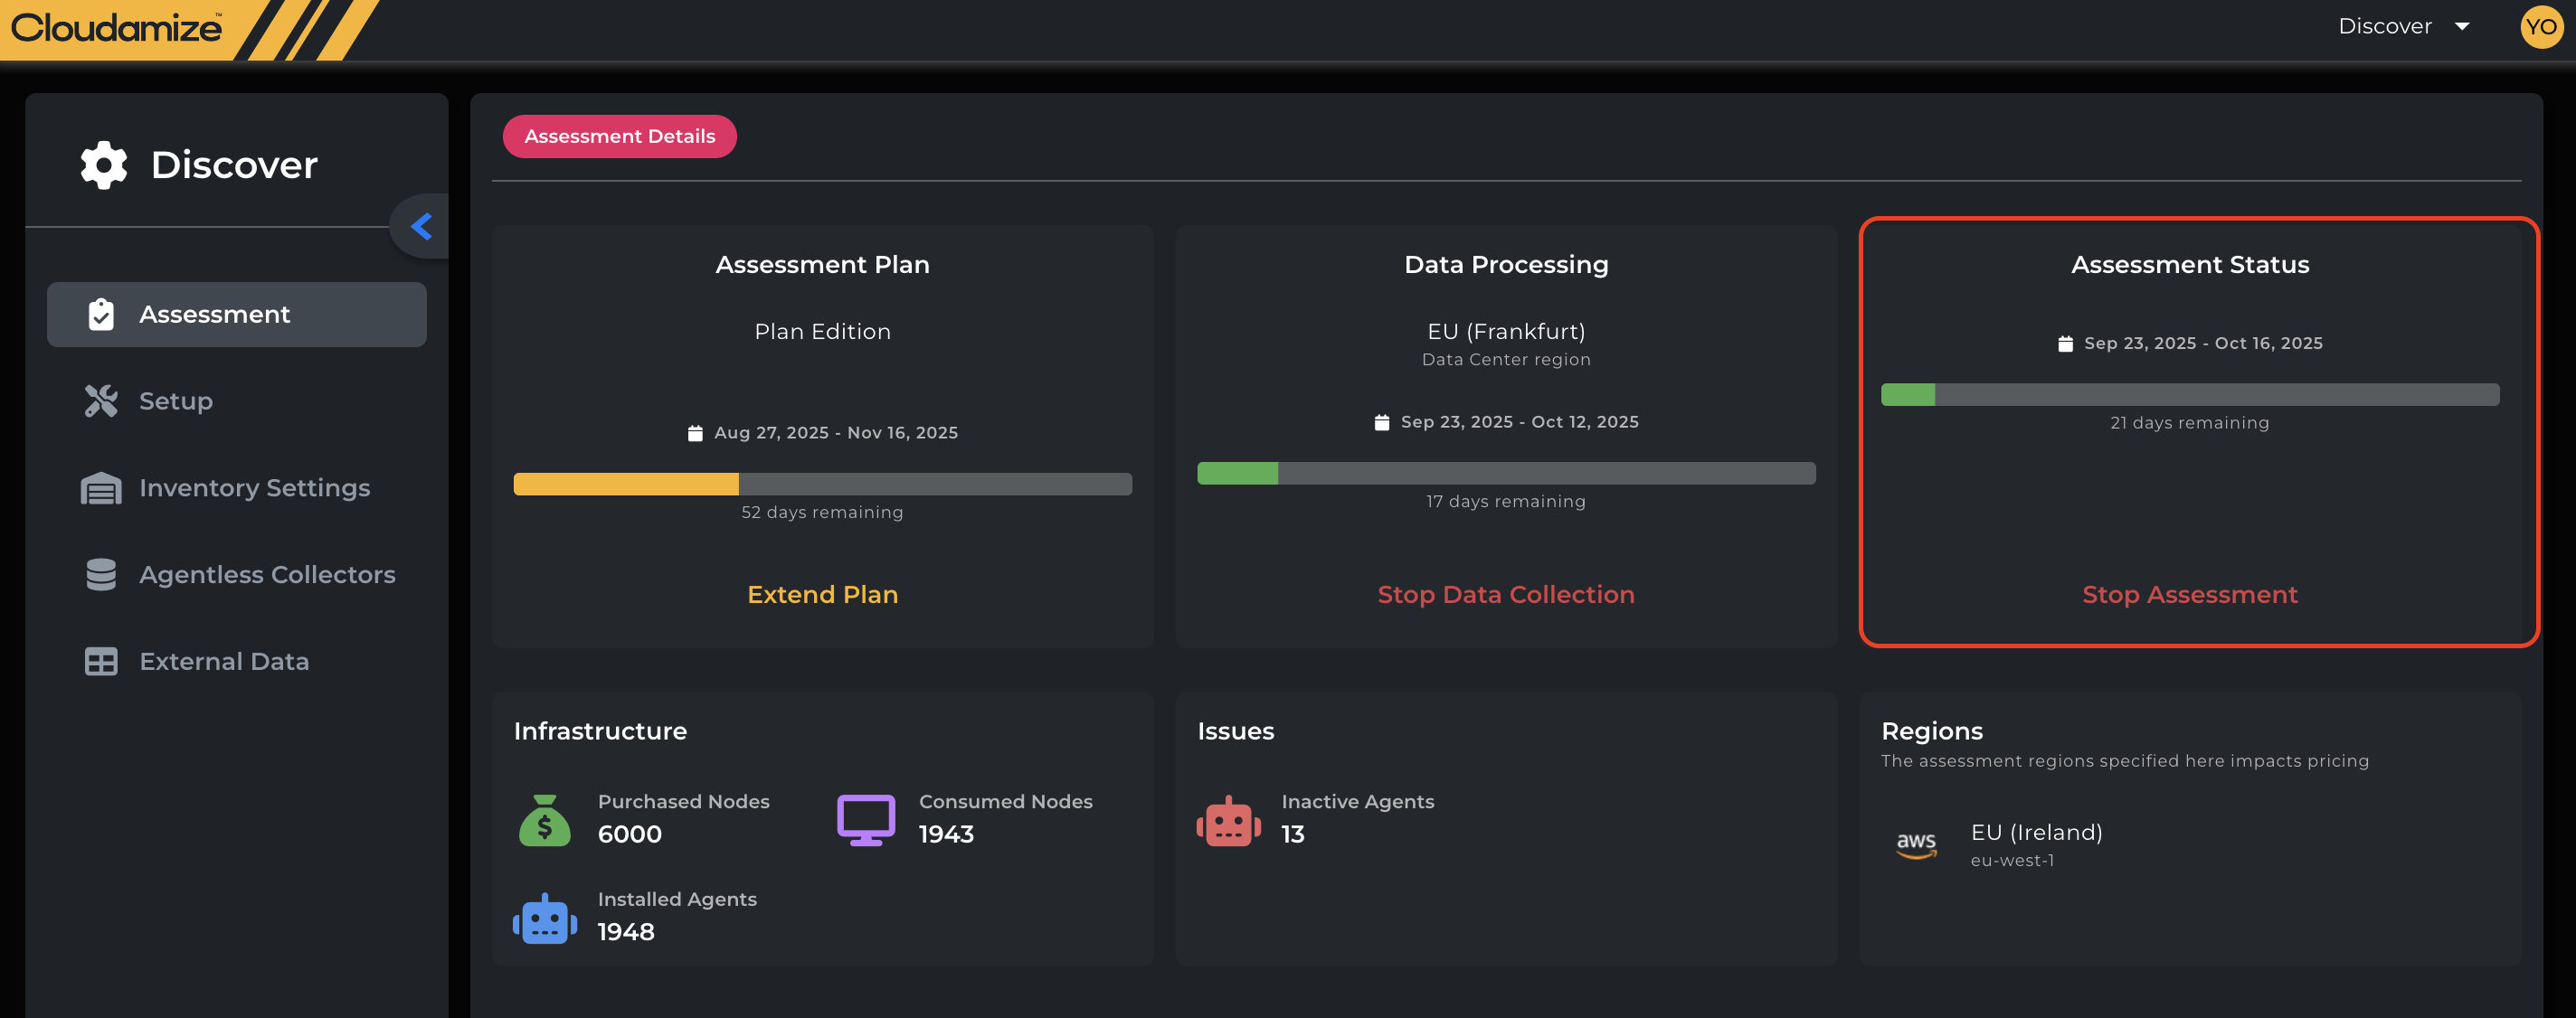
The assessment status will change once processing is complete, as shown in the screenshot below.
Stopping An Assessment
Stopping this assessment ends the current collection phase. To resume data collection, you must define a new date range.
Important: Data collected before stopping will not be carried over or included in the new assessment period.
It is possible to stop a running Assessment during the Data Collection period. A “Stop Assessment” button is available during this time to perform this:
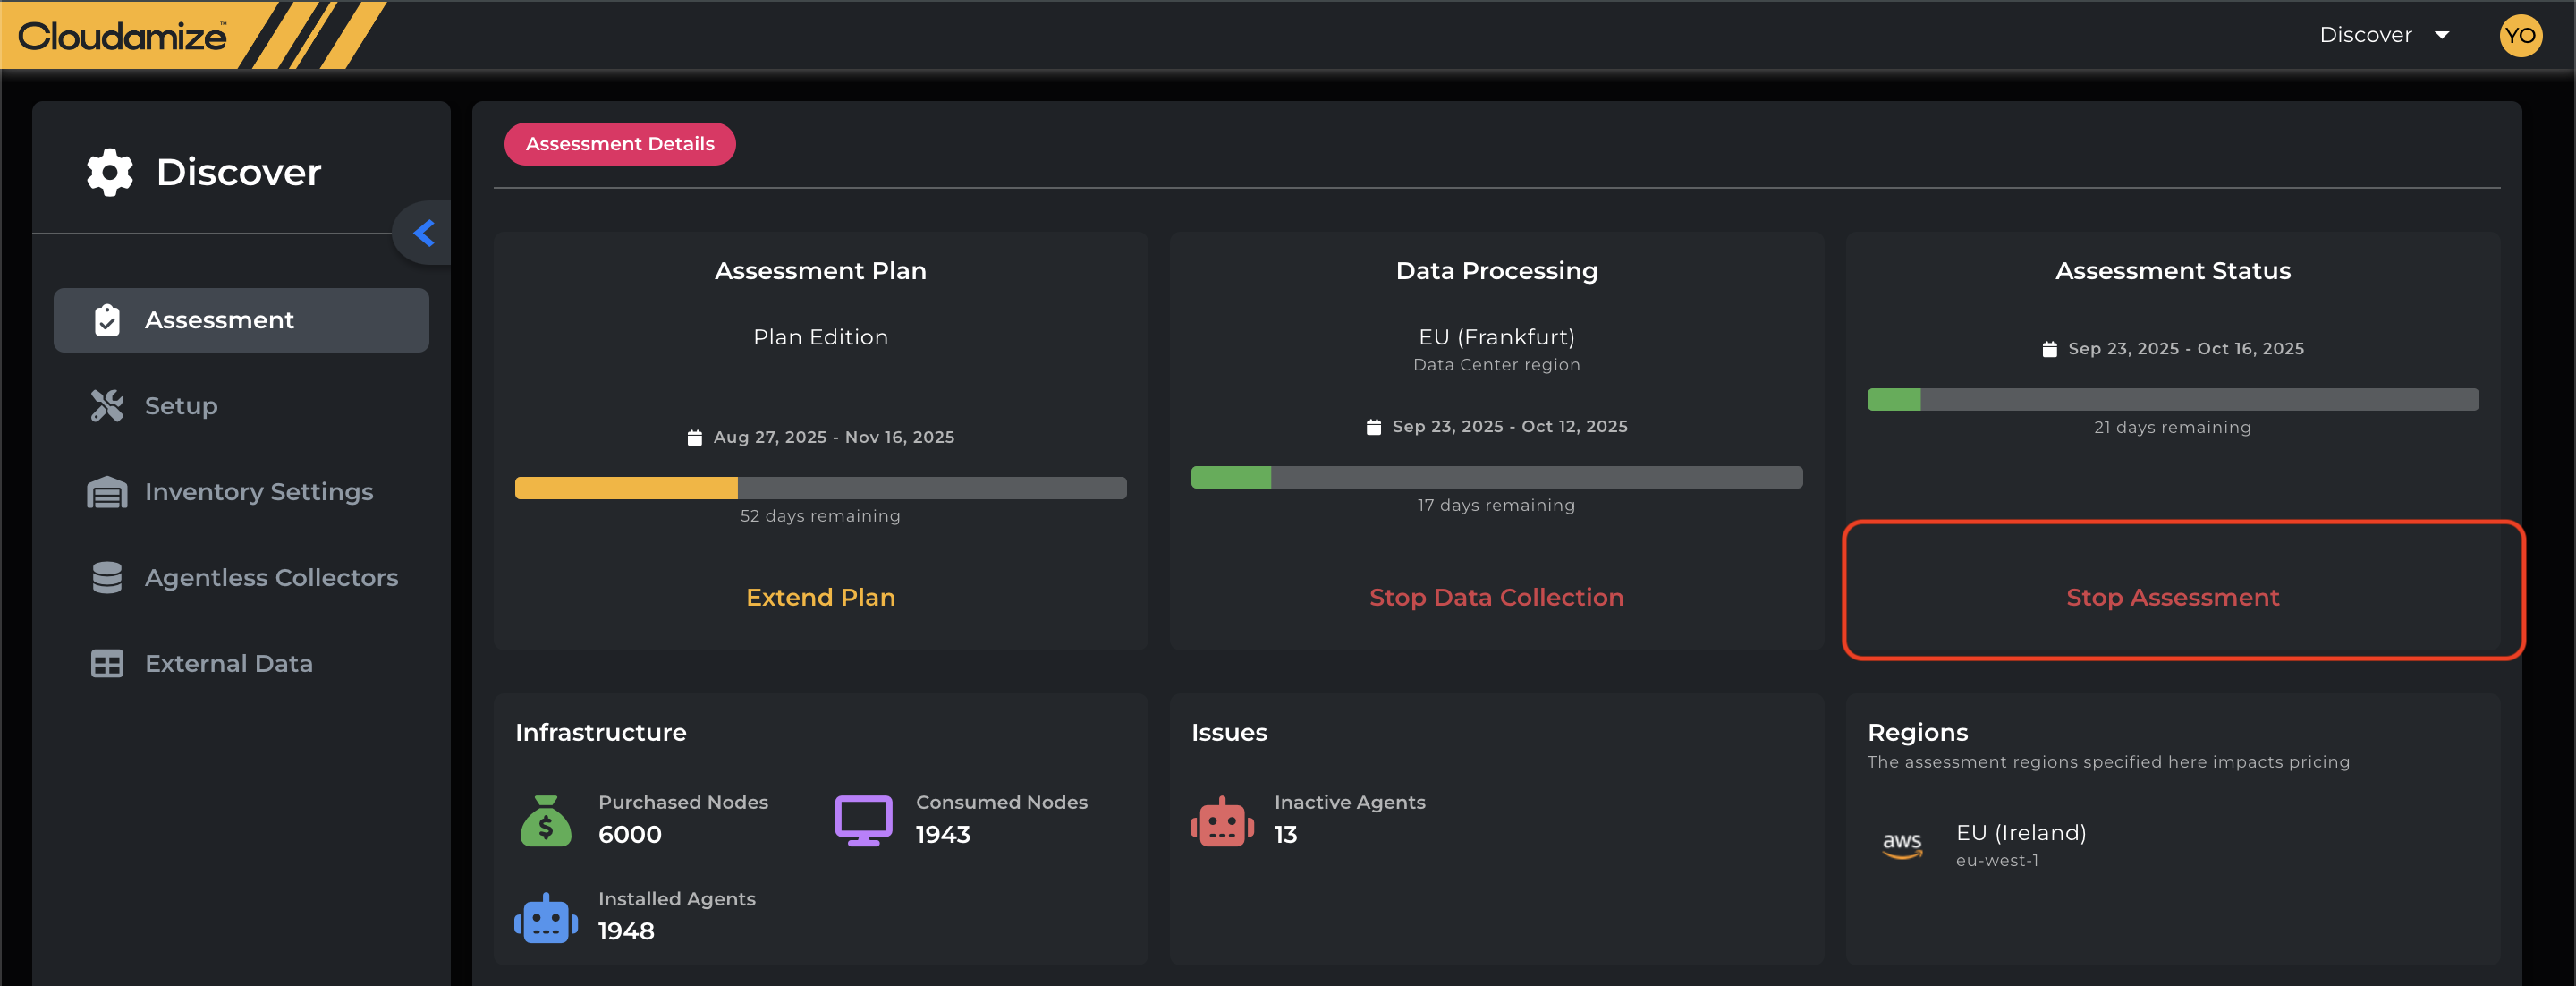
Finally, once started, your Assessment status will also be shown on the Console Landing Page:
Assessment Re-run Guidelines
For the re-run of an assessment, please review and acknowledge the following important information.
Important Considerations:
-
Existing Results Will Be Overwritten
Initiating a re-run will permanently overwrite all existing assessment results associated with the current assessment cycle. Once the re-run process has started, previous results and related data will no longer be available in the console and cannot be restored. -
Download Required Reports and Data
Before requesting a re-run, ensure that all required reports, exports, and assessment data are downloaded and securely stored for future reference. Data from the previous assessment cycle cannot be recovered after the re-run is initiated.
Next Steps:
Once you have reviewed the above information and confirmed your approval, the new assessment dates can be scheduled and the re-run process can be initiated.
If you have any queries, please get in touch with the helpdesk via our Helpdesk Portal or by email at helpdesk@cloudamize.com.