

Network administrators can deploy and install the Cloudamize Windows Agent using a small batch file that is pushed using a Group Policy Object (GPO) and Active Directory (AD).
There are three distinct procedures that you must follow to complete the GPO deployment:
-
Create and provision a network share from which to deploy the Agent installer
-
Create a GPO to identify targets of the deployment
-
Create a Windows scheduled task to deploy and install the Windows Agent.
Create a network share and provision a batch file
To deploy the Windows Agent using GPO and AD, you must first create a network share. You will provision the share with two items:
-
A batch (.bat) file that will be used to deploy the Windows Agent installation (.msi) file to network computers
-
The Windows Agent installer (.msi) file that runs the Agent installation on network computers
Note: For more information about file and storage services available on Windows Server, see File and Storage Services Overview on Microsoft TechNet.
-
Log on to Windows Server as an administrator.
-
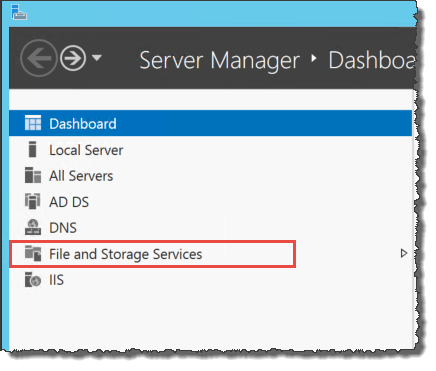
Open the Server Manager console by selecting it from the Administrative Tools menu. For information about using the Server Manager, see Server Manager on Microsoft TechNet.
-
From the Server Manager Dashboard, select File and Storage Services.
-
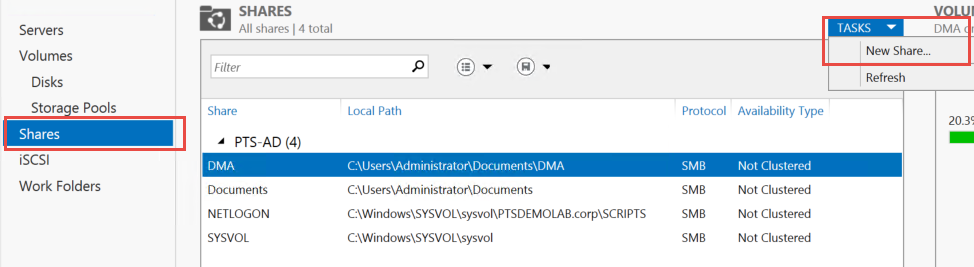
Select Shares, then click TASKS, then New Share ….
-
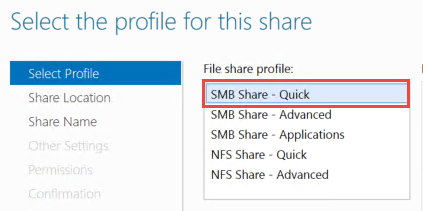
You are presented with the New Share Wizard. In the wizard, click on Select Profile, select the option SMB Share - Quick, then click Next.
-
On the Shared Location tab, enter the file path to the shared folder that you created for deploying the agent installer, then click Next.
-
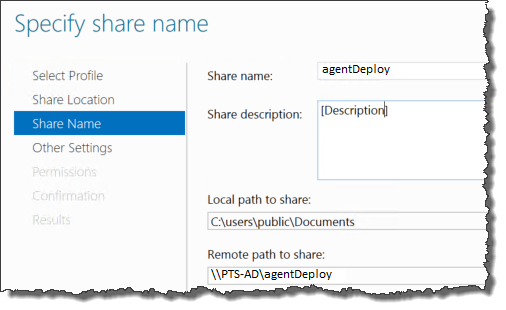
On the Specify share name tab page, enter a name for your share. Optionally, enter a share description. Note that the wizard automatically creates the local and remote file paths to the share. Click Next.
-
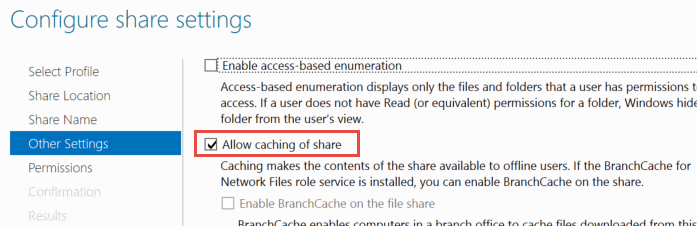
On the Configure share settings wizard page, accept the default for Other Settings: Allow caching of share. Click Next.
-
On the Specify permission to control access page, accept the default and click Next.
-
On the Confirm selections page, review your selections, then click Create.
-
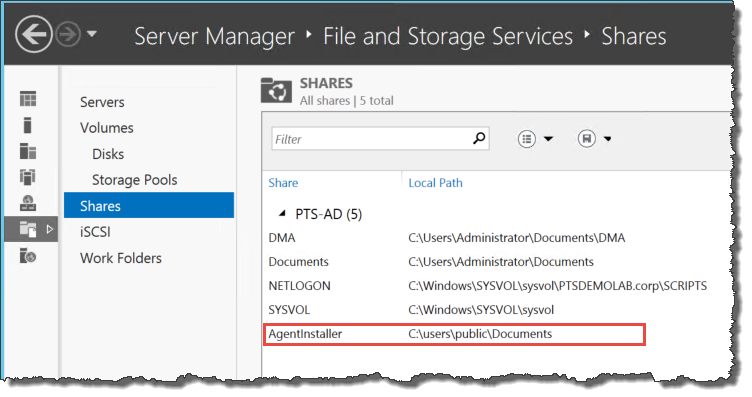
Your new public share is now visible in the Shares pane.
-
Now that you have the public share created, right-click on it and select Open Share.
-
Place both the agent installer (.msi) file and the batch (.bat) file in the share.
Important: Be sure to capture and store the full network file path (not the local path), because you will need it in a later step.
Create a Group Policy Object (GPO) to execute a scheduled task
The next phase of the project involves creating a GPO that a scheduled task will use when it deploys and installs the DMA on network computers.
-
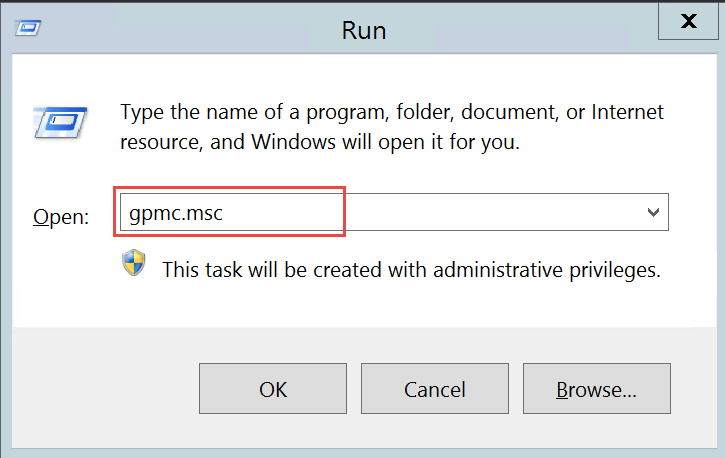
Open the Group Policy Management Console (GPMC) by clicking Run (Windows key + r), then typing gpmc.msc; then click OK.
-
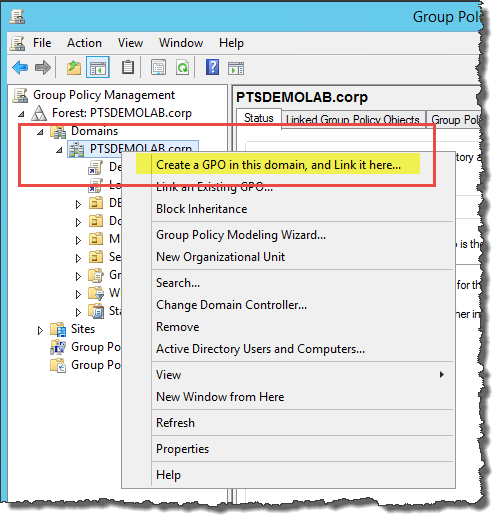
Once in the GPMC, right-click on your target "organizational unit" (typically a domain), and select Create a GPO in this domain, and Link it here .... In our example in the screen shot, the organizational unit is the domain PTSDEMOLAB.com.
-
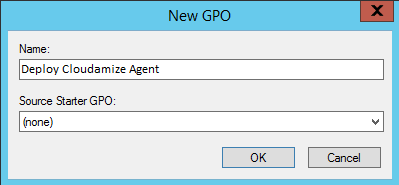
On opening the New GPO dialog box, enter a name for the new GPO. In this example, we use the name "Deploy Cloudamize Agent."
Note: By default, the GPO applies to all users and computers that successfully authenticate to the Active Directory domain that you selected.
-
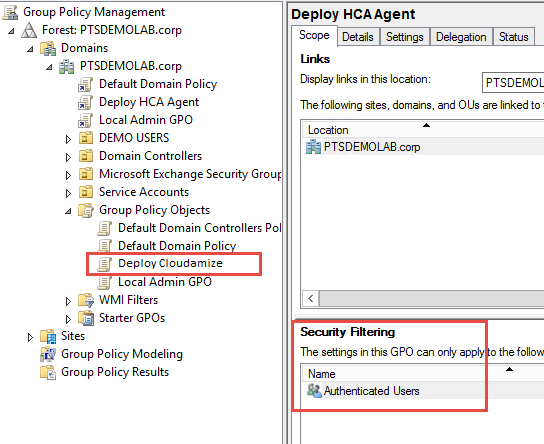
Once the new GPO is created, you will see it in the GPMC in the left navigation pane, under Group Policy Objects.
Note: You can modify the scope of computers to which the agent is deployed and installed by changing the Security Filtering values for the new GPO. The default value is Authenticated Users, but Active Directory groups can be added and removed to suit your needs. For more information, see Active Directory Security Groups on Microsoft TechNet.
Create a scheduled task to execute the deployment and installation of the Windows Agent
The next phase of the project involves creating a scheduled task that will automatically deploy the Windows Agent to all of the network computers that are in the scope of the GPO you created, and then kick off the installation.
-
Open the Group Policy Management Editor by right-clicking on the new GPO you created, and selecting Edit.
-
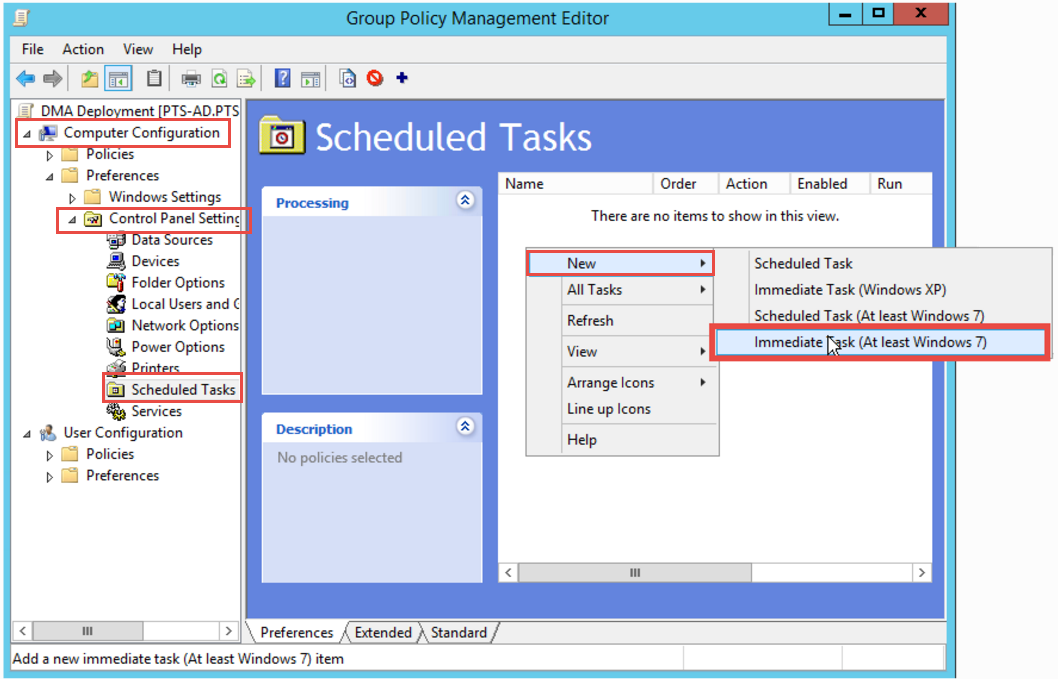
In the editor navigation tree, under Computer Configuration, click Preferences > Control Panel Settings; then, right-click Scheduled Tasks, click New, and then select Immediate Task (At least Windows 7).
-
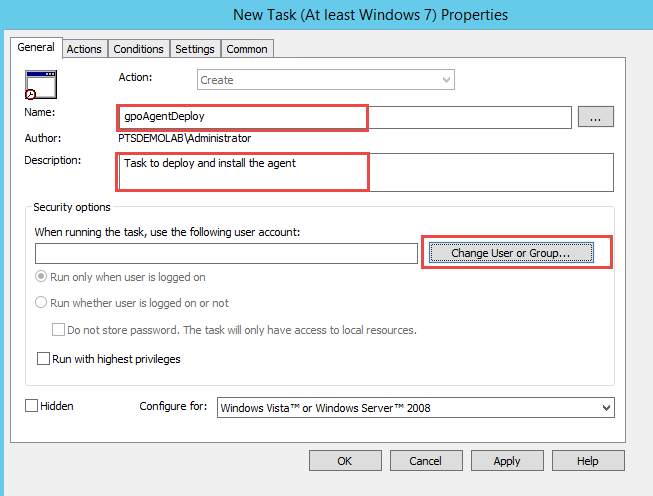
This presents the New Task dialog box. Enter a name and, optionally, a description.
-
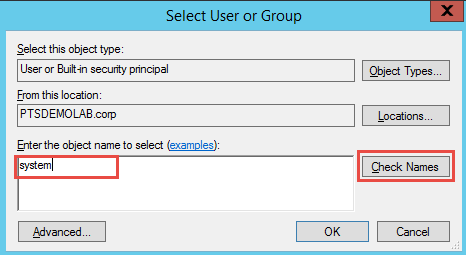
Under Security options, click the button Change User or Group …. In the resulting Select User or Group dialog box, enter "system" in the text box, then click Check Names. Confirm that you have the correct value and click OK.
-
Make sure that the system object resolves to the value "NT Authority\System," as shown in the Security options group.
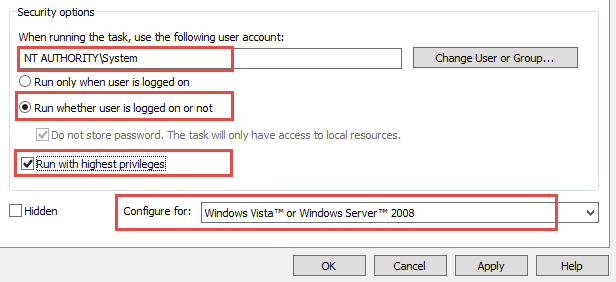
Also check the following:- Ensure that Run whether user is logged on or not is selected.
- Ensure that Run with highest privileges is selected.
- Ensure that Configure for: is set to Windows Vista or Windows Server 2008. -
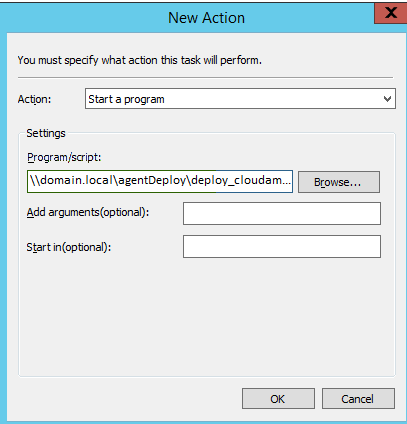
Click on the Actions tab and then click New ….
-
In the New Action dialog box, set the Action drop-down to Start a program. In the Program/script text box, enter the network file path to the shared folder that we created earlier. Finally, click OK.
-
Back in the New Task Properties dialog box, select the Conditions tab, then select the checkbox for Start only if the following network connection is available, then select Any connection.

-
Click OK.
-
Close the Group Policy Management Editor, then close the Group Policy Management window.
The Cloudamize Windows agent installer (.msi) file will execute on all of the selected computers at the next policy group refresh. The typically occurs every 90 minutes, but with random offsets of zero to 30 minutes.
Check out the Batch File Template for Deployment with GPO and AD.
If you have any queries, please get in touch with the helpdesk via our Helpdesk Portal or by email at helpdesk@cloudamize.com.