

Overview:
This KB provides instructions for installing the Cloudomize Windows Data Collector agent. This agent is used to discover and assess physical and virtual Windows machines. You can install it either through the graphical user interface (GUI) or the command line.
Prerequisites:
-
Access to our servers at am.cloudamize.com for US infrastructure, am-de.cloudamize.com for EU infrastructure, or am-ae.cloudamize.com for UAE infrastructure over port 443 directly or through a corporate proxy.
-
If your system locally caches DNS resolution, you may need to resolve am.cloudamize.com to 35.171.170.26 or am-de.cloudamize.com to 18.194.12.63 to allow egress traffic. This feature is not currently available for our UAE region.
-
-
One of the following OSes:
-
Windows Server 2022
-
Windows Server 2019
-
Windows Server 2016
-
Windows Server 2012 R2
-
Windows Server 2008 R2 and Server 2003 R2 are no longer officially supported, but if sufficiently up to date, may be compatible.
-
-
.NET Framework version 3.5 or above
-
320 MB persistent storage
-
Requirement for Agent to Collect SQL Data from a remote machine(If SQL data is required)
-
The Agent will collect the Basic SQL data, as no PowerShell script is utilized for this.
-
PowerShell 5.1 is required to collect additional SQL Server data on the remote machine. The Agent will also install the NuGet packet and SqlServer PowerShell module to collect the Advanced SQL details. Below are the links that need to be whitelisted to allow the Agent to download the packages.
NuGet packet installation: https://go.microsoft.com and https://onegetcdn.azureedge.net
SqlServer PowerShell module installation: https://www.powershellgallery.com and https://psg-prod-eastus.azureedge.net -
.NET Framework 3.5 is the minimum requirement on the remote machine.
-
Server Core for each of the above OSs is also supported
The Cloudamize Machine Agent requires .2% of available CPU and 3% of memory while running. If the agent takes more than the allotted CPU and memory, the watchdog process will stop the agent process and begin again once it's able to run below the thresholds.
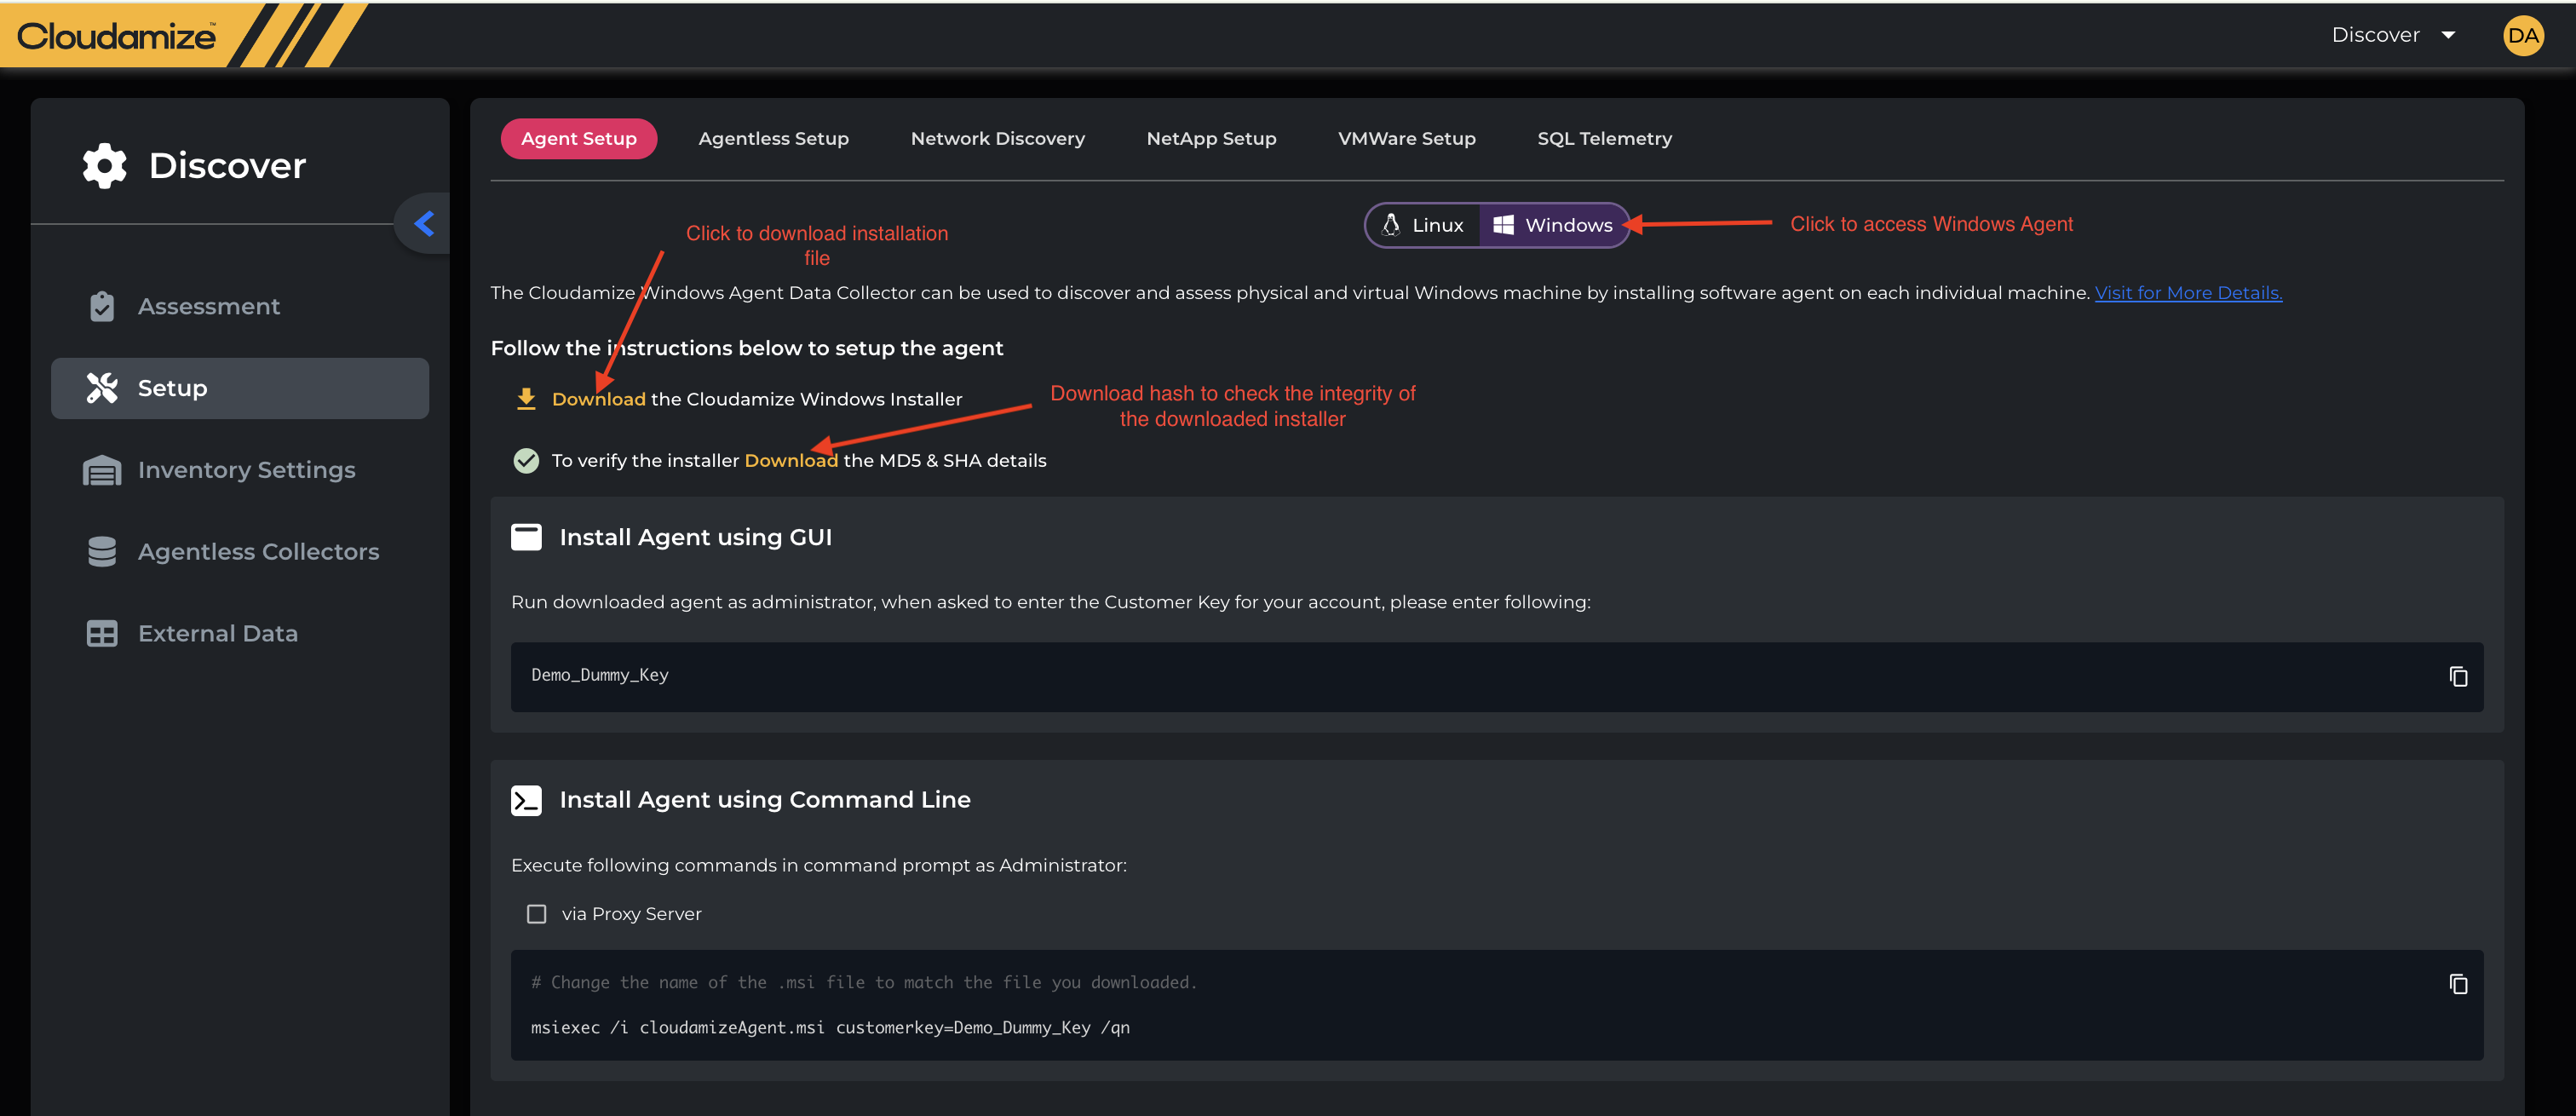
Download the Installer
First, download the Cloudomize installer.
-
Download the Cloudomize Windows installer.
-
This will download the installer file, typically a
.msifile.
-
-
To verify the installer, download the MD5 & SHA details.
-
This provides a hash file that you can use to check the integrity of the downloaded installer.
-
Install the Agent
You have two options for installation: using the GUI or the command line.
Install using the GUI
This is the most common method and is recommended for a single machine.
-
Run the downloaded agent as an administrator.
-
During the installation, a prompt will appear asking for the Customer Key.
-
Enter your unique customer key into the field. The screenshot shows
Dummy_Keyas an example; be sure to replace this with your actual key.
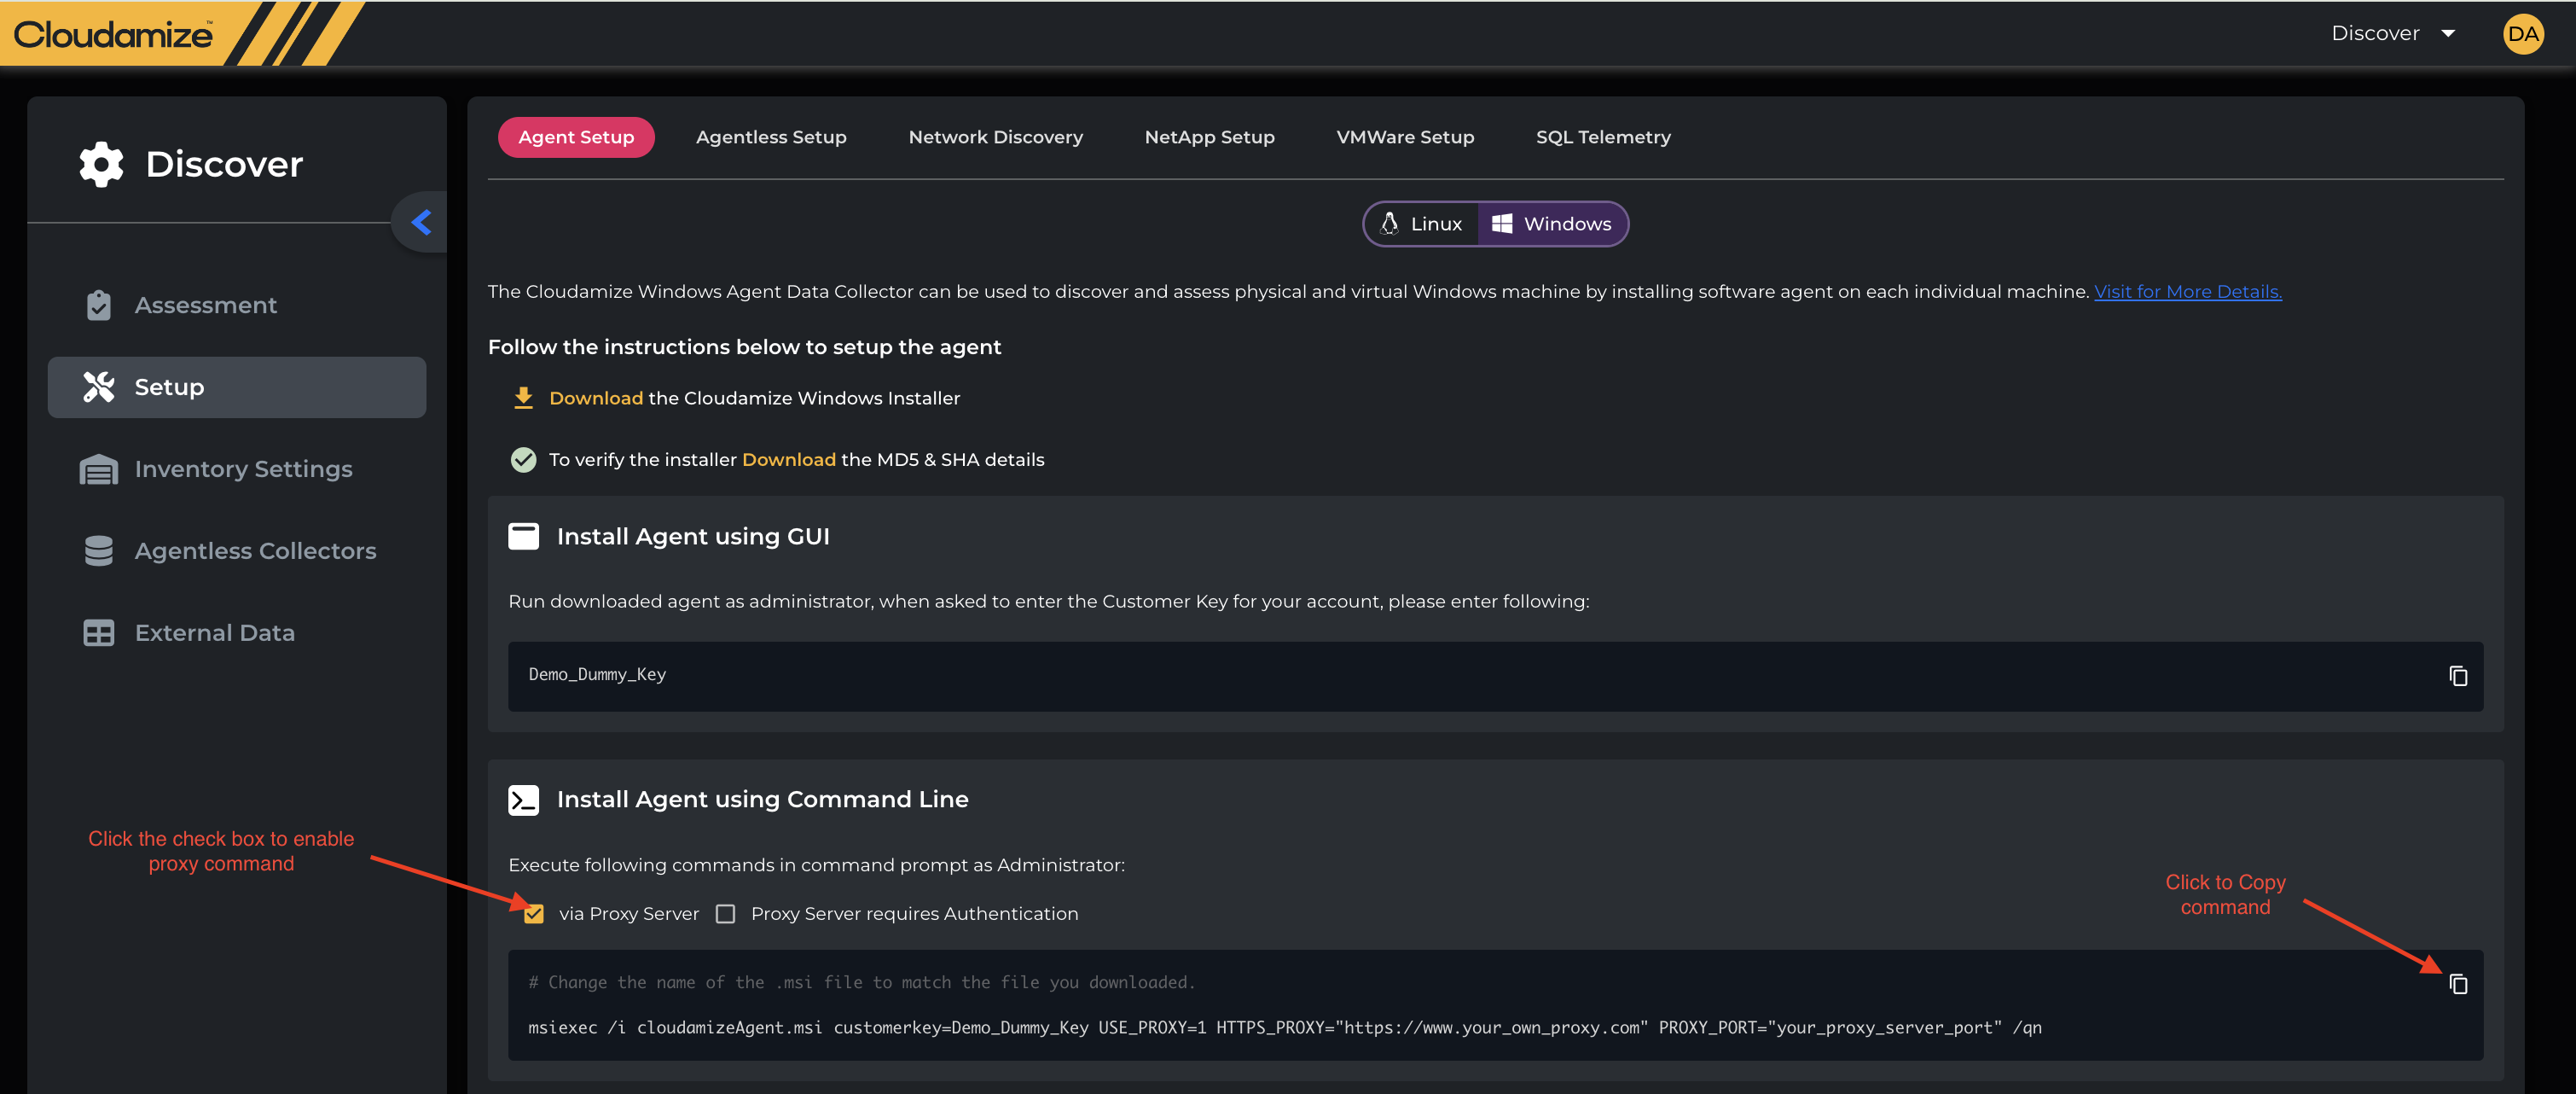
Install using the Command Line
This method is useful for silent or automated installations on multiple machines.
-
Open Command Prompt as an administrator.
-
Execute the following command, replacing
CloudomizeAgent.msiwith the actual name of your downloaded file andDummy_Keywith your customer key.
Bash
msiexec /i CloudomizeAgent.msi customerkey=Dummy_Key /qn
-
msiexec /i: This command is used to run an installation package. -
CloudomizeAgent.msi: The name of the installer file. -
customerkey=Dummy_Key: This parameter passes your unique customer key to the installer. -
/qn: This switch runs the installer in "quiet" mode, meaning the installation will happen silently without any user interface.
-
Via a Proxy Server (Optional): The screenshot shows a placeholder for installing via a proxy server, but the command isn't fully detailed. If you need to use a proxy, you would typically need to include additional parameters or configure your system's proxy settings before running the command.
Command-line Installation with GUI
This method is suitable for stand-alone servers (Windows machines without a GUI). In this case, the same pop-up dialog boxes will appear as in the GUI-based installation, as described in Section 3.1.
Please select one of the following commands and run it as administrator (i.e., run Command Prompt as administrator and type in one of the commands)
-
When a proxy server is not used,
-
msiexec /i <downloaded MSI file> CUSTOMERKEY="your key"
-
-
When a proxy server is used but proxy credentials are not used,
-
msiexec /i <downloaded MSI file> CUSTOMERKEY="your key" USE_PROXY=1 HTTPS_PROXY="https://www.your_own_proxy.com" PROXY_PORT="your_proxy_server_port"
-
-
When a proxy server is used, and proxy credentials are used,
-
msiexec /i <downloaded MSI file> CUSTOMERKEY="your key" USE_PROXY=1 HTTPS_PROXY="https://www.your_own_proxy.com" PROXY_PORT="your_proxy_server_port" USE_PROXY_CREDENTIAL=1 PROXY_USER_NAME="user_name" PROXY_PASSWORD="password"
-
-
When a connection problem occurs, the installer will try to connect to the Cloudamize server for 24 hours. To limit the installation maximum duration due to a connection problem,
-
msiexec /i <downloaded MSI file> CUSTOMERKEY="your key" INSTALL_MAX_DURATION_IN_MIN=60
-
Unit of INSTALL_MAX_DURATION_IN_MIN is minutes, and 60 minutes are set in this example.
-
-
Note that these command lines are the same as those given in Section 3.3, except that they are missing the "/qn" at the end.
Command-line Installation with silent mode and without GUI
We recommend attempting installation with the GUI first. Once installation is successful on a handful of machines, the command-line method can be used.
Please select one of the following commands and run it as administrator.
-
When a proxy server is not used,
-
msiexec /i <downloaded MSI file> CUSTOMERKEY="your key" /qn
-
-
When a proxy server is used but proxy credentials are not used,
-
msiexec /i <downloaded MSI file> CUSTOMERKEY="your key" USE_PROXY=1 HTTPS_PROXY="http://www.your_own_proxy.com" PROXY_PORT="your_proxy_server_port" /qn
-
-
When a proxy server is used and proxy credentials are used,
-
msiexec /i <downloaded MSI file> CUSTOMERKEY="your key" USE_PROXY=1 HTTPS_PROXY="http://www.your_own_proxy.com" PROXY_PORT="your_proxy_server_port" USE_PROXY_CREDENTIAL=1 PROXY_USER_NAME="user_name" PROXY_PASSWORD="password" /qn
-
-
When a connection problem occurs, the installer will try to connect to the Cloudamize server for 24 hours. To limit the installation maximum duration due to a connection problem,
-
msiexec /i <downloaded MSI file> CUSTOMERKEY="your key" INSTALL_MAX_DURATION_IN_MIN=60 /qn
-
Unit of INSTALL_MAX_DURATION_IN_MIN is minute and 60 minutes are set in this example.
-
-
-
Additional options
-
IS_PROXY_CERTIFICATE_SIGNED_BY_CA
-
0: Skip the proxy certificate verification with the proxy server option. This is the default value.
-
1: Verify the proxy certificate.
-
-
IS_SERVER_CERTIFICATE_SIGNED_BY_CA
-
0: Skip the server certificate verification.
-
1: Verify the server certificate. This is the default value.
-
-
INSTALL_SQL_SERVER_PS_MODULE
-
0: Skip installation of the SQL Server PowerShell Module (only required for advanced SQL data).
-
1: Attempt installation of the SQL Server PowerShell Module if necessary.
-
-
NO_UPGRADE
-
0: The agent can be upgraded by the Cloudamize server (Agent Manager). This is the default value.
-
1: The agent cannot be upgraded by the Cloudamize server (Agent Manager).
-
-
If there is any issue, please attach
-
Screenshot: Capture a screenshot of any explicit error outputs or relevant Event Viewer logs.
-
Log File: Collect the
log_backup.txtfile from the following directory:C:\Program Files (x86)\Cloudamize\log_backup.txt
Email both items to helpdesk@cloudamize.com for advanced engineering assistance.
If you have any queries, please get in touch with the helpdesk via our Helpdesk Portal or by email at helpdesk@cloudamize.com.