

Overview
This guide will walk you through creating CSV-based move groups in the Migration Planner. You will learn how to format the CSV file, upload the file, select which columns to map groupings to, and then view the results.
Instructions
First, you will need to create a file in CSV format, which will be used to re-group your machines. The layout of this file can vary significantly based on your specific use case; however, you will always need a column with the machine names and at least two other columns to map to the Group name and Asset name. These columns could be anything relevant to the environment - Production/Non-production, Migration Type, Application, Scope, etc.
Attached is a sample CSV file:
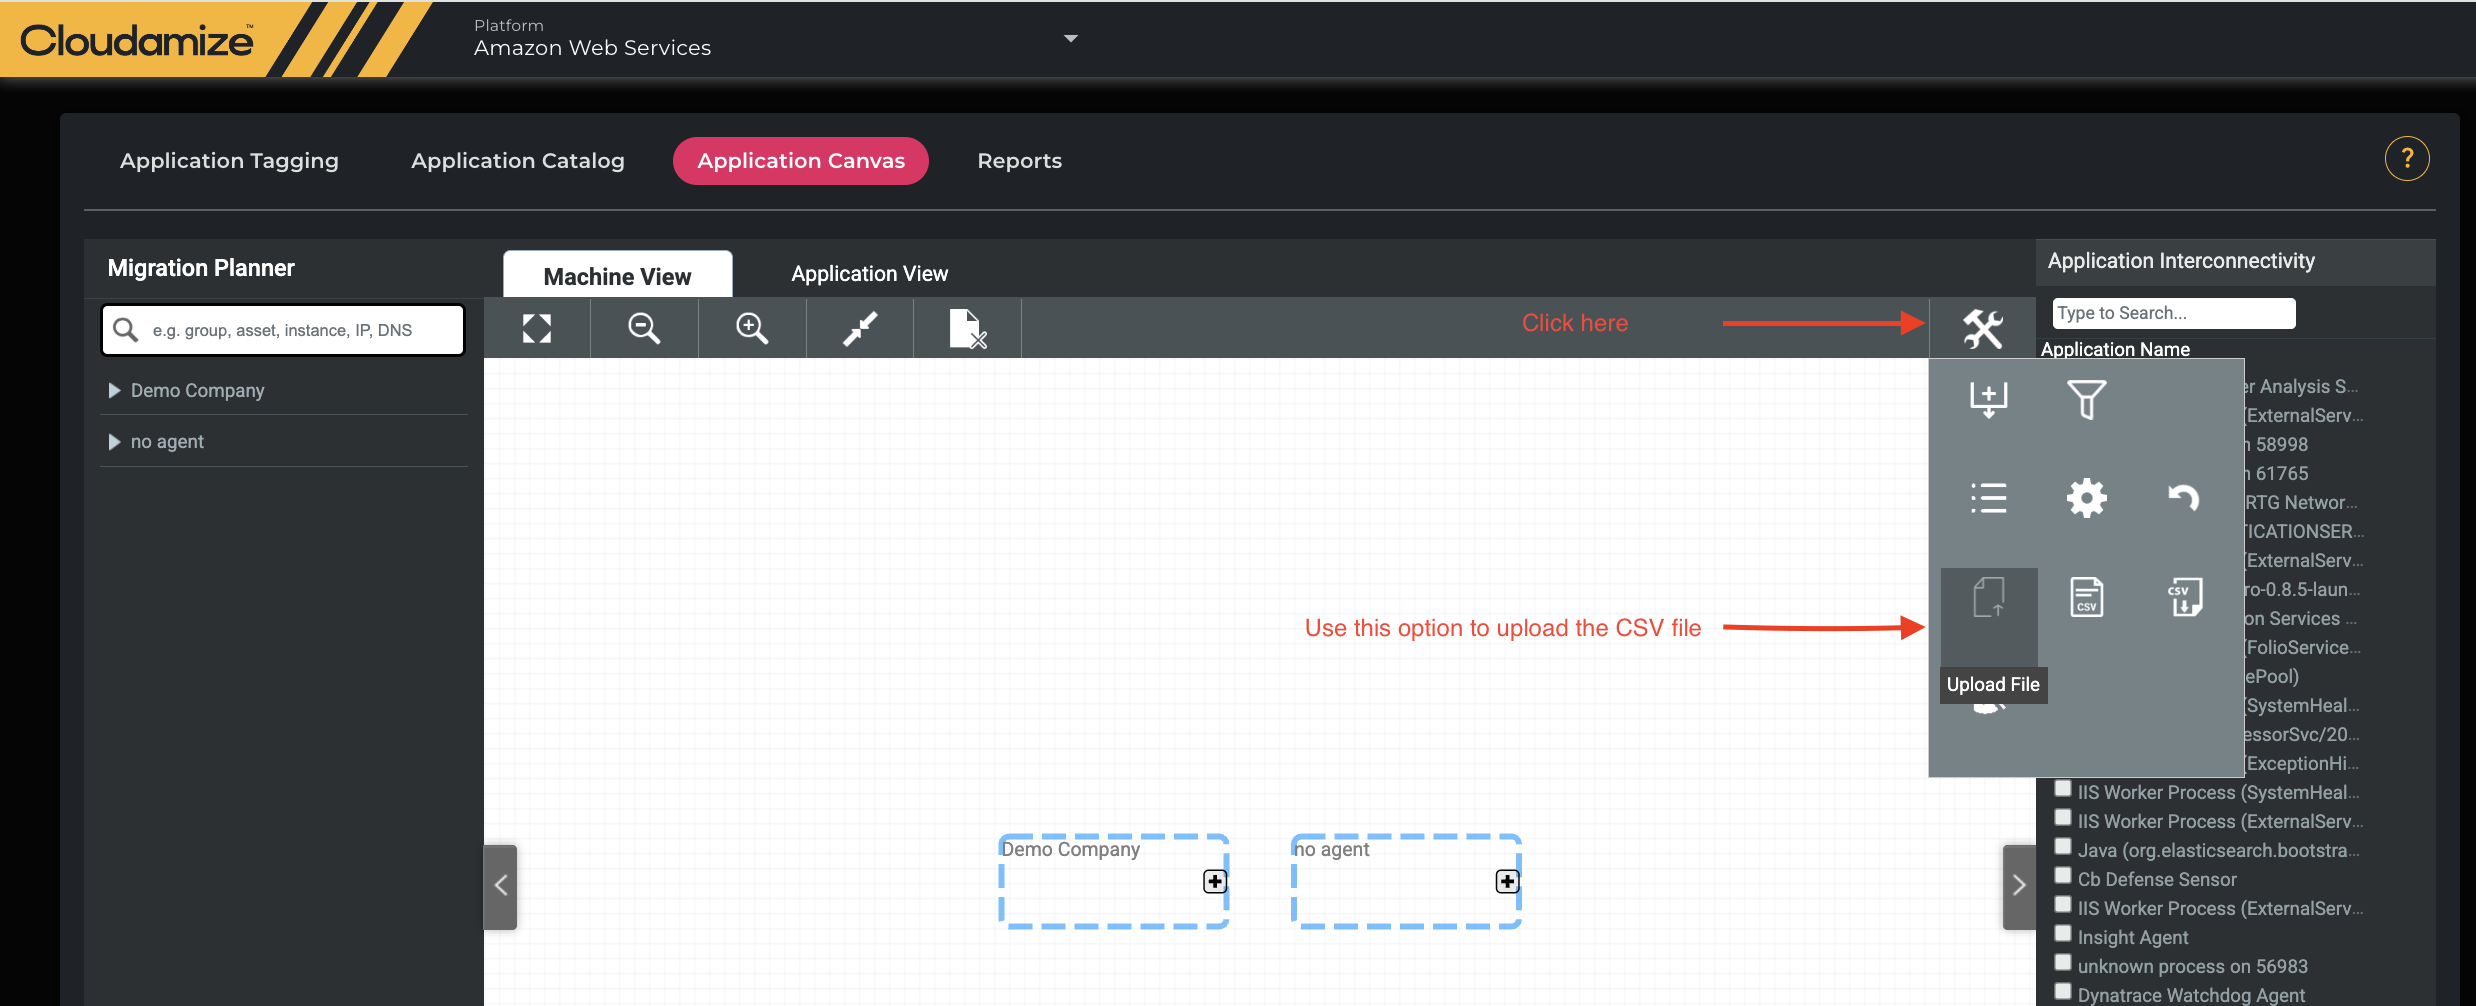
Navigate to the Migration Planner and click “Upload File” from the top toolbar by following these steps:
Step 1: Click the “Plan” section on the console portal home page.
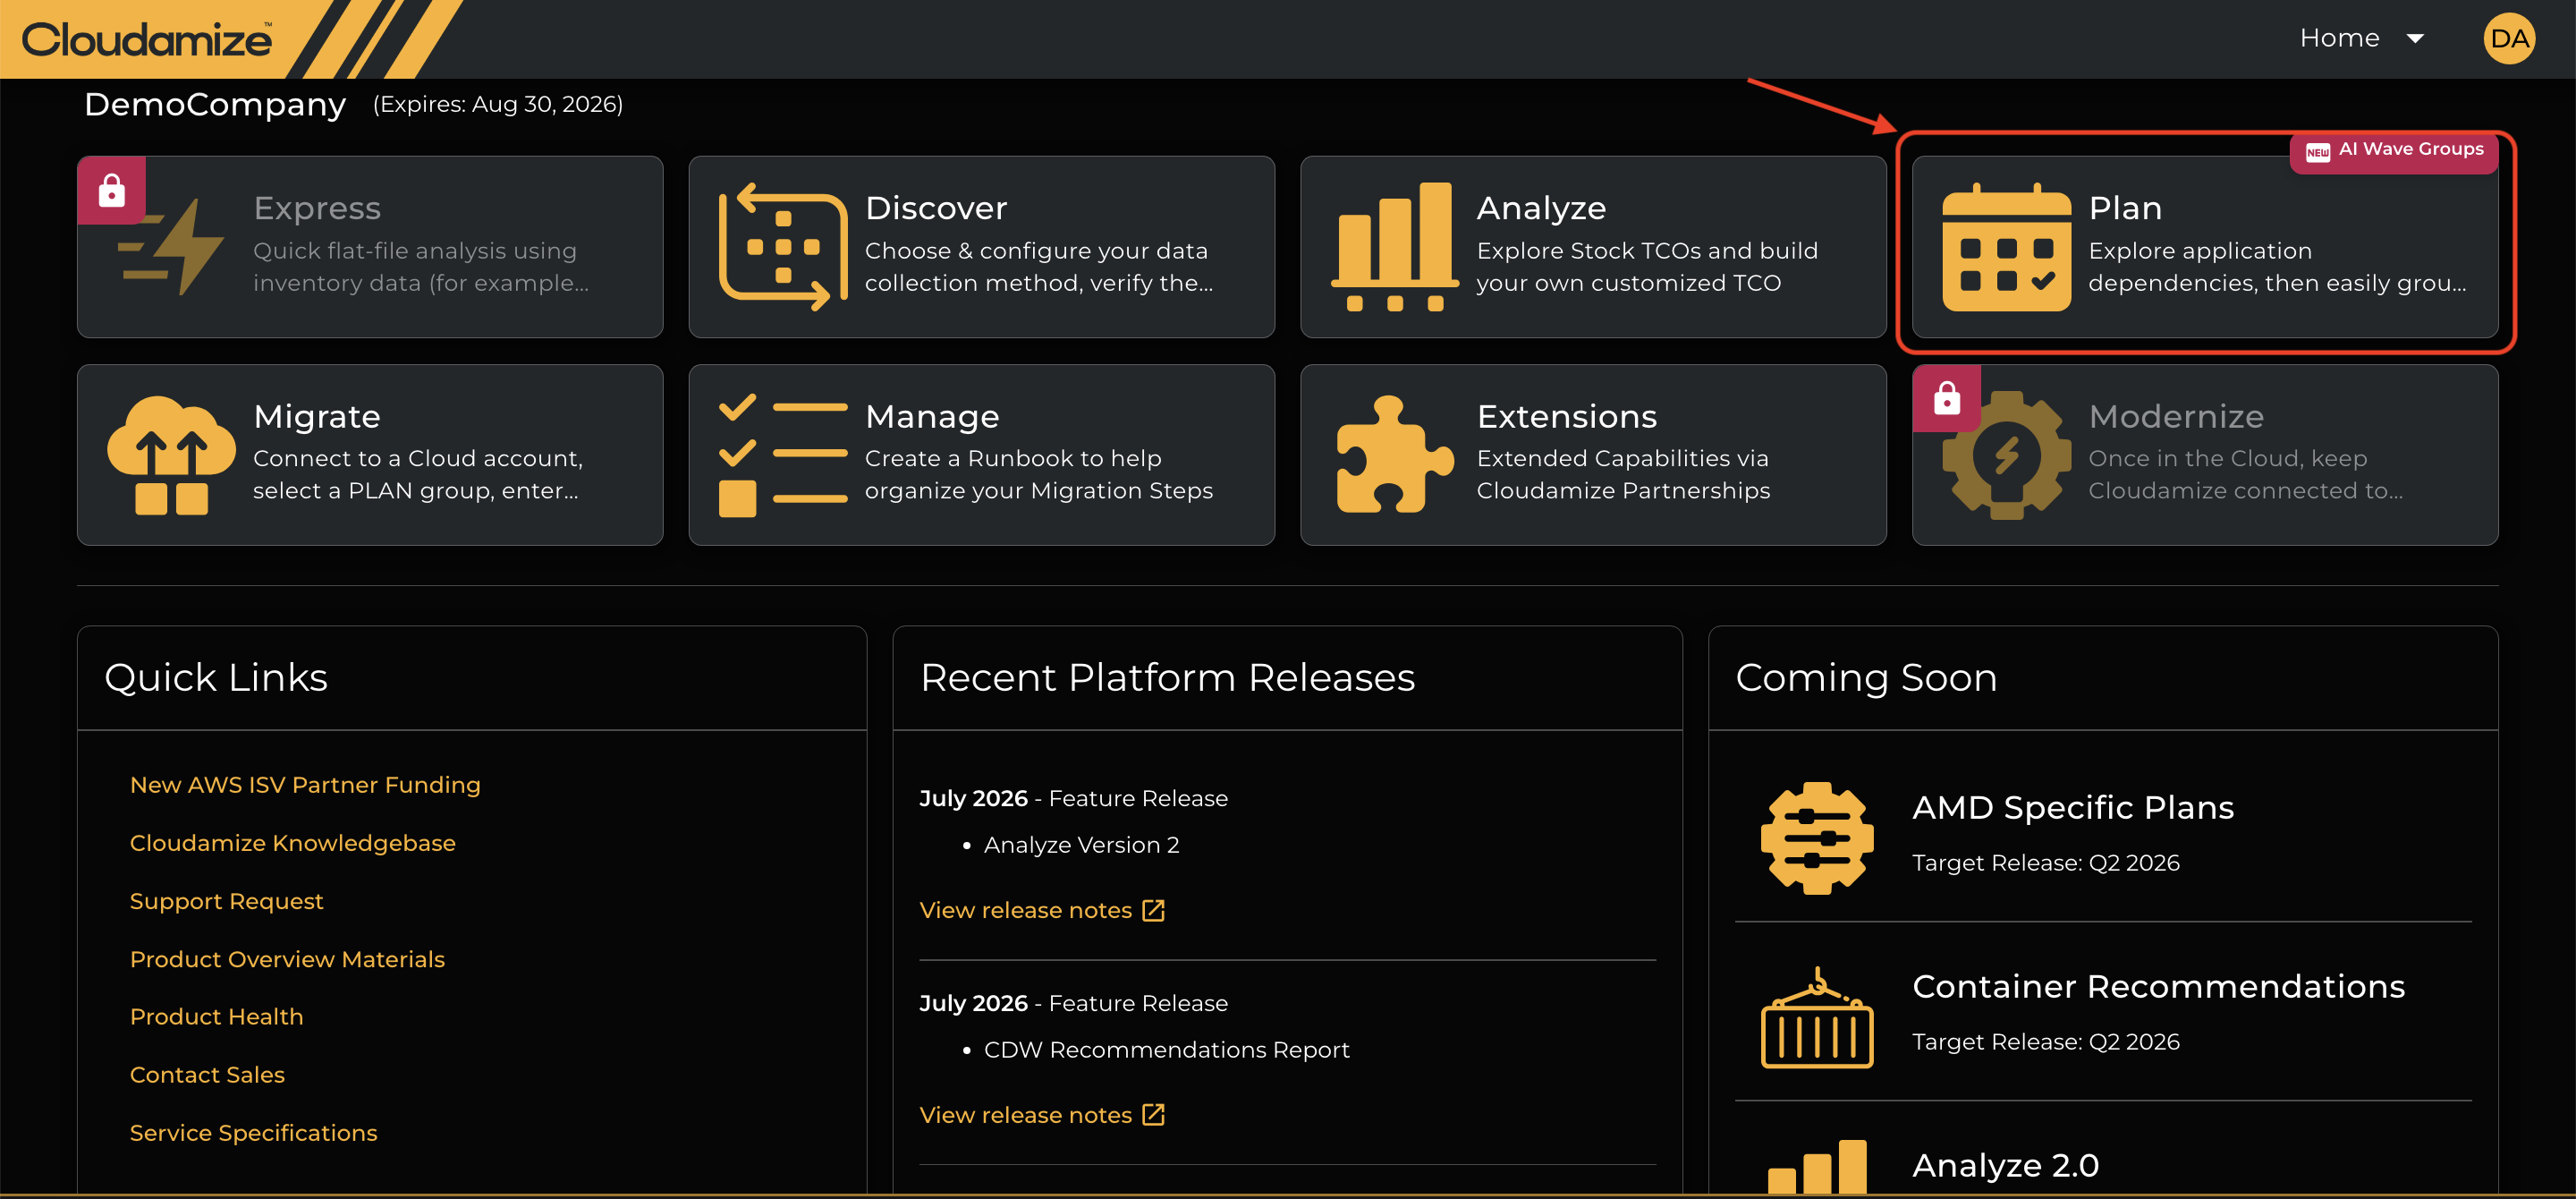
Step 2: The Plan section takes you to the page below, and click on the “Application Canvas” tab as shown in the screenshot below.
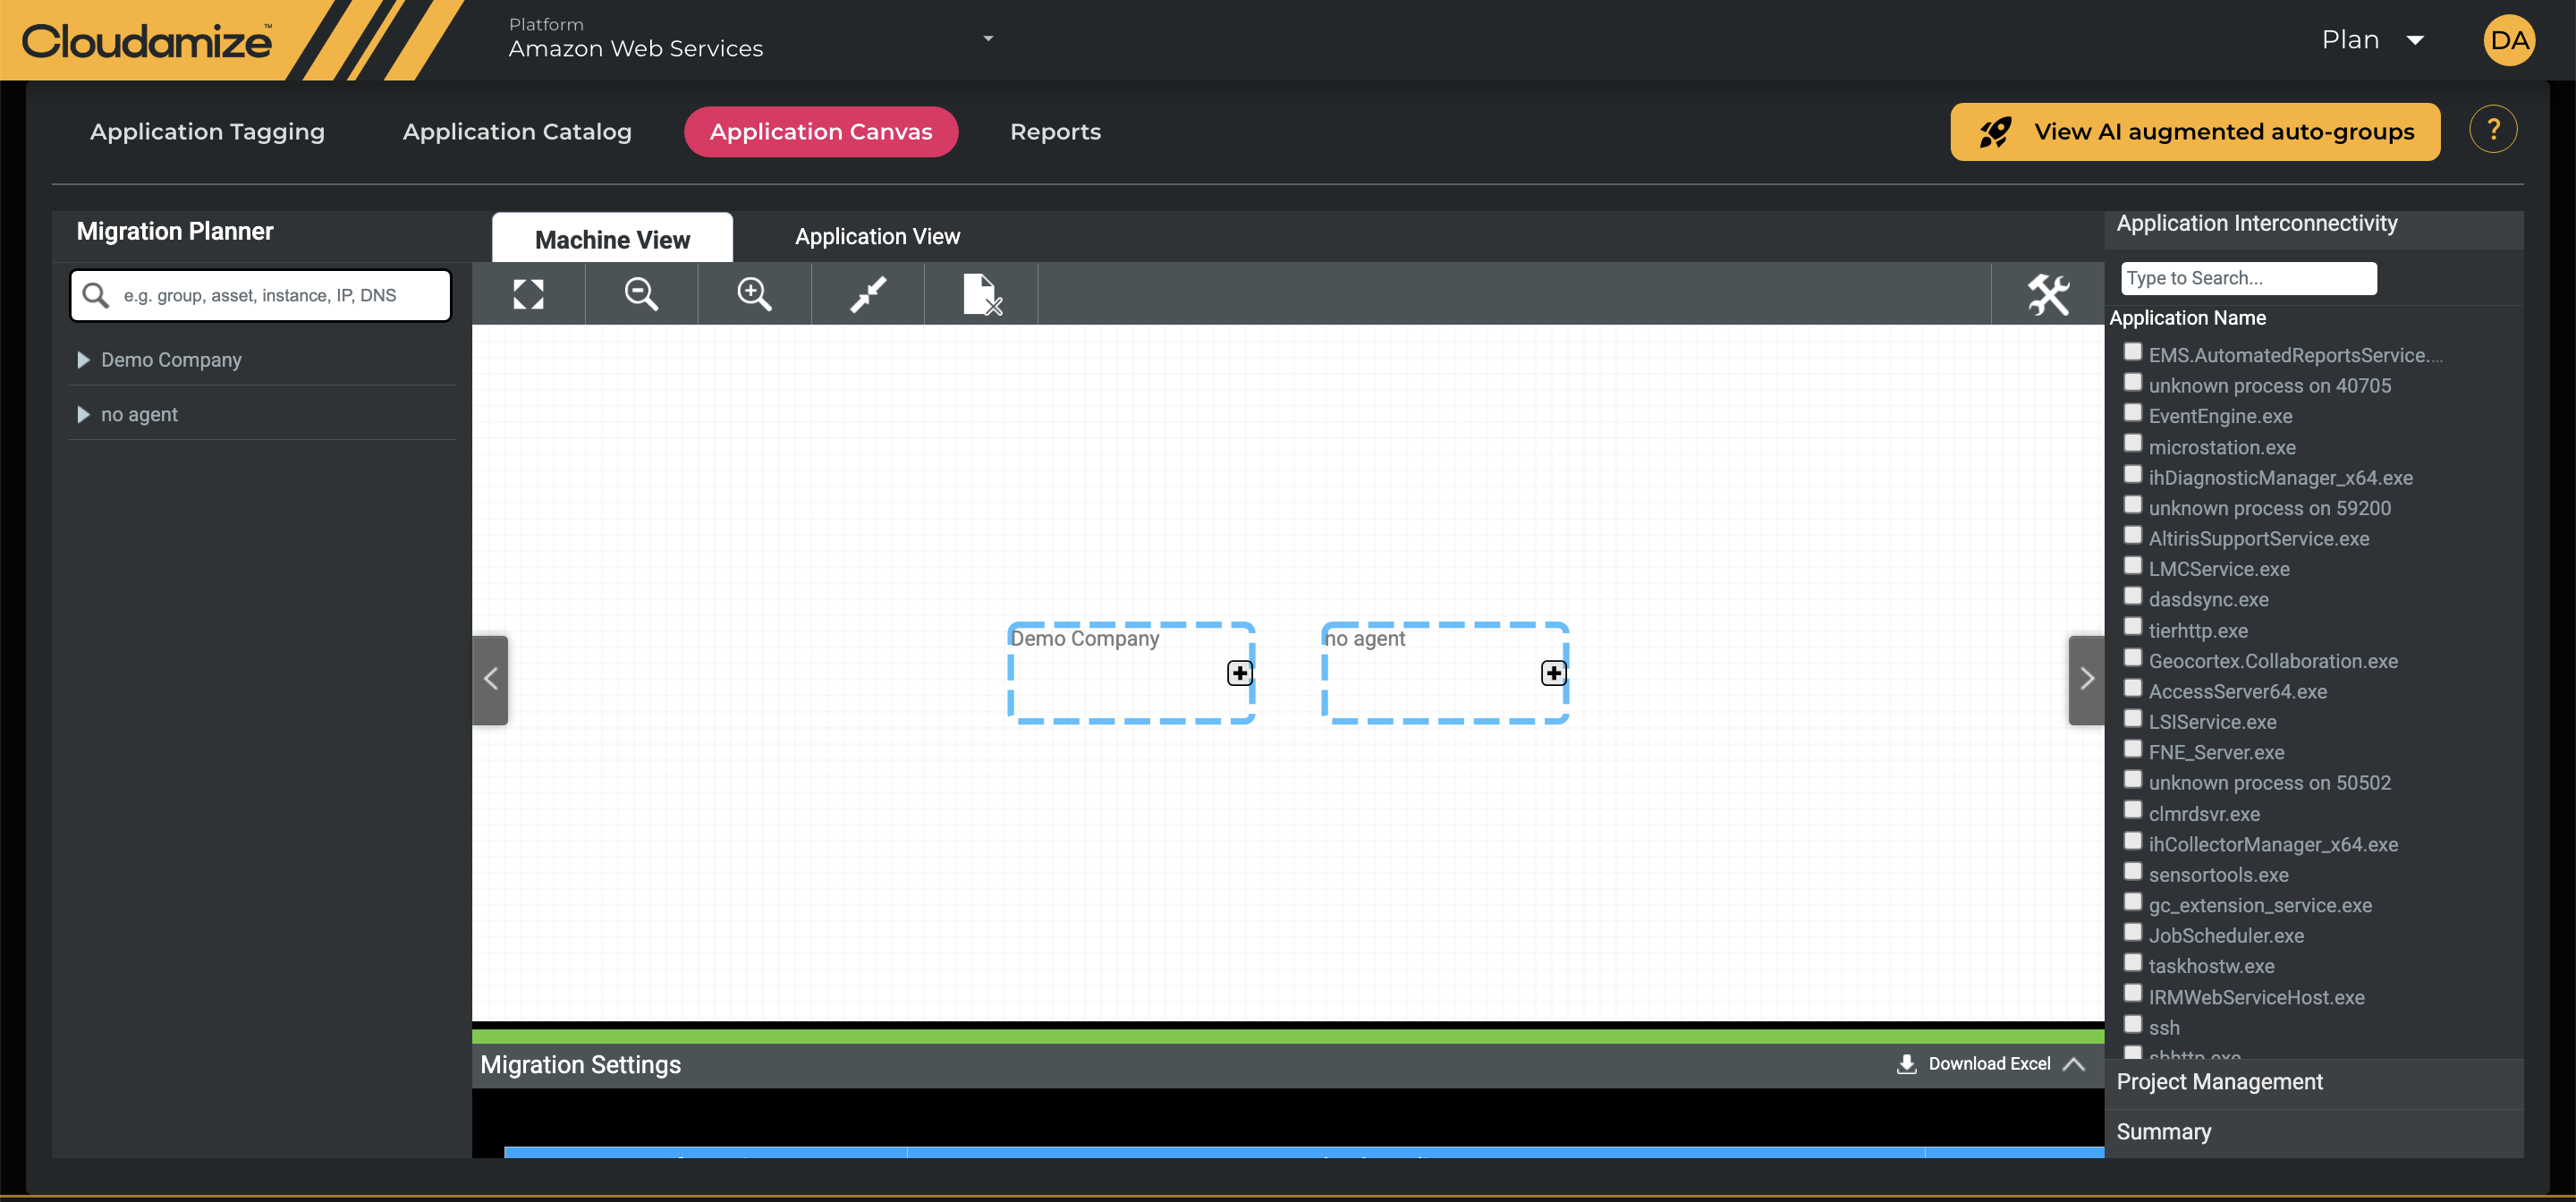
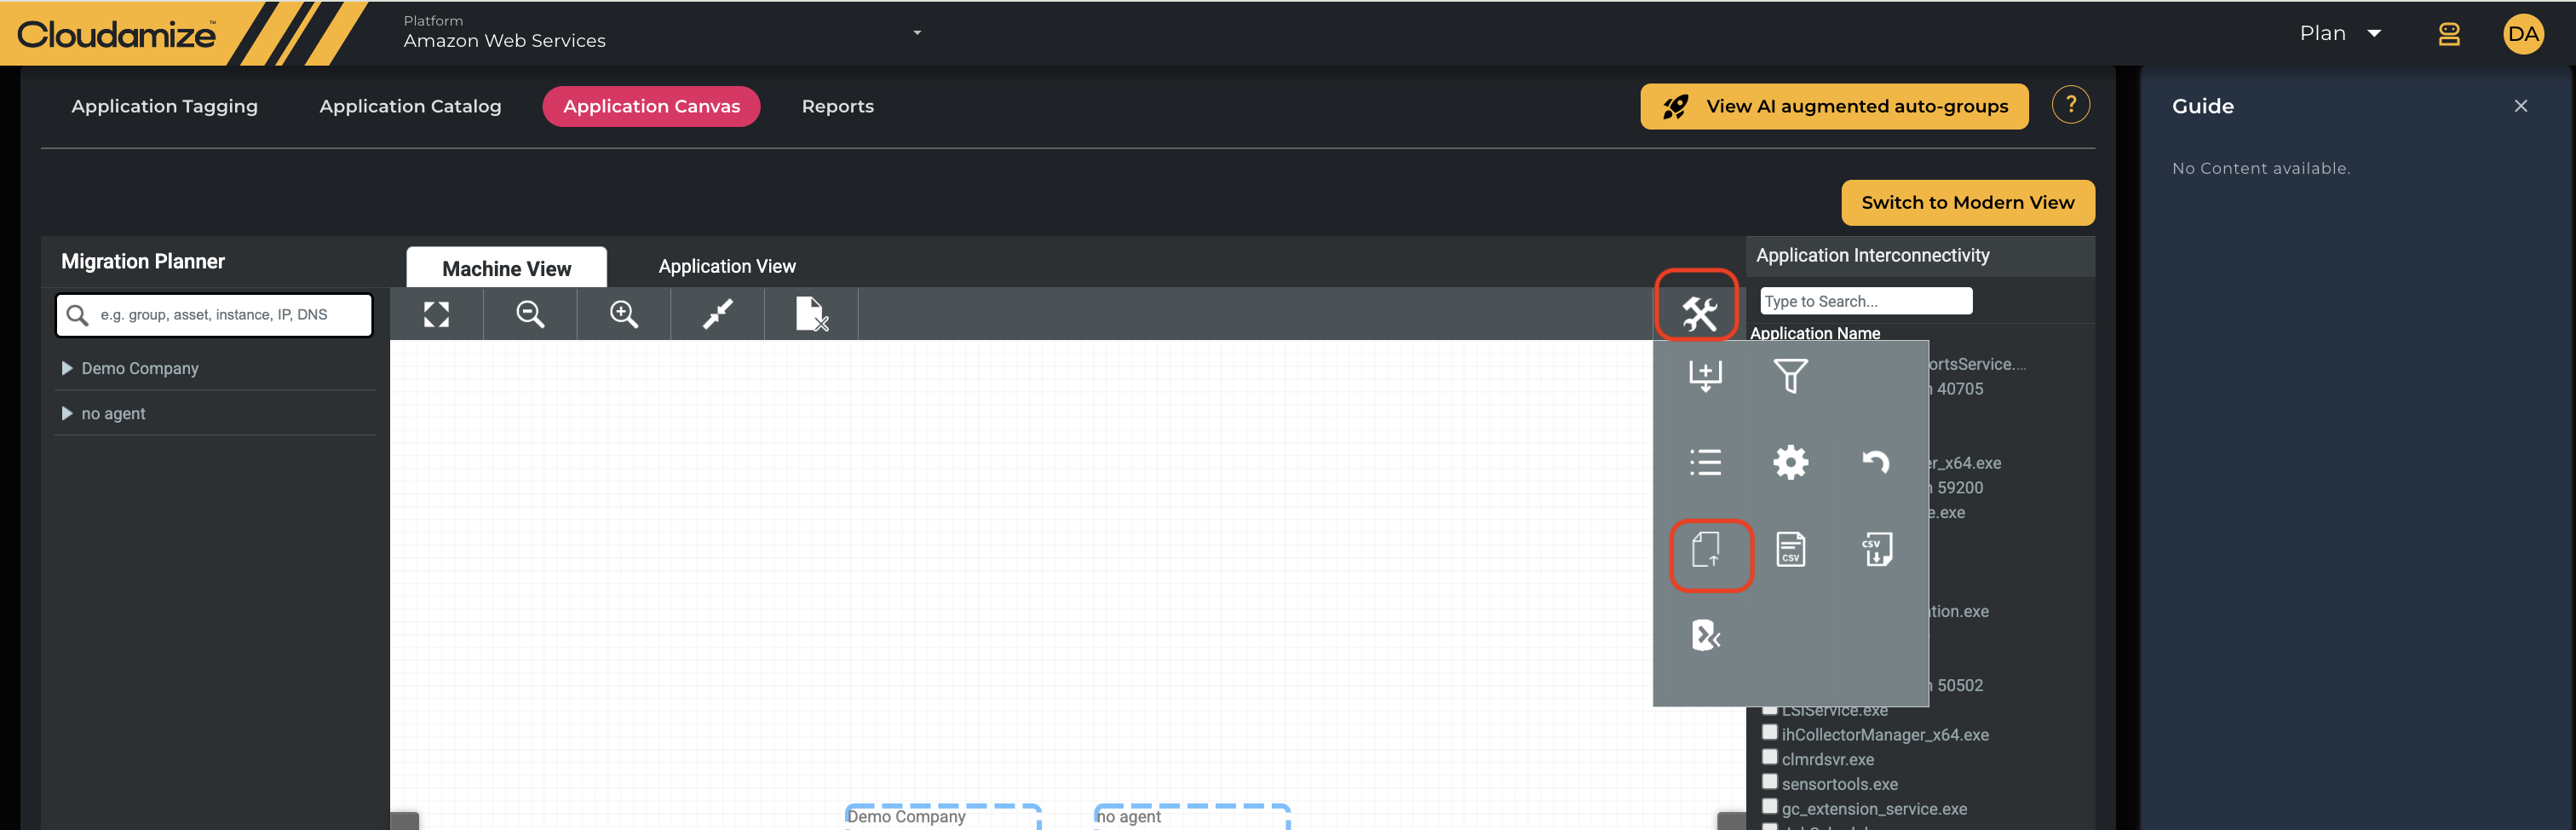
Step 3: Then, click on the highlighted option below to open the CSV upload option and to upload the file.
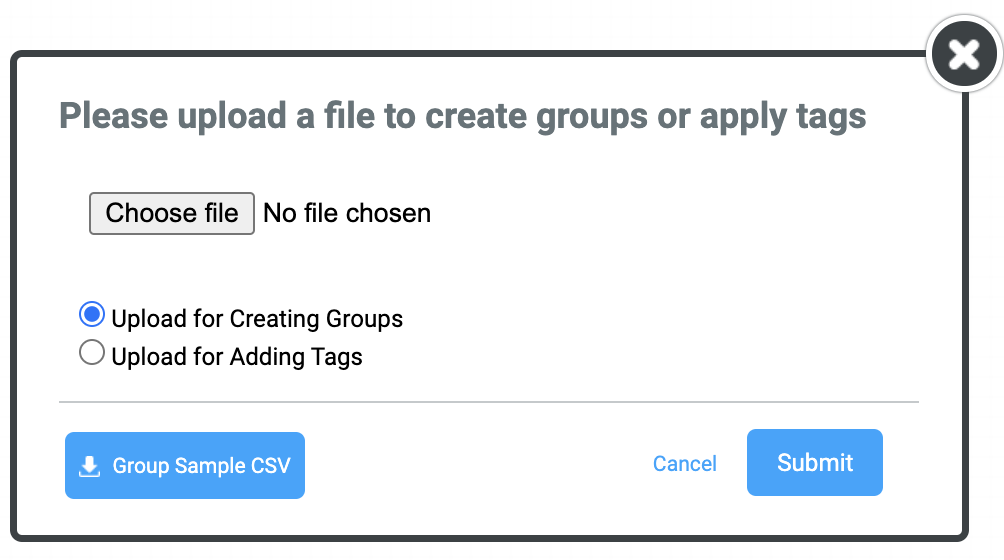
Click Choose File, navigate to the CSV file you created, and select it. Then click Submit to continue.
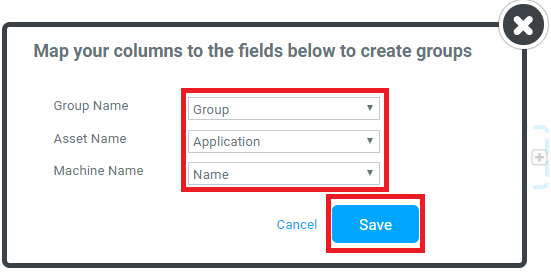
Select which column from your CSV file will be mapped to Group Name, Asset Name, and Machine Name. Then click Save to continue.
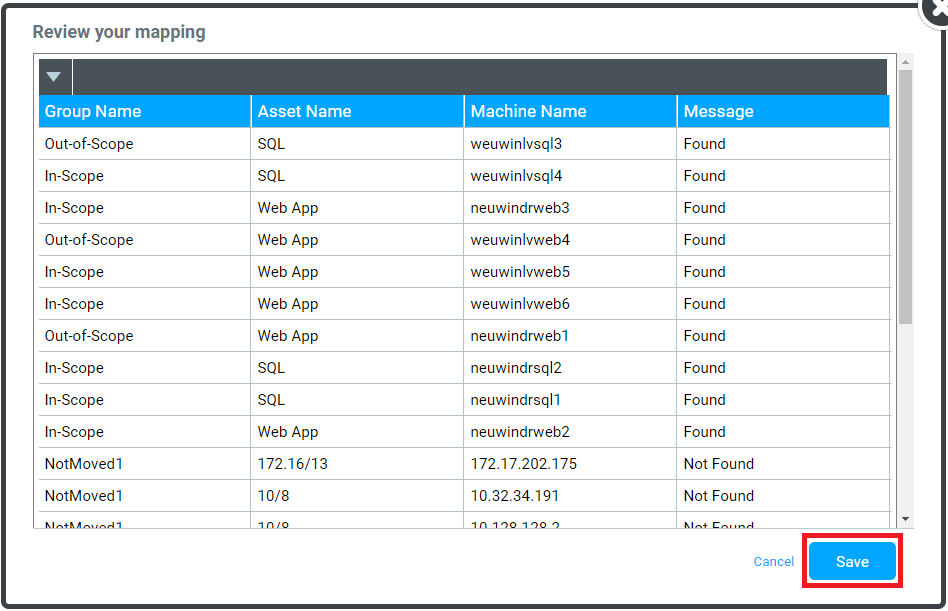
Review the mapping before applying the changes. Here you will see the Group Name, Asset Name, Machine Name, and a Message indicating whether the machine was found or not found. Click Save to apply the changes and return to Migration Planner.
You may now view the changes applied in the Migration Planner.
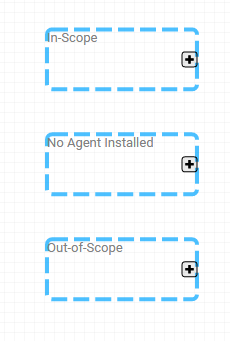
You have finished the process to create meaningful move groups based on custom columns defined in a CSV file.
Adding Tags via CSV Upload
Cloudamize allows users to bulk-apply tags to infrastructure assets using CSV file ingestion within the Canvas module. This bulk onboarding feature enables project teams to rapidly import custom key-value pairs such as ownership details, environment classifications, target migration strategies, or custom tag parameters across large machine inventories.
Download the Tag Sample CSV Template
-
Log in to your account portal at console.cloudamize.com.
-
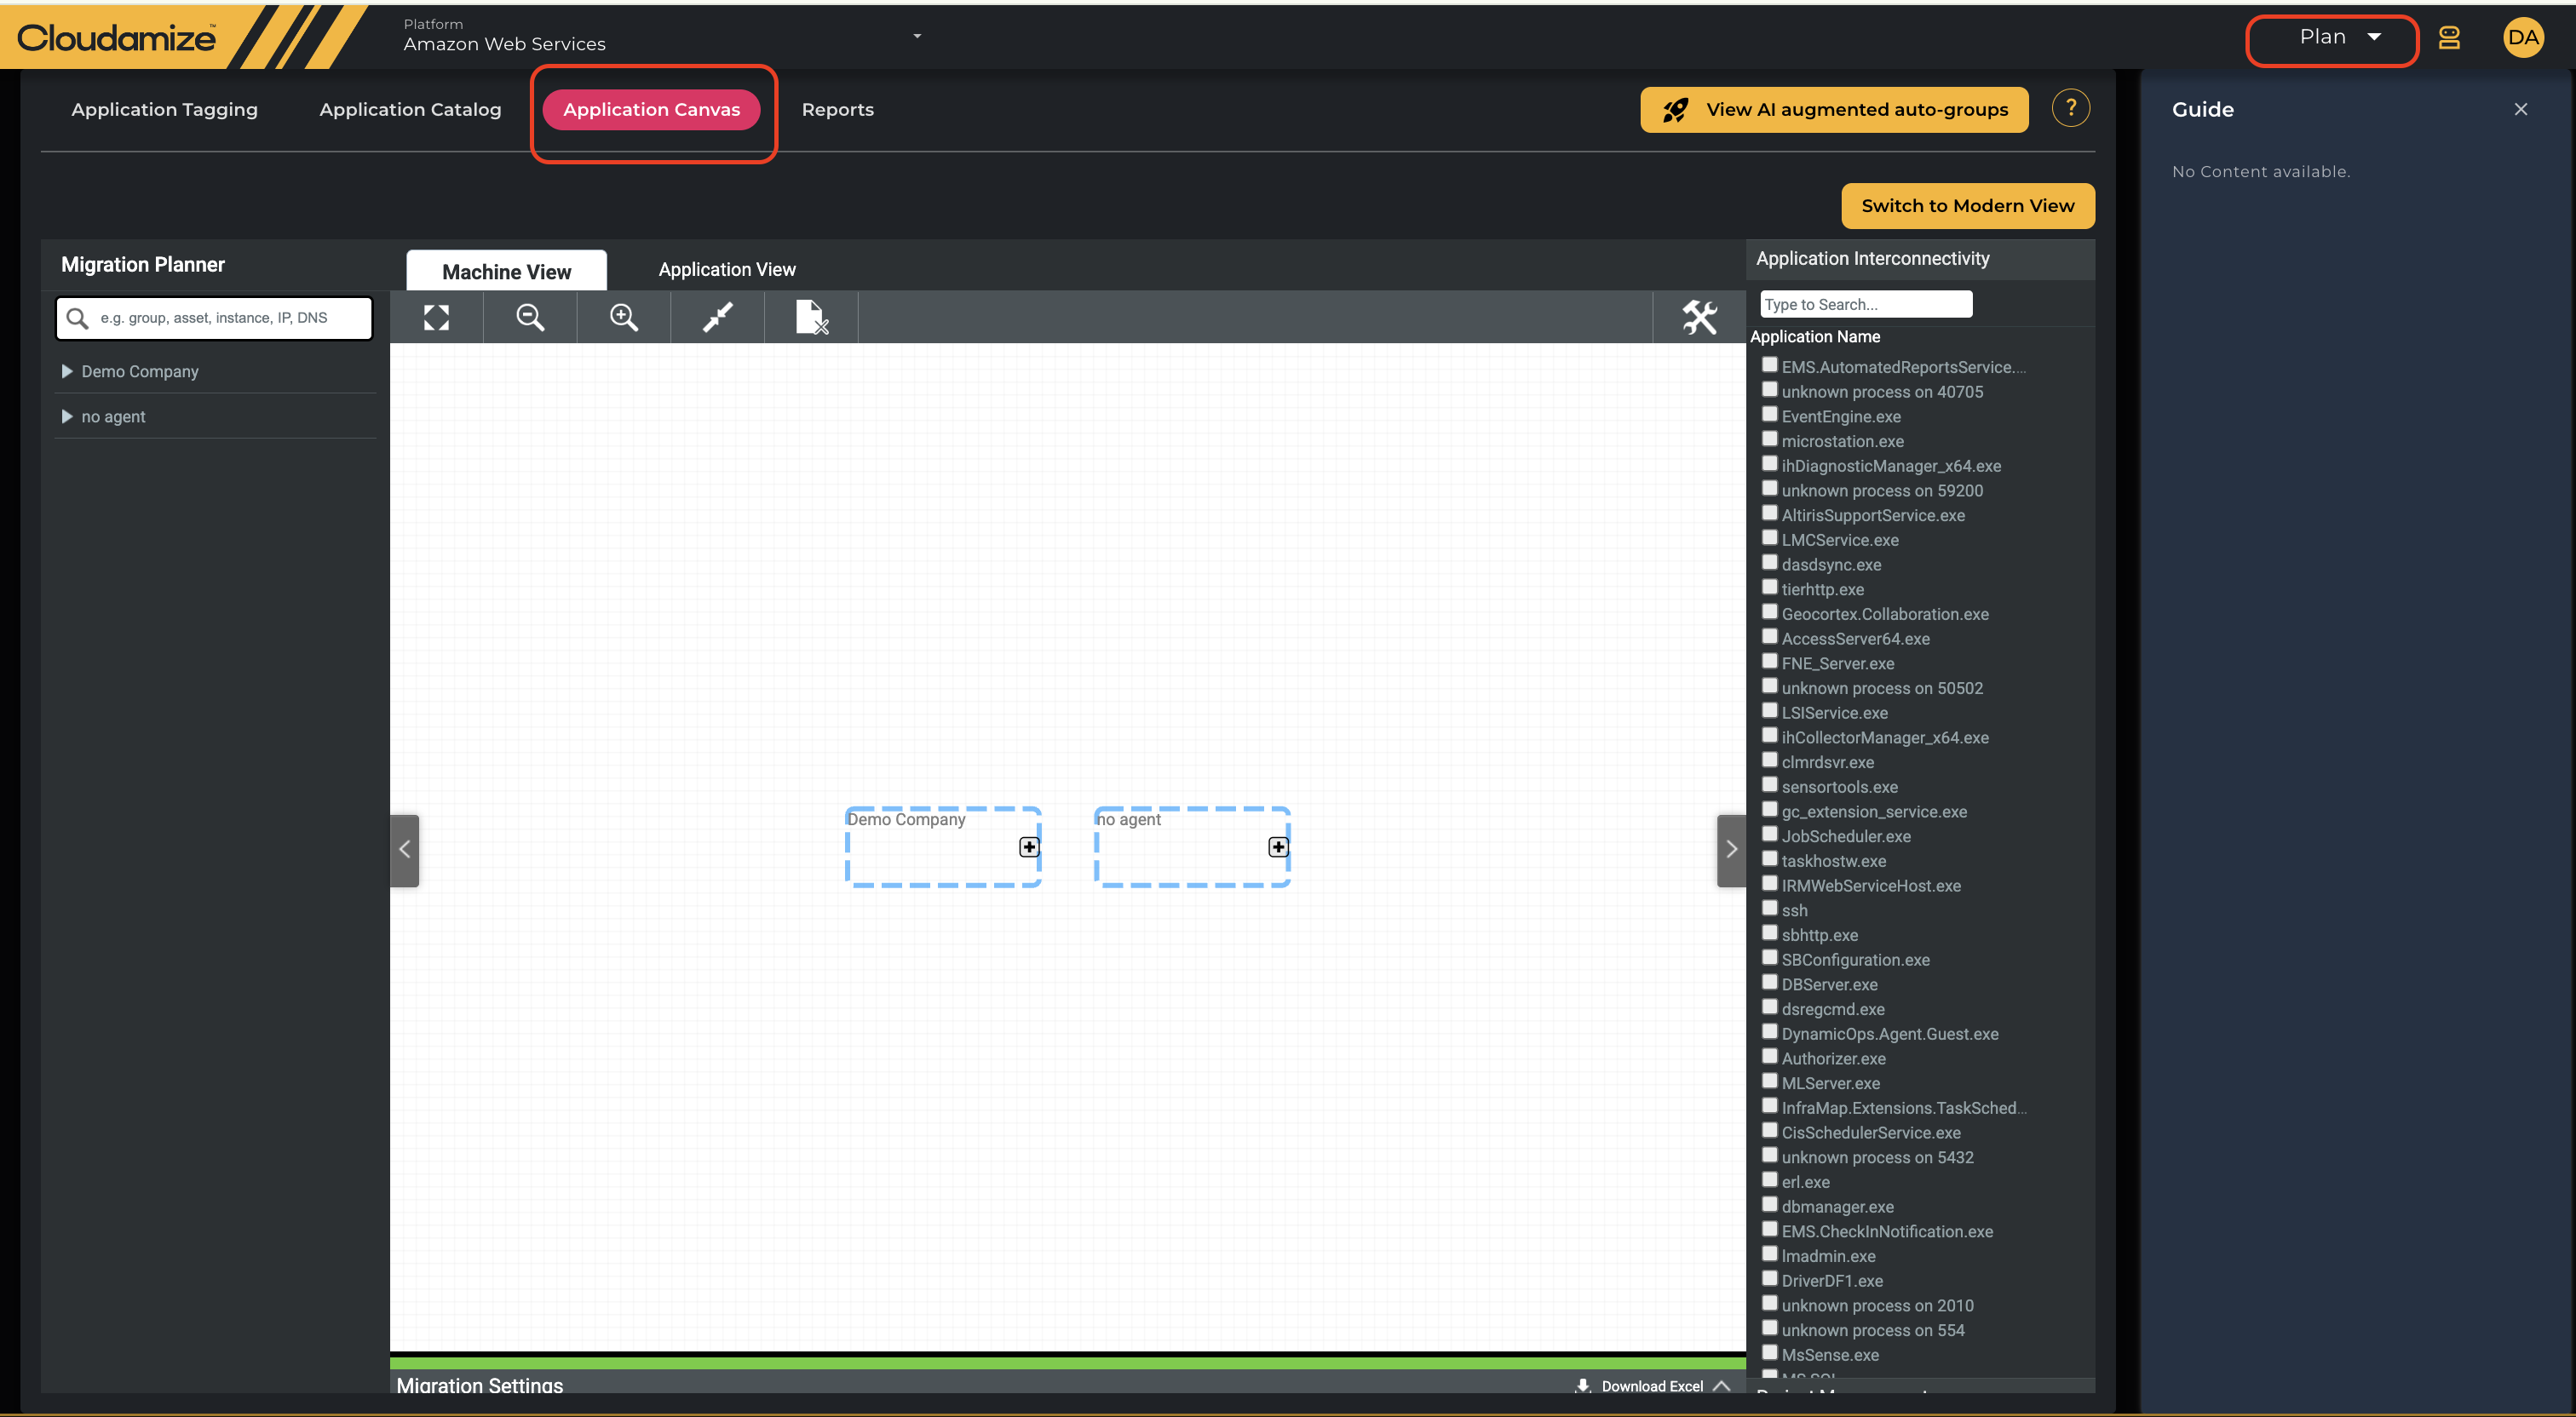
Select “Plan” from the top right navigation bar and click on “Application Canvas”
-
Ensure you are under Migration Planner > Machine View.
-
On the top-right corner of the interactive canvas grid, click the Wrench icon (Tools Menu) to expand the Canvas Action Tools palette.
-
Click the CSV Upload icon (the document icon with the downward arrow labeled CSV).
Step 2: Open Modal & Download Template
-
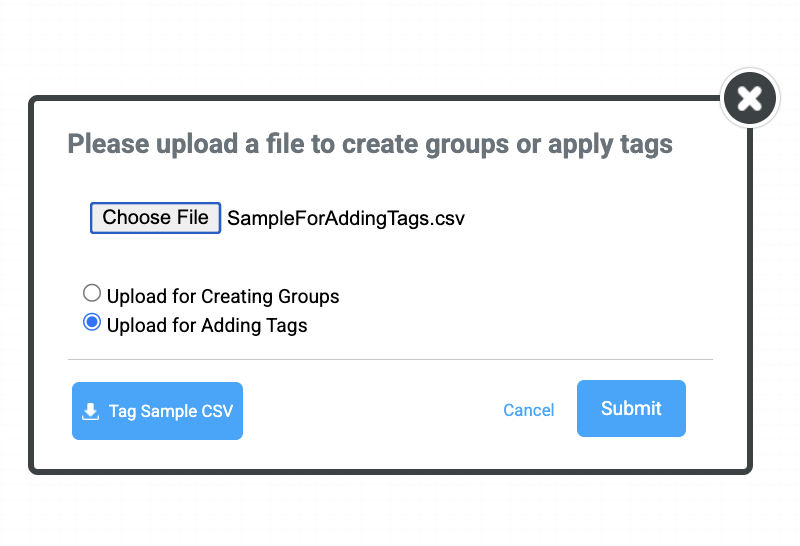
When the "Please upload a file to create groups or apply tags" modal opens, select the Upload for Adding Tags radio button.
-
Click Tag Sample CSV to download the official sample template (
SampleForAddingTags.csv). -
Save the file to your local workspace.
Step 3: Populate the CSV File
Open SampleForAddingTags.csv in your spreadsheet editor (such as Microsoft Excel or Google Sheets) and enter your machine and tag attributes.
CSV Formatting Guidelines & Structure
|
Column Header |
Description & Technical Requirement |
Required / Optional |
Example Entry |
|
MachineName |
The exact hostname or server name discovered in Cloudamize. |
Required (Column A) |
|
|
Owner |
User or team responsible for the target host. |
Optional |
|
|
Environment |
Operating environment classification (e.g., DEV, Test, Prod). |
Optional |
|
|
Purpose |
Function or application role of the server. |
Optional |
|
|
[Custom Tag Columns] |
Additional key-value pairs (e.g., |
Optional |
|
Step 4: Upload and Ingest Tags
-
Save your populated file strictly in .CSV format (Comma Separated Values).
-
Return to the open modal in Cloudamize:
-
Click Choose File and select your file (
SampleForAddingTags.csv). -
Confirm that Upload for Adding Tags remains selected.
-
-
Click Submit to ingest and process the tags across your targeted infrastructure.
⚠️ IMPORTANT FILE CONSTRAINTS:
-
File Format: The file must be saved in native
.CSVformat. Excel spreadsheet formats (.xlsx,.xls) will fail validation. -
Host Identification: The server name under
MachineNamemust match the discovered hostname in Cloudamize exactly. -
Visibility: Uploaded tags will be reflected across the Project Management Tab and Canvas views for filtering, grouping, and migration wave planning.
If you have any queries, please get in touch with the helpdesk via our Helpdesk Portal or by email at helpdesk@cloudamize.com.