

Setting up your Virtualized Environment
Creating vCenter Read-Only Credentials
Cloudamize will need read-only access to your vCenter to collect system performance data from the hypervisor in a VMware environment.
Follow these steps to create the necessary read-only credentials and add them to the Cloudamize portal:
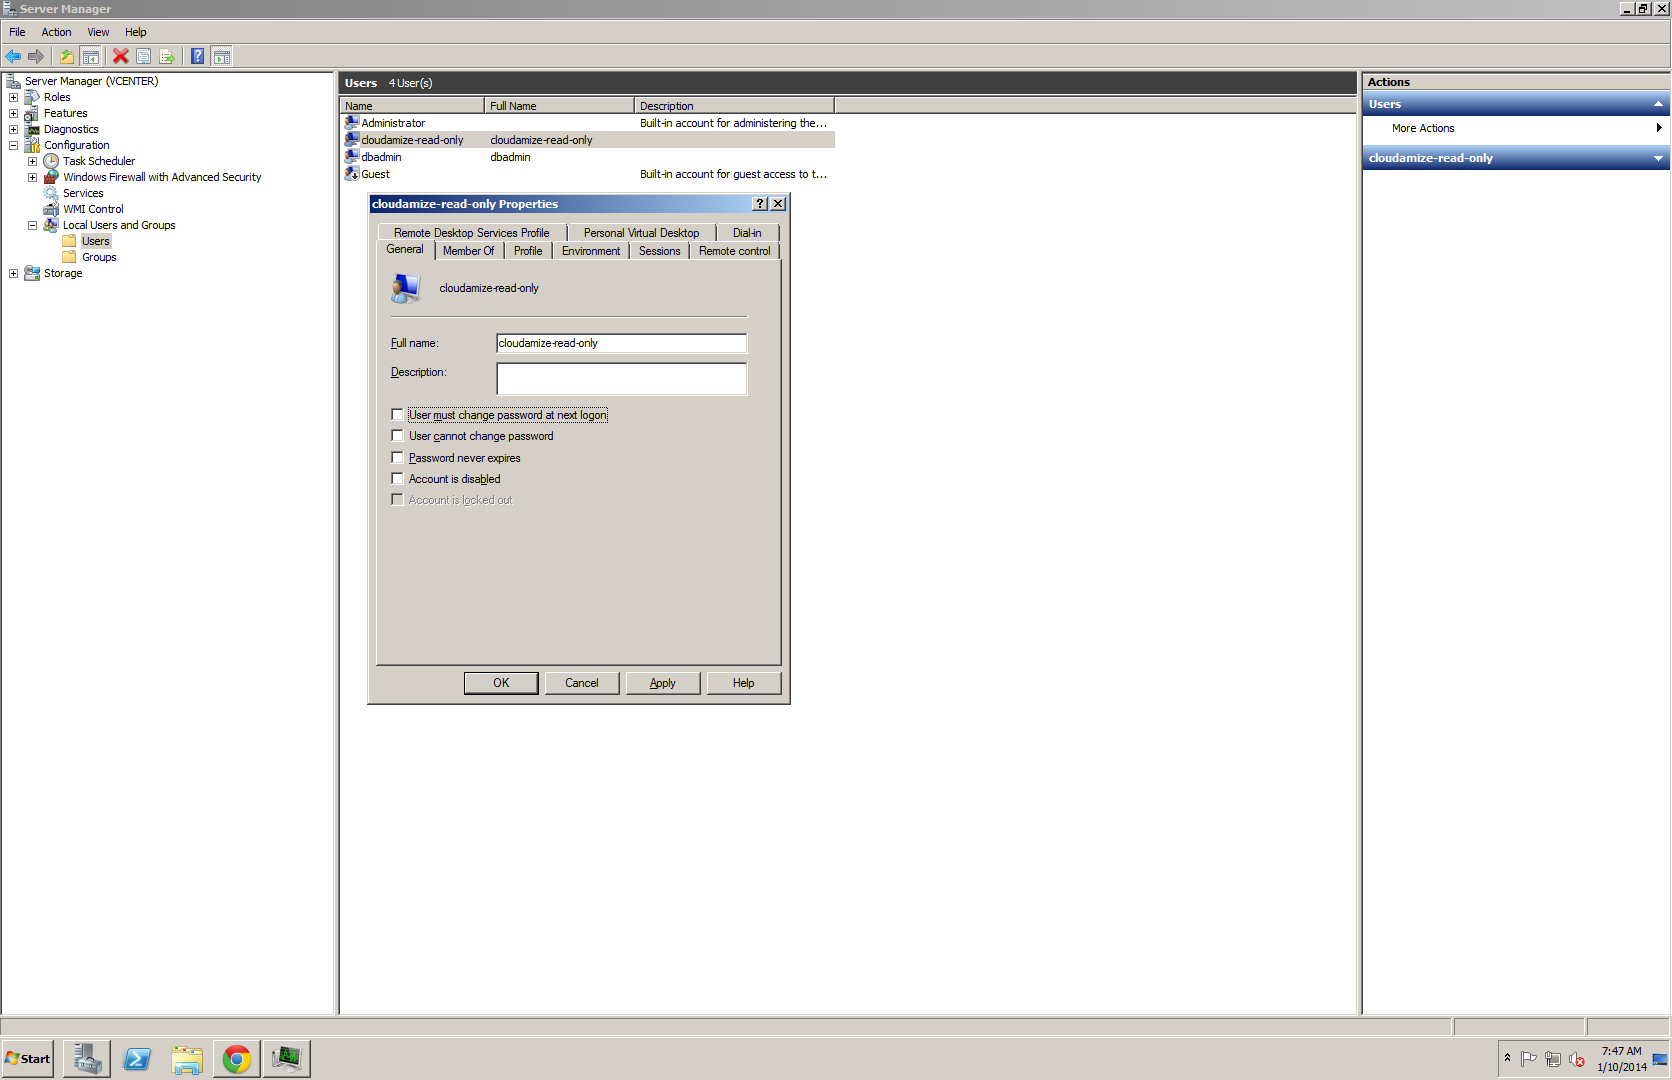
Step 1: Log in to the machine that is hosting your vCenter and create a new user account.
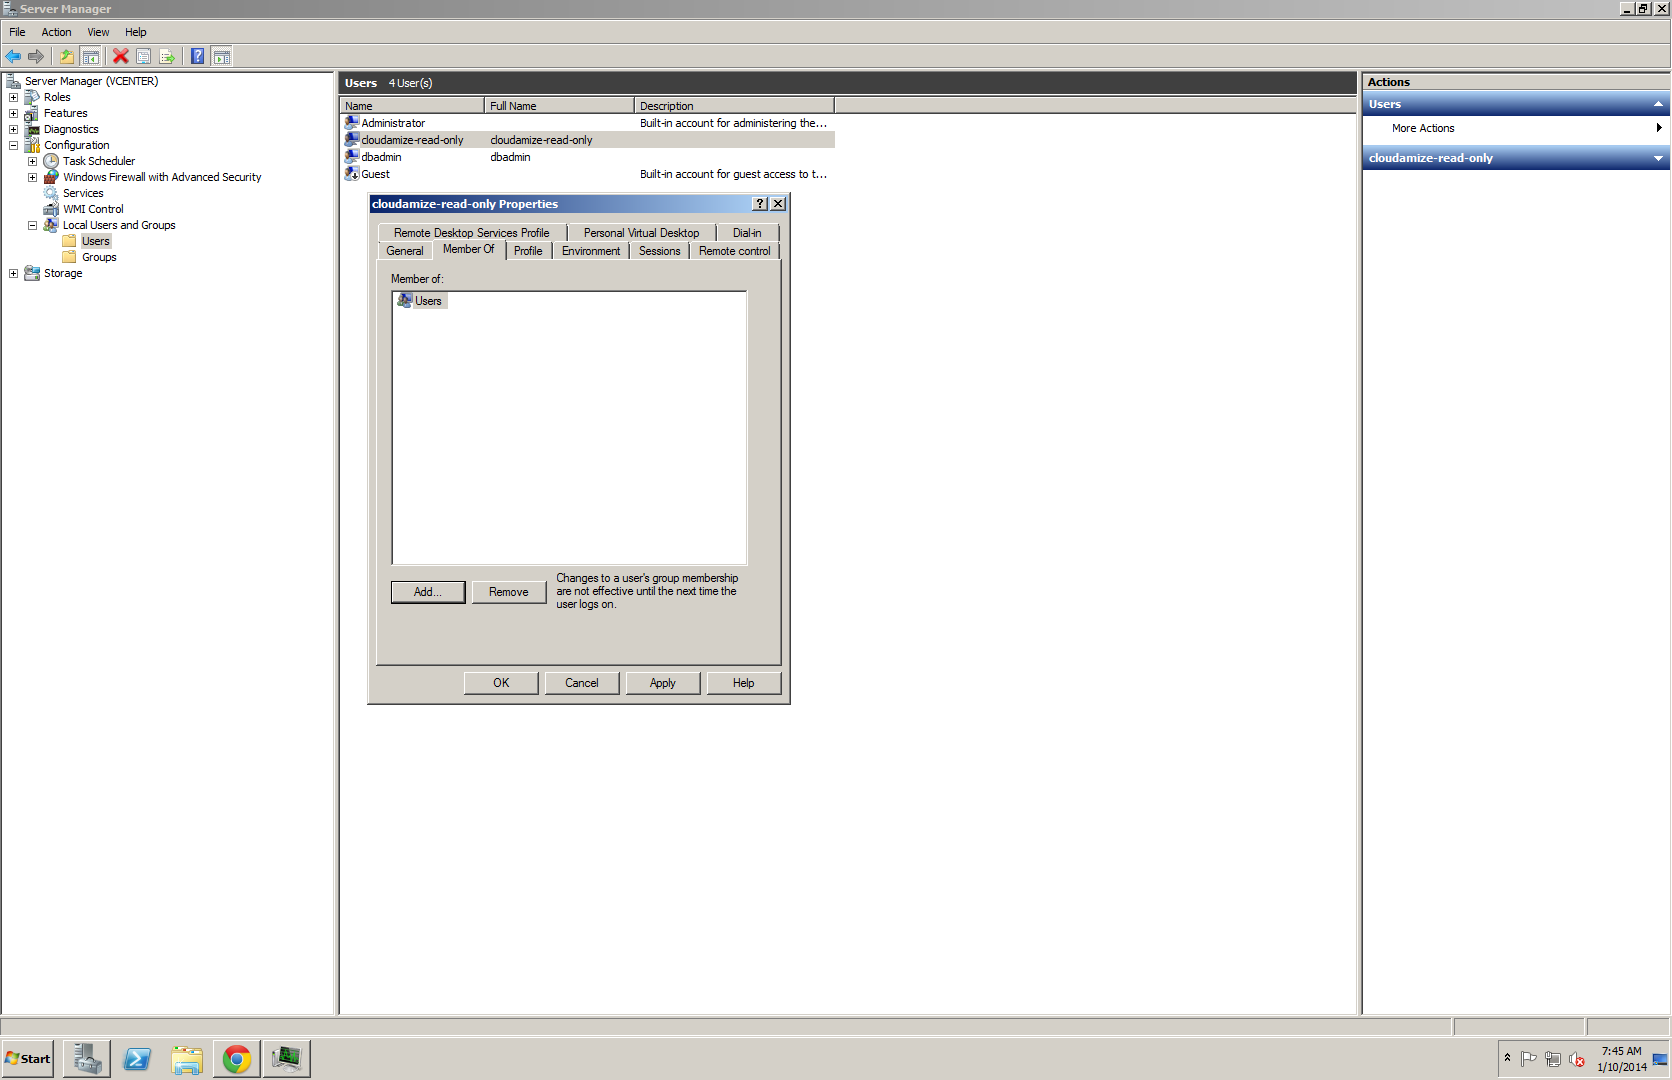
Step 2: Assign the new user to the “Users” group. Click on the “member of” tab and select “Users.”
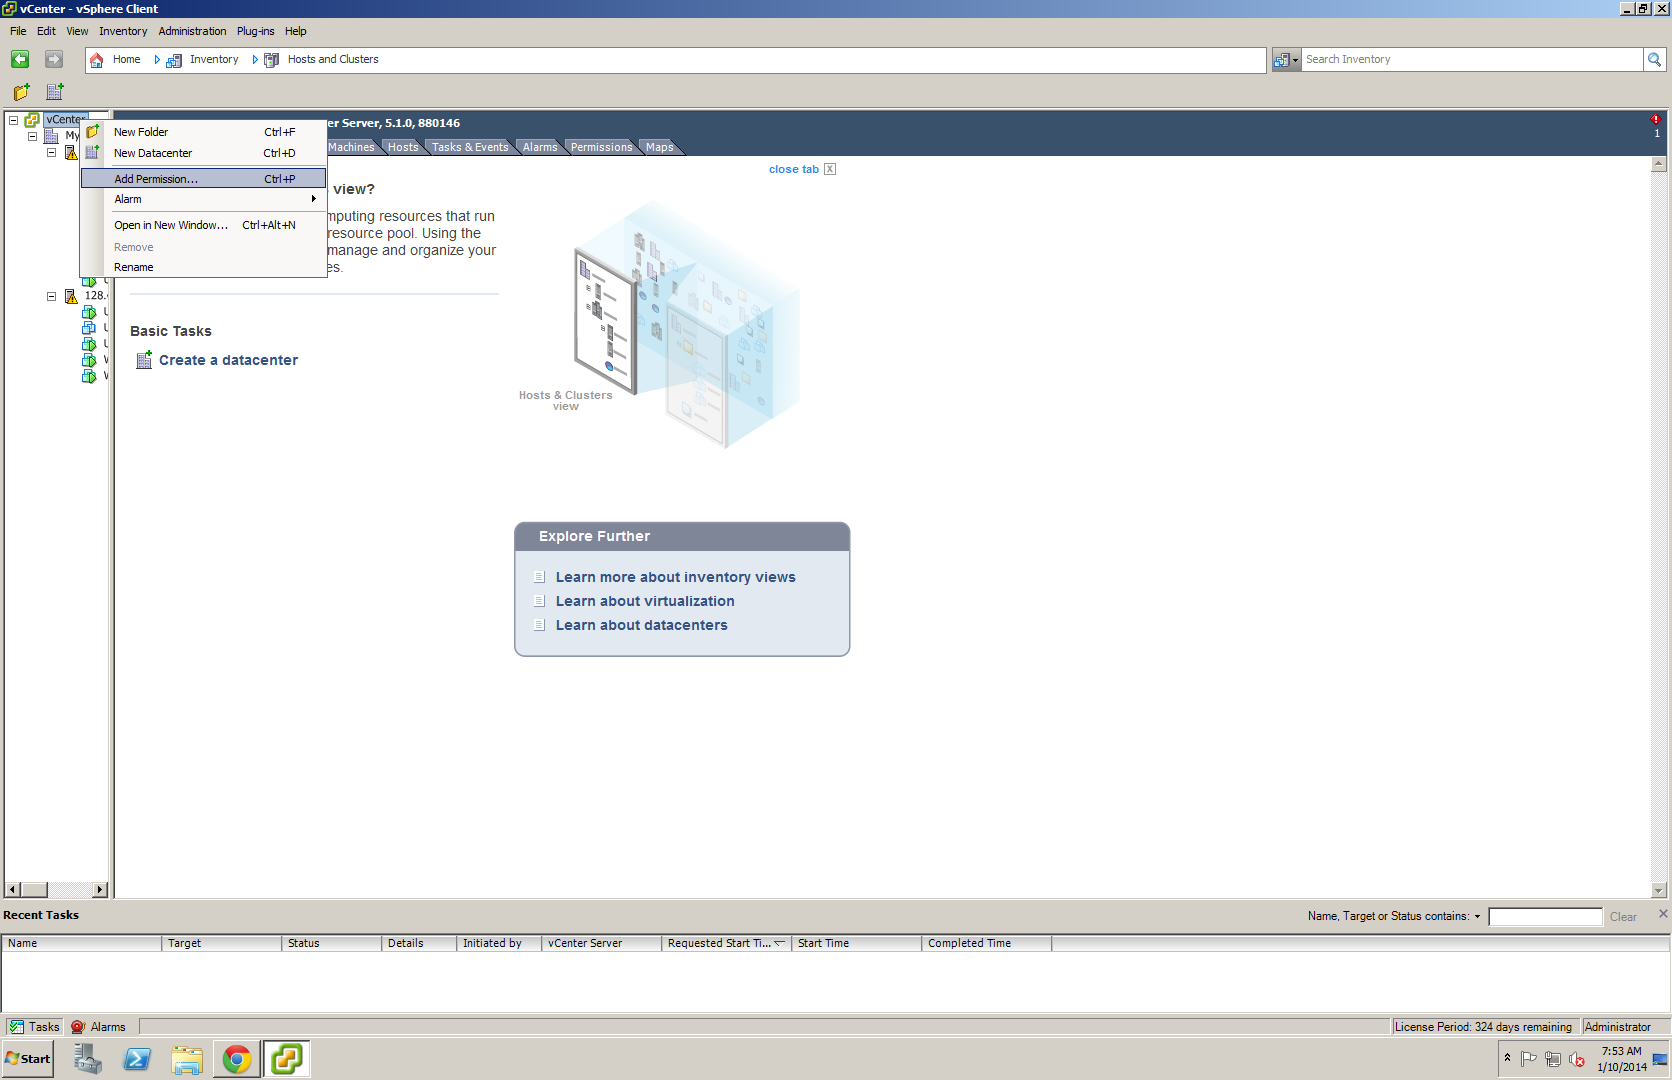
Step 3: Go to your vCenter management dashboard, right-click the vCenter, and select “Add Permission.”
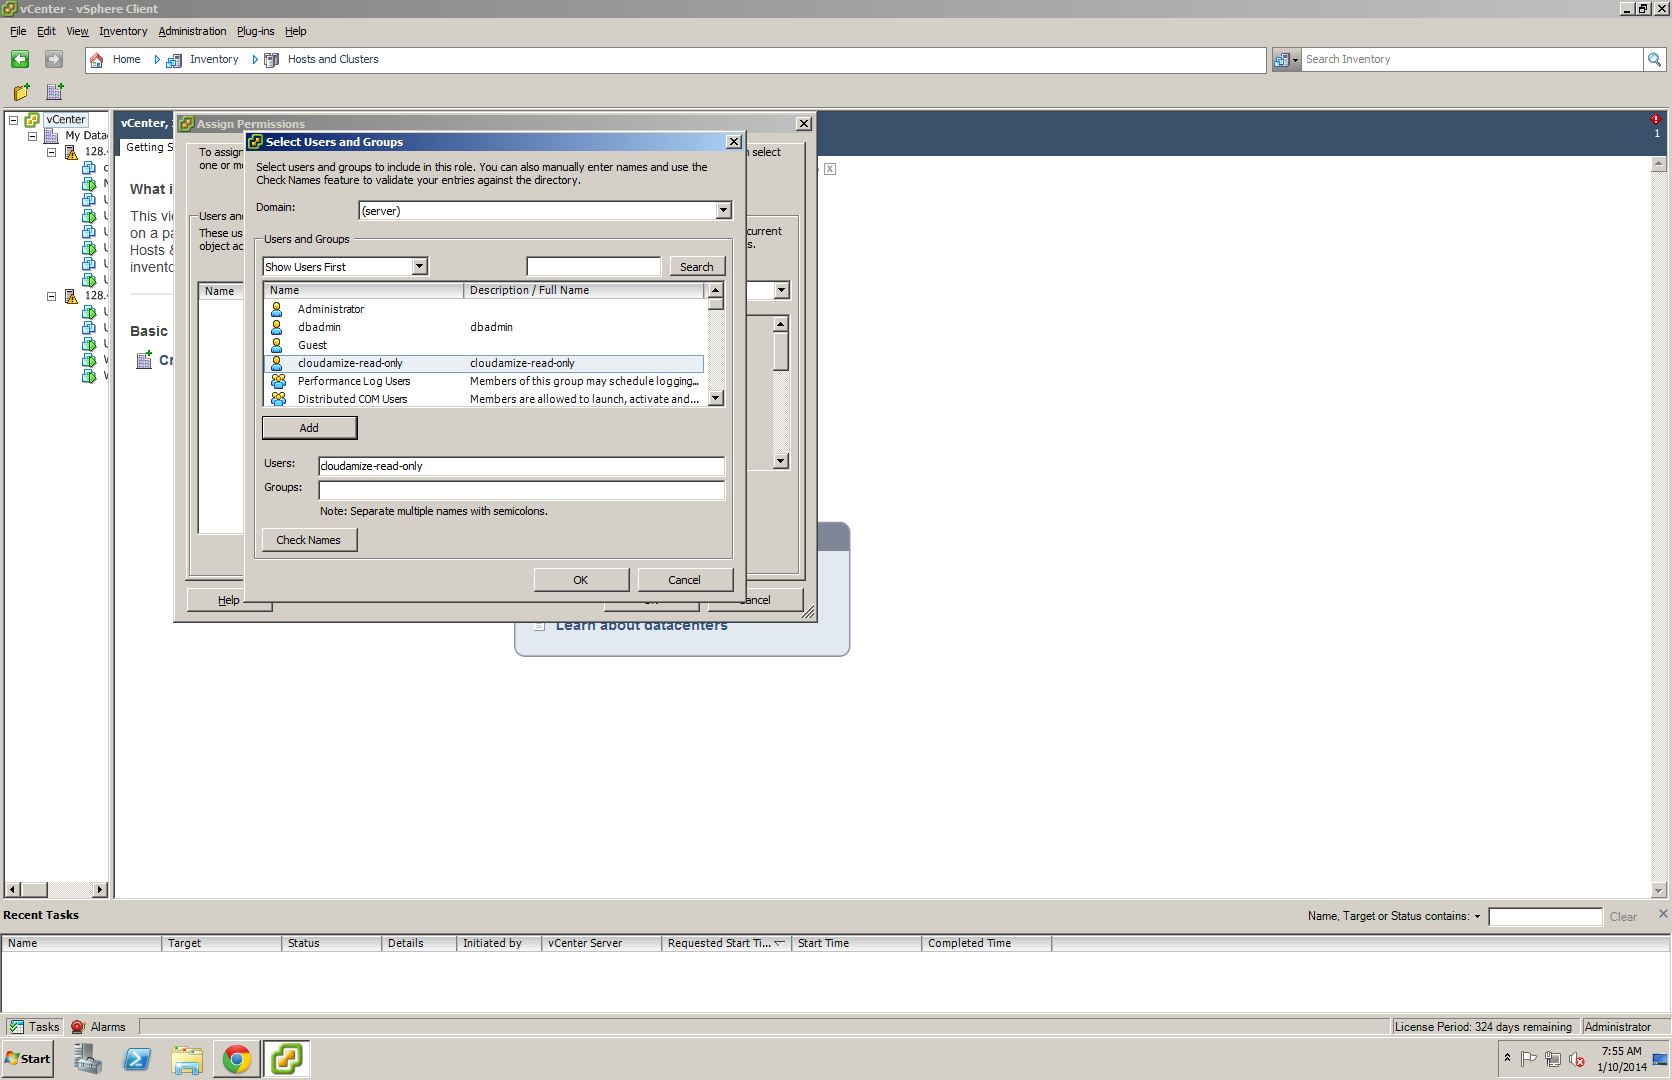
Step 4: Select “Add” from the Assign Permissions screen.
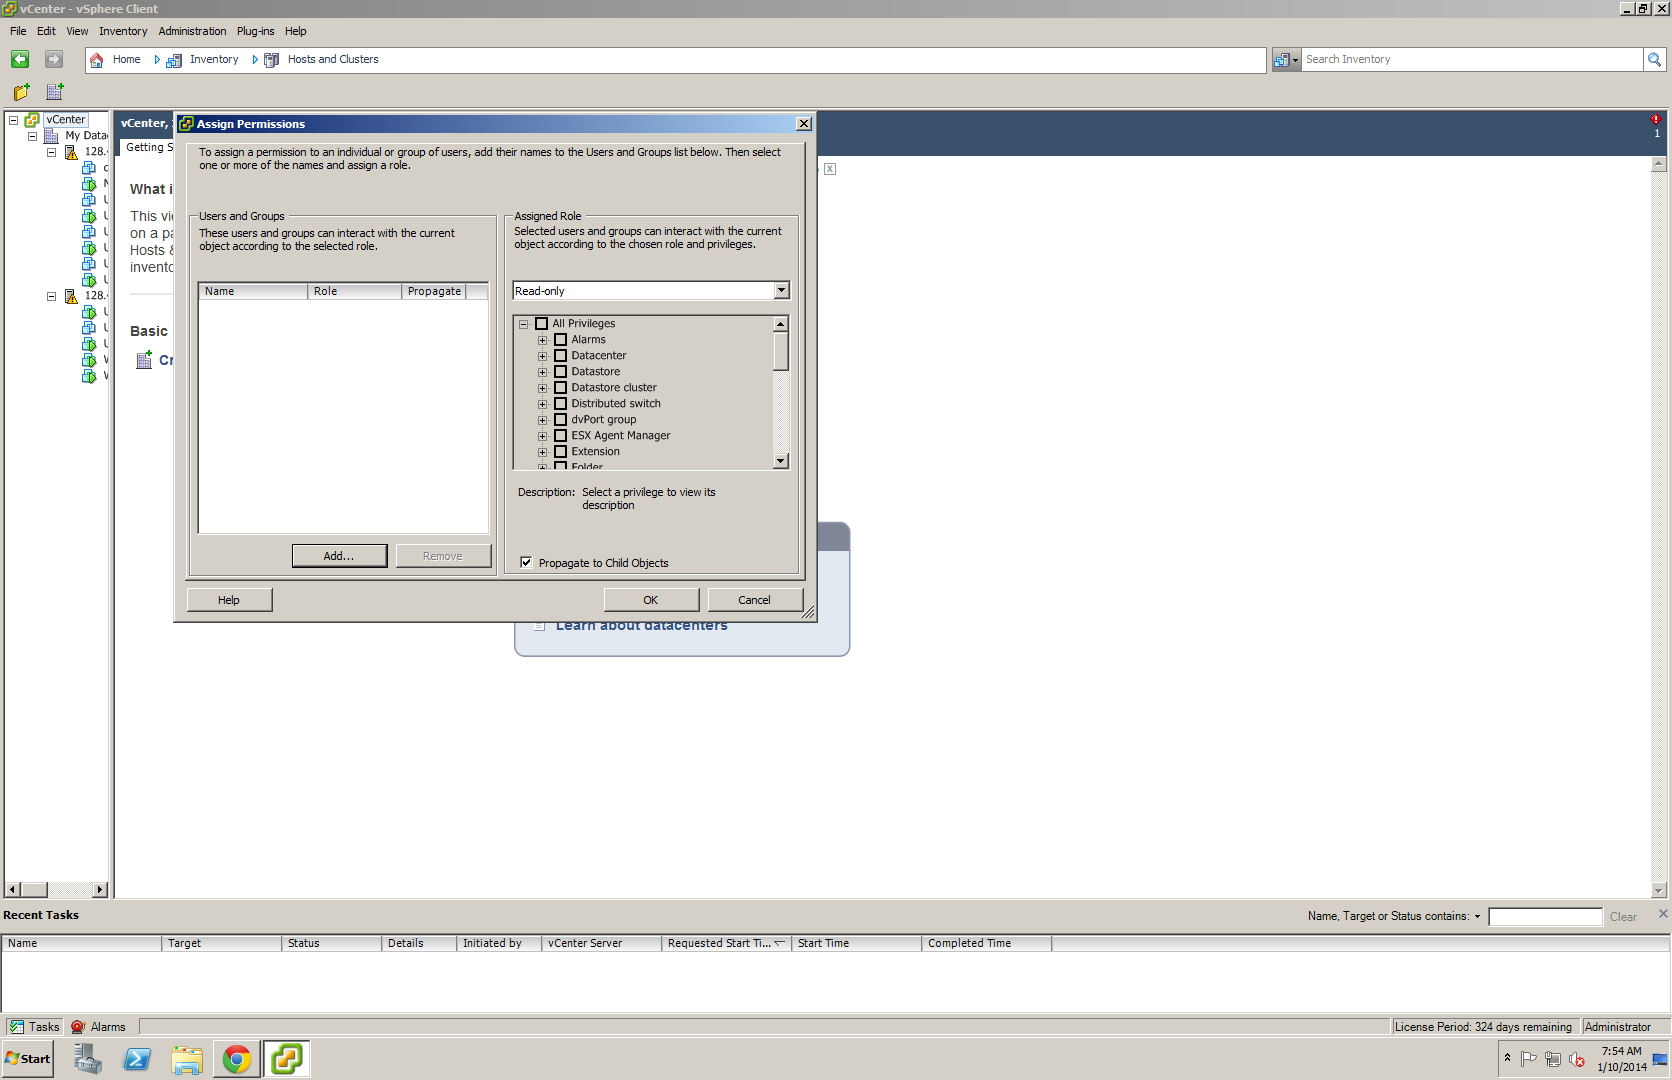
Step 5: From the user and groups list, select the new, read-only user account and click “OK.”
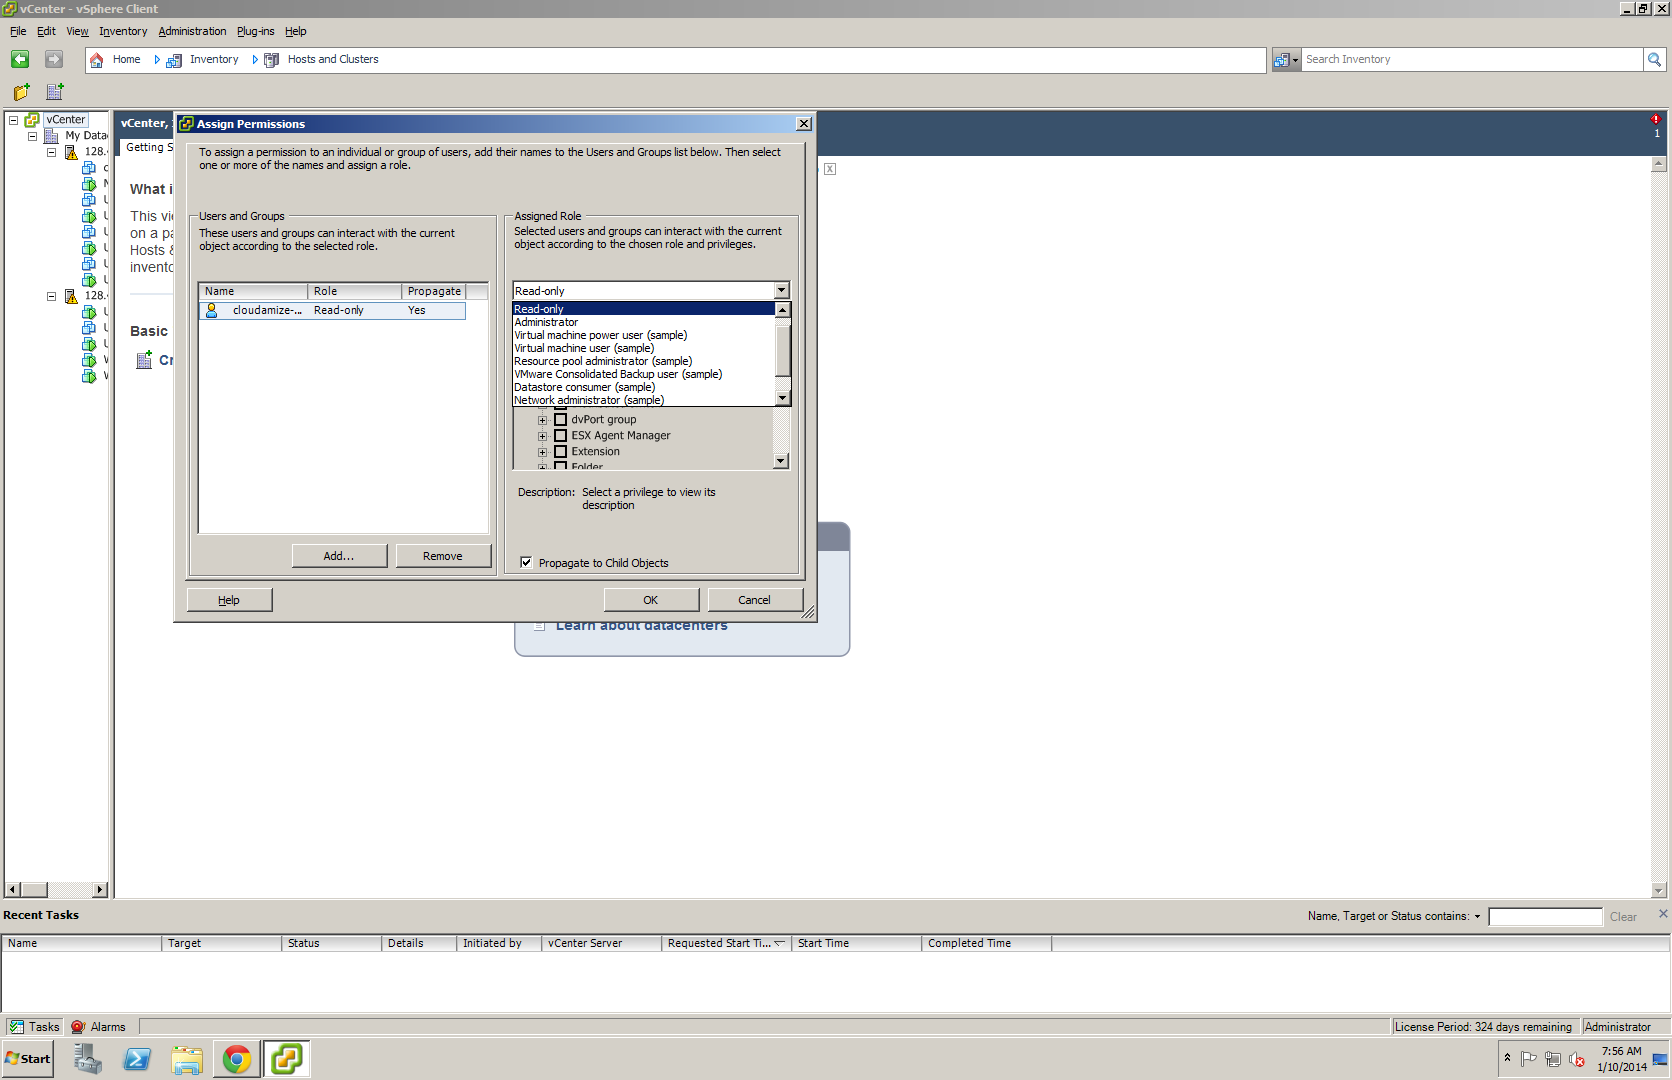
Step 6: Next, under “Assign Role,” select “Read-only’ and click “OK.”
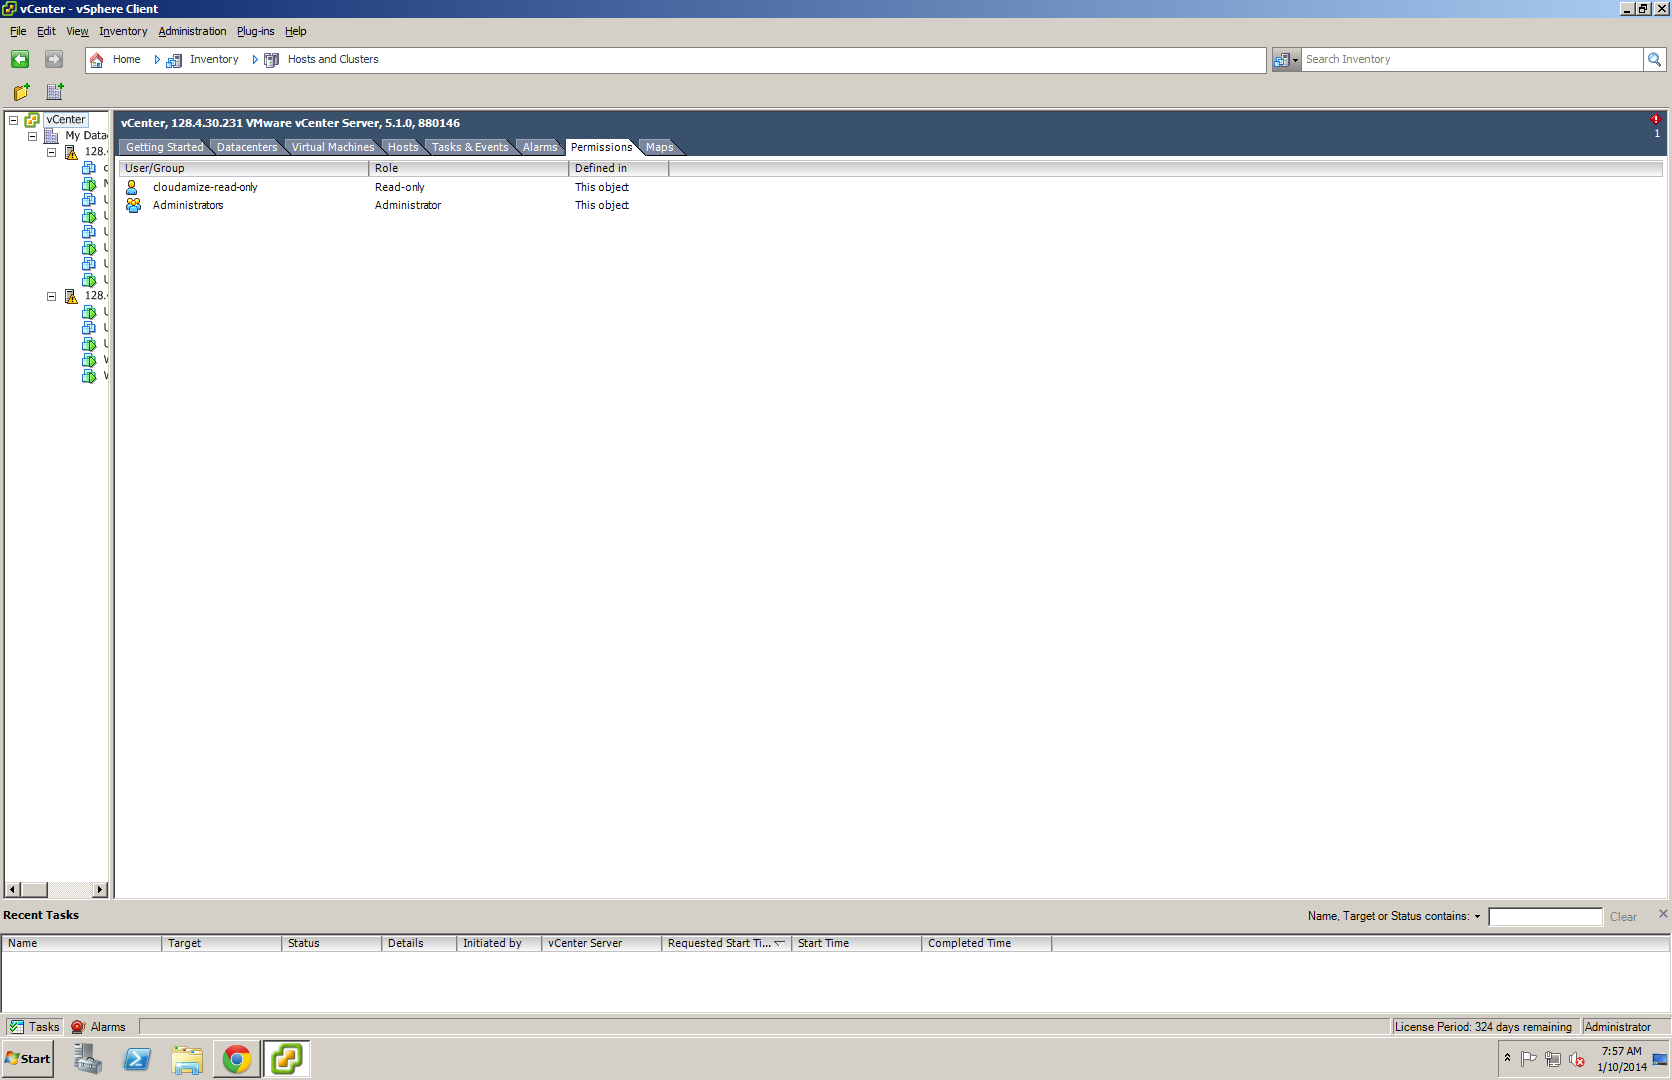
Step 7: To verify the setup was done correctly, select the “Permissions” tab from your vCenter and make sure the role for the newly created account is set to “read-only.”
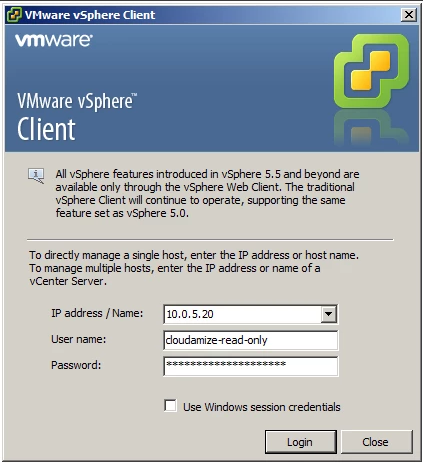
Step 8: Check that your login succeeds with the read-only credentials created.
-
IP address / Names: your vCenter IP address
-
User name: read-only user name
-
Password: read-only user password
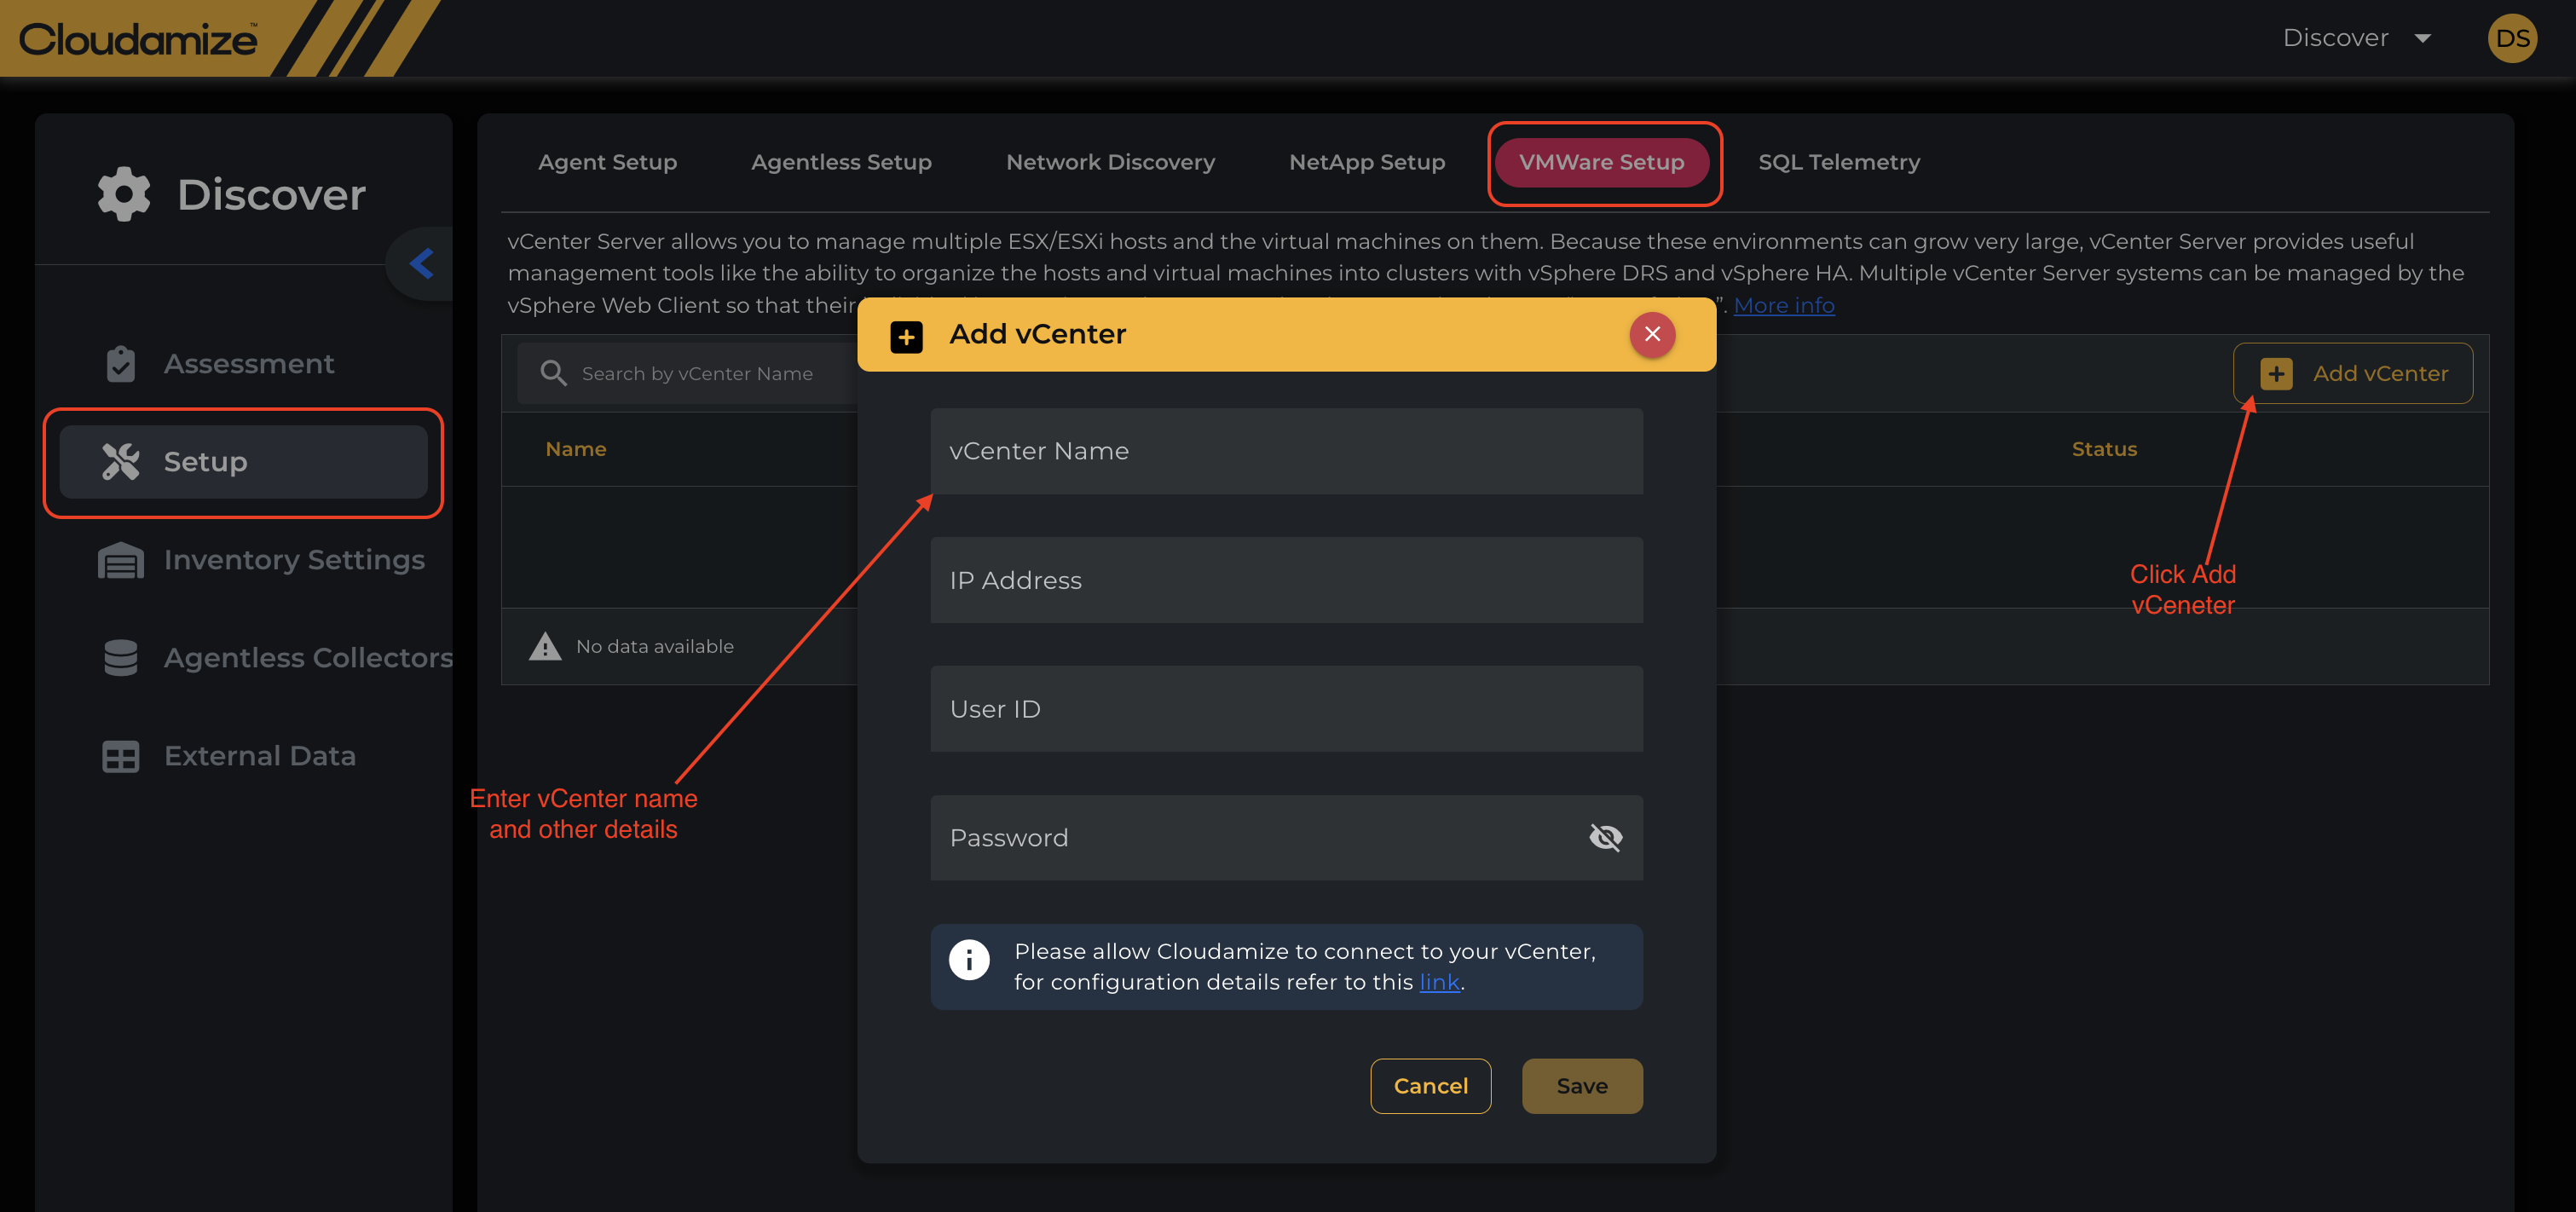
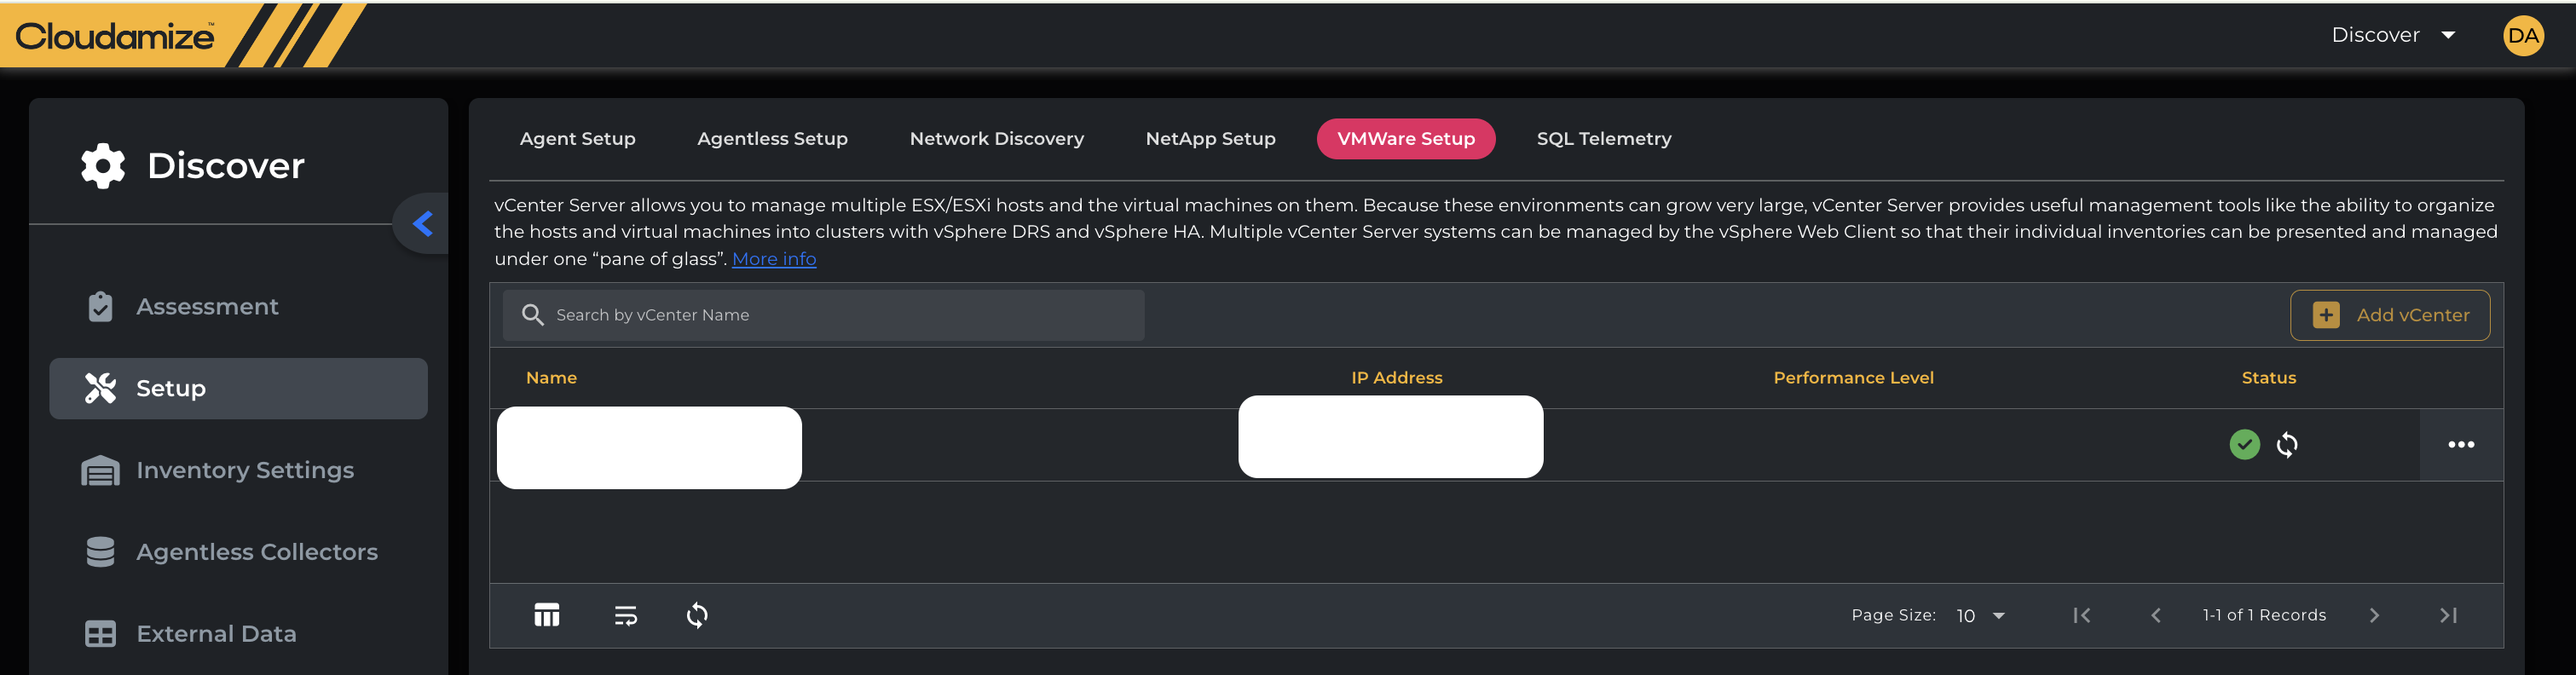
Step 9: Log into the Cloudamize Console (https://console.cloudamize.com/#/login), click on the Discover section under the home screen.
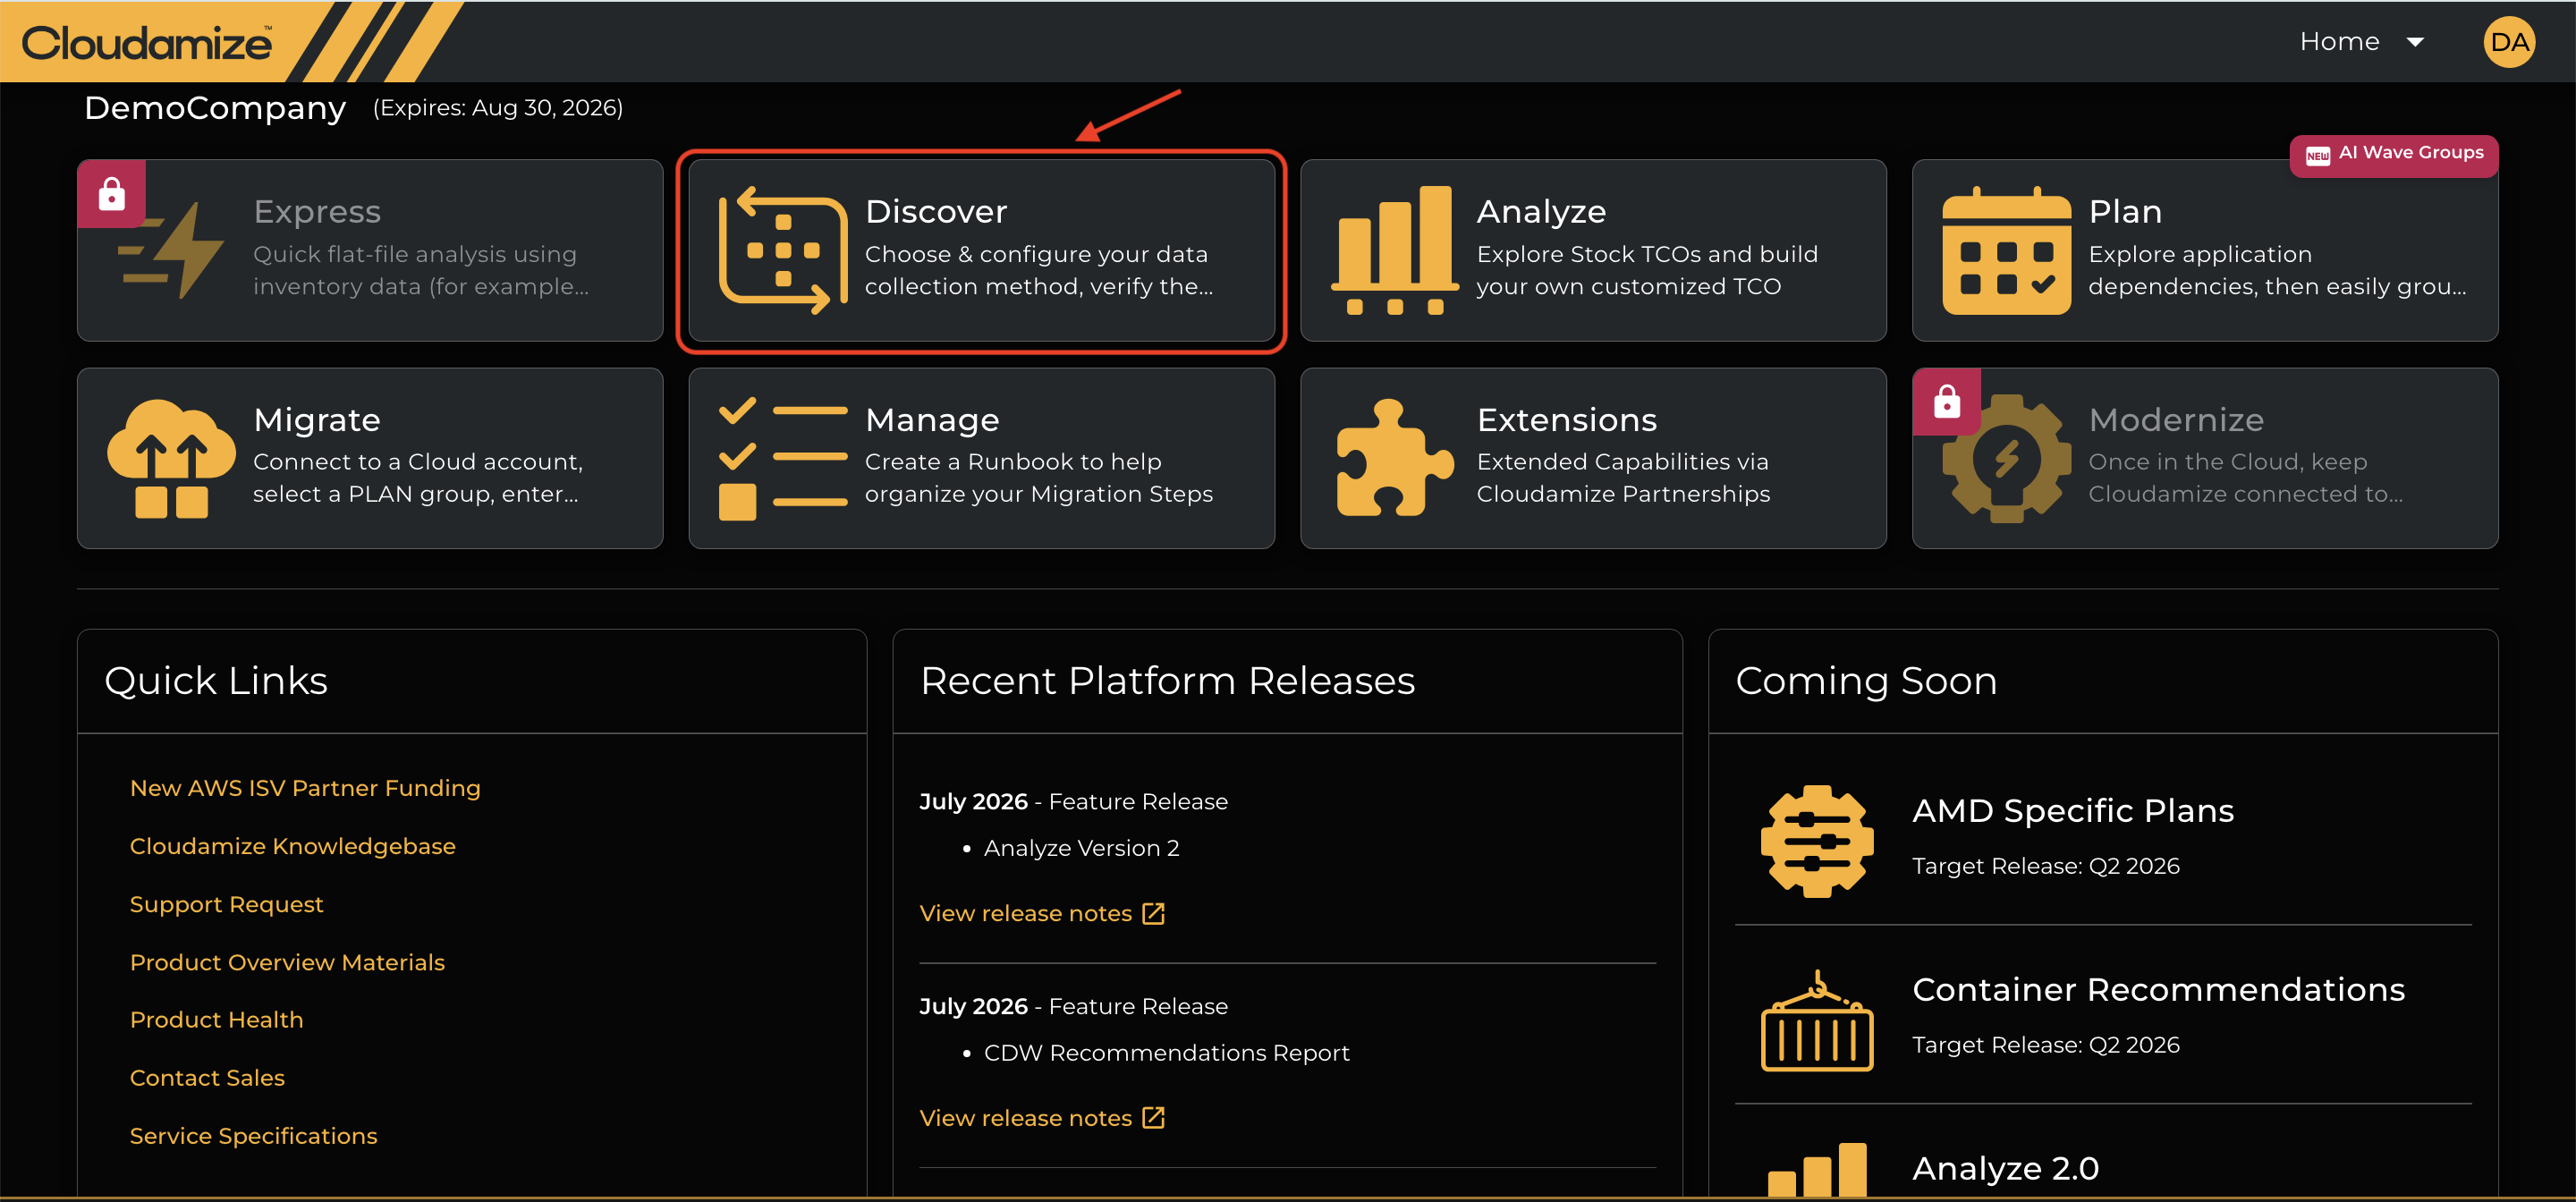
Under Setup, you will see the option “VMware Setup”. Click the button and then click on Add vCenter, then enter a name for the vCenter, the IP address (public or private), and the read-only credentials just created.
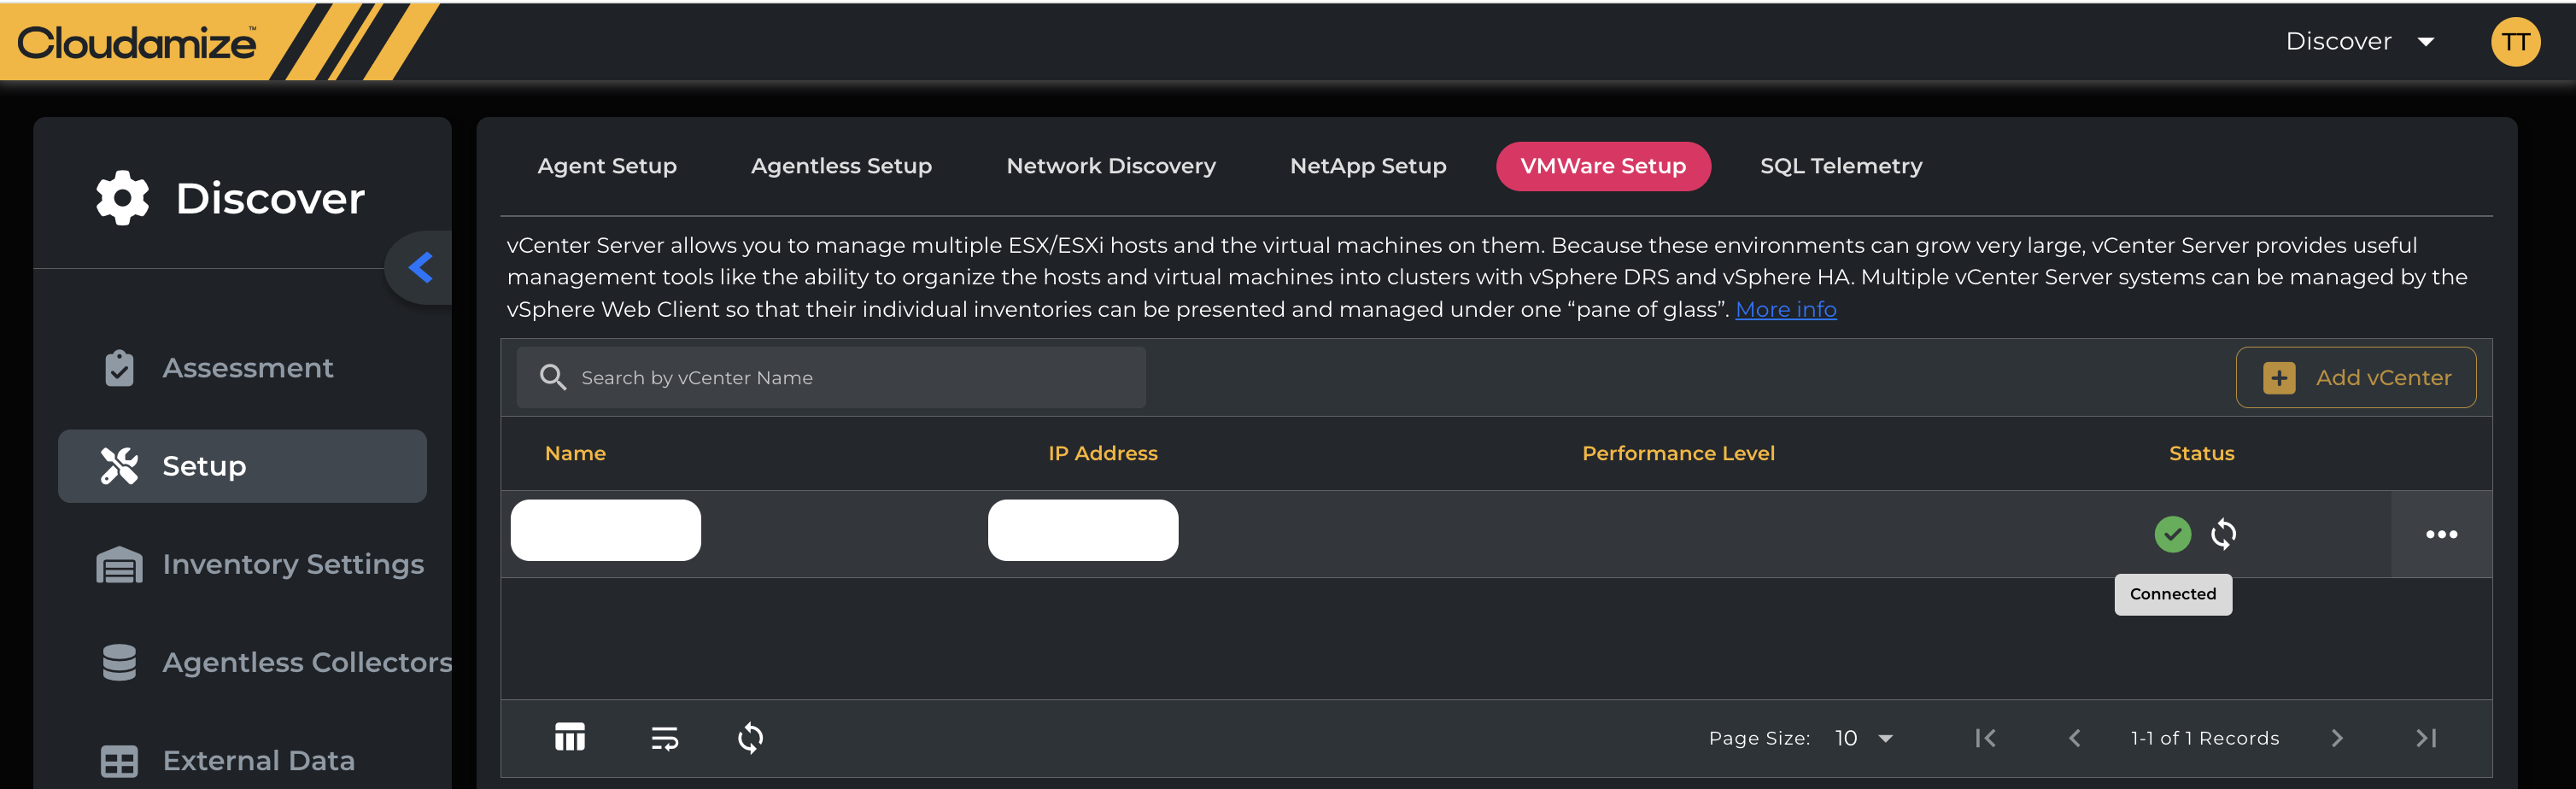
NOTE: If your vCenter has a public IP address, then you will need to make sure TCP port 443 is open outbound to our vCenter data collector at IP address 35.169.181.115 for (us-east-1)US Infrastructure, 3.124.43.33 for (eu-central-1)EU Infrastructure, and 3.28.96.27 for (me-central-1)UAE Infrastructure. Once you have entered and saved your vCenter information, you should see the status as CONNECTED. This concludes the vCenter setup for Cloudamize.
NOTE: If your vCenter has only a private IP address, then you will need to make sure TCP port 443 is open outbound to our vCenter proxy at IP address 52.202.114.20. Then, continue to set up the Cloudamize proxy, which establishes a connection between your vCenter and the Cloudamize vCenter data collector.
Setting Up the Cloudamize Proxy
If your vCenter IP address is a private (e.g. 10.x.x.x or 192.168.x.x) IP address, you will need to install Cloudamize Proxy that will forward data to the Cloudamize server.
How does the proxy work?

The Cloudamize Proxy can be installed either directly on the vCenter machine or on a separate Windows virtual machine. The proxy is unique per vCenter and VM. For example, if you have two vCenters, you will need two unique proxies that will need to get installed on either two Windows VMs or two vCenters.
You will need to allow outbound traffic on port 443 to IP address 52.202.114.20. You will also need to allow traffic on port 443 from the VM or vCenter with the Cloudamize Proxy installed to the vCenter IP address. Alternatively, the Cloudamize vCenter Proxy supports traffic over port 22 and port 80. If you choose to use either of these ports, please be sure to check that your firewall configuration is set correctly.
The Cloudamize Proxy is an auto-start service that has no user interface or user inputs from the command line. You can check the status of the proxy from services.msc or the VMware tab in the Cloudamize application.
The Cloudamize Proxy is a bridge between the client vCenter and our vCenter Data Collector. Therefore, if the proxy is stopped, there is no connection, and data is not being collected, however, the vCenter data collector will send data to the vCenter Data Collector up to one hour after it is collected from the client vCenter.
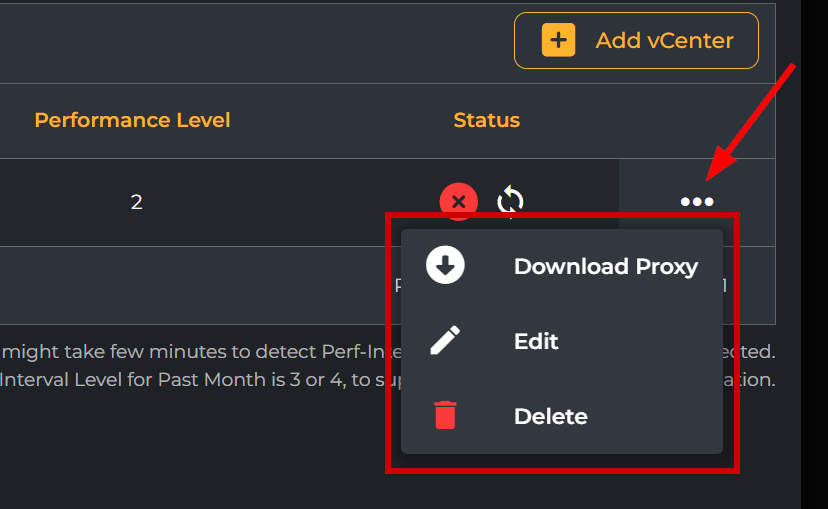
Step 1: You can download the Cloudamize Proxy after entering your private IP address. Click the three dots this will provide you with the option to download the Cloudamize proxy.
Step 2: Once downloaded, run the installer as an administrator and then click “Next.”

Step 3: Read and accept the terms of the End-User License Agreement and click “Next”.
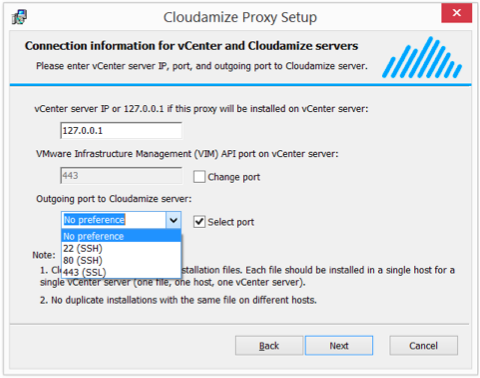
Step 4: Enter your vCenter IP address and port.
Select the Outgoing Port. Cloudamize recommends "No Preference", as this will search 443, 80 and 22 to determine the best port to use.
Then click “Next.”
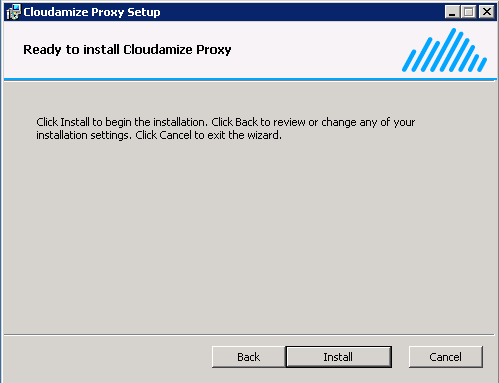
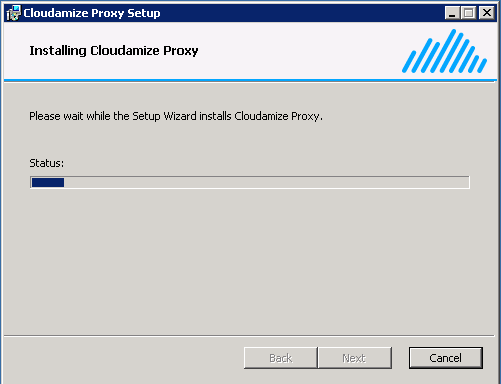
Step 5: Click “Install” to begin the installation.
Step 6: Your installation is complete.
Step 7: Following a successful installation, “CONNECTED” will appear on the following screen. Additional vCenters can be added by clicking “Add vCenter” and following the steps above.
How It Works
The Cloudamize Proxy is an auto-start service that has no user interface or user inputs from the command line. You can check the status of the proxy from Services.msc or the VMware tab in the Cloudamize application.
If the Cloudamize Proxy service goes down for any reason, no data will be uploaded. When the service is resumed, system-level data collected over the previous hour will be delivered, and normal data collection will resume.
Note: If the agents are installed on vCenter machines, the linking process in the Cloudamize console can take up to 24 hours. We recommend starting the assessment rather than waiting for the linking to complete.
If you have any queries, please get in touch with the helpdesk via our Helpdesk Portal or by email at helpdesk@cloudamize.com.