

Overview
Designer 2.0 Lite allows AWS customers to define their own named sets of sizing, architecture, and pricing preferences directly within the Cloudamize Classic UI.
Previously, assessments generated standard Cloudamize presets and OLA options (OLA 1–10). Applying alternative assumptions, such as excluding burstable instances, adding storage headroom, switching to RDS, or modifying Savings Plans, required building plans in the legacy Designer. Designer 2.0 Lite streamlines this process, enabling users to generate right-sizing recommendations that directly reflect their target AWS procurement and modernization strategies.
Key Capabilities
-
First-Class Assessment Integration: AWS customers define their initial design directly during the Start Assessment wizard.
-
Always Editable: Customers can create, update, or re-run designs at any time before, during, or after assessment processing.
-
Default Analysis View: Once built, the Analyze page automatically opens on the customer’s default design (defaults to OLA 2 while pending).
Where to Find Designer 2.0 Lite
1. Assessment Page (Custom Design Card)
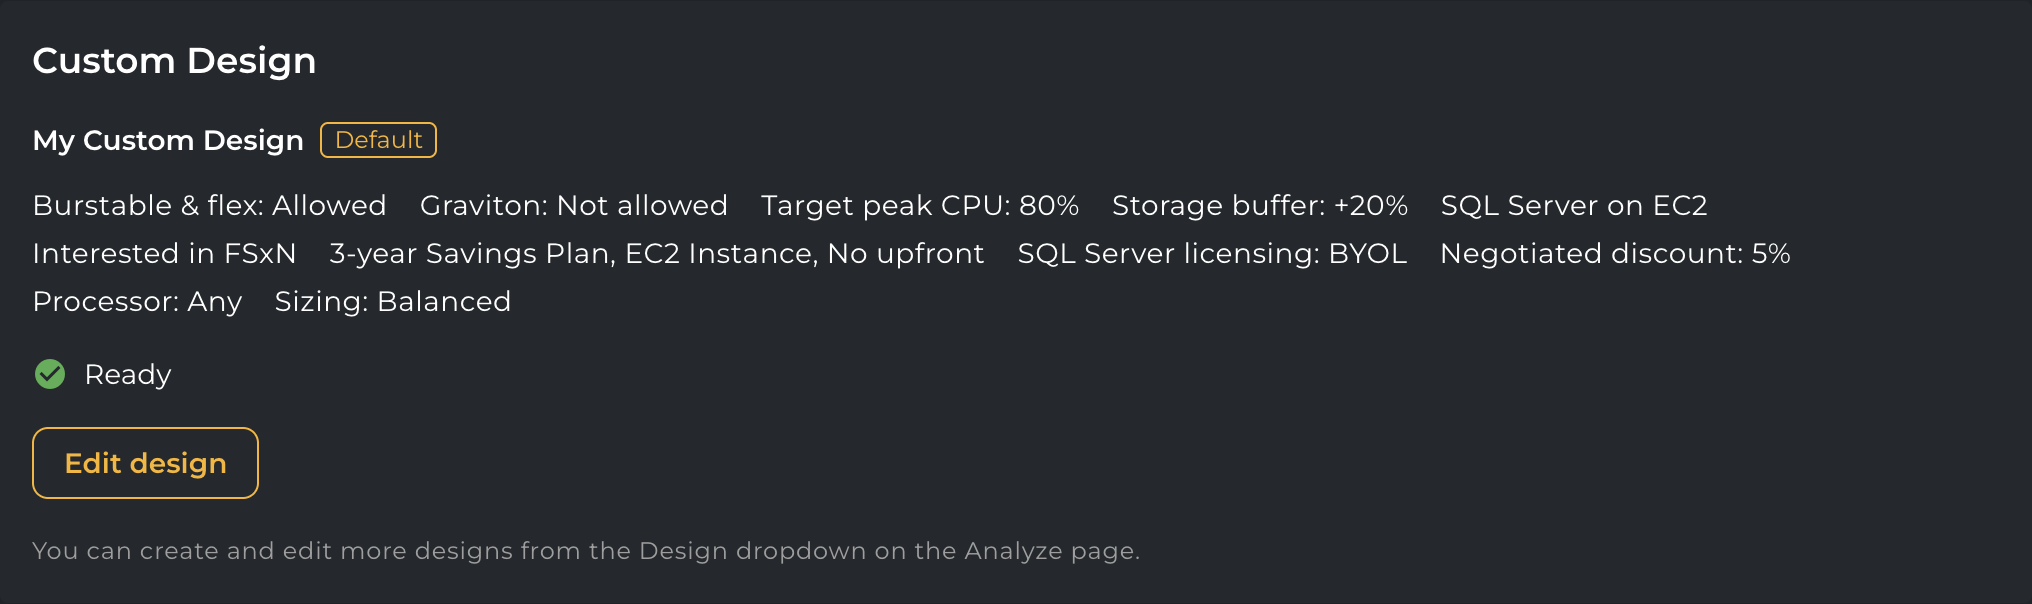
The Assessment overview displays a dedicated Custom Design status card showing:
-
Current Default Design Name
-
Build Status:
-
Ready: The design has finished building, and its results are available in Analyze (the assessment itself may still be running). -
Building: Plan processing is underway. -
Build failed: Build could not complete; displays aTry againaction.
-
-
Quick Actions: Use Edit design to modify settings.
Note: Customers who started their assessment before this release will see Create your design instead.
Even after the assessment has started, you can still create a design. On the Assessment tab, find the Custom Design card and click Create your design (or Edit design once a design exists).
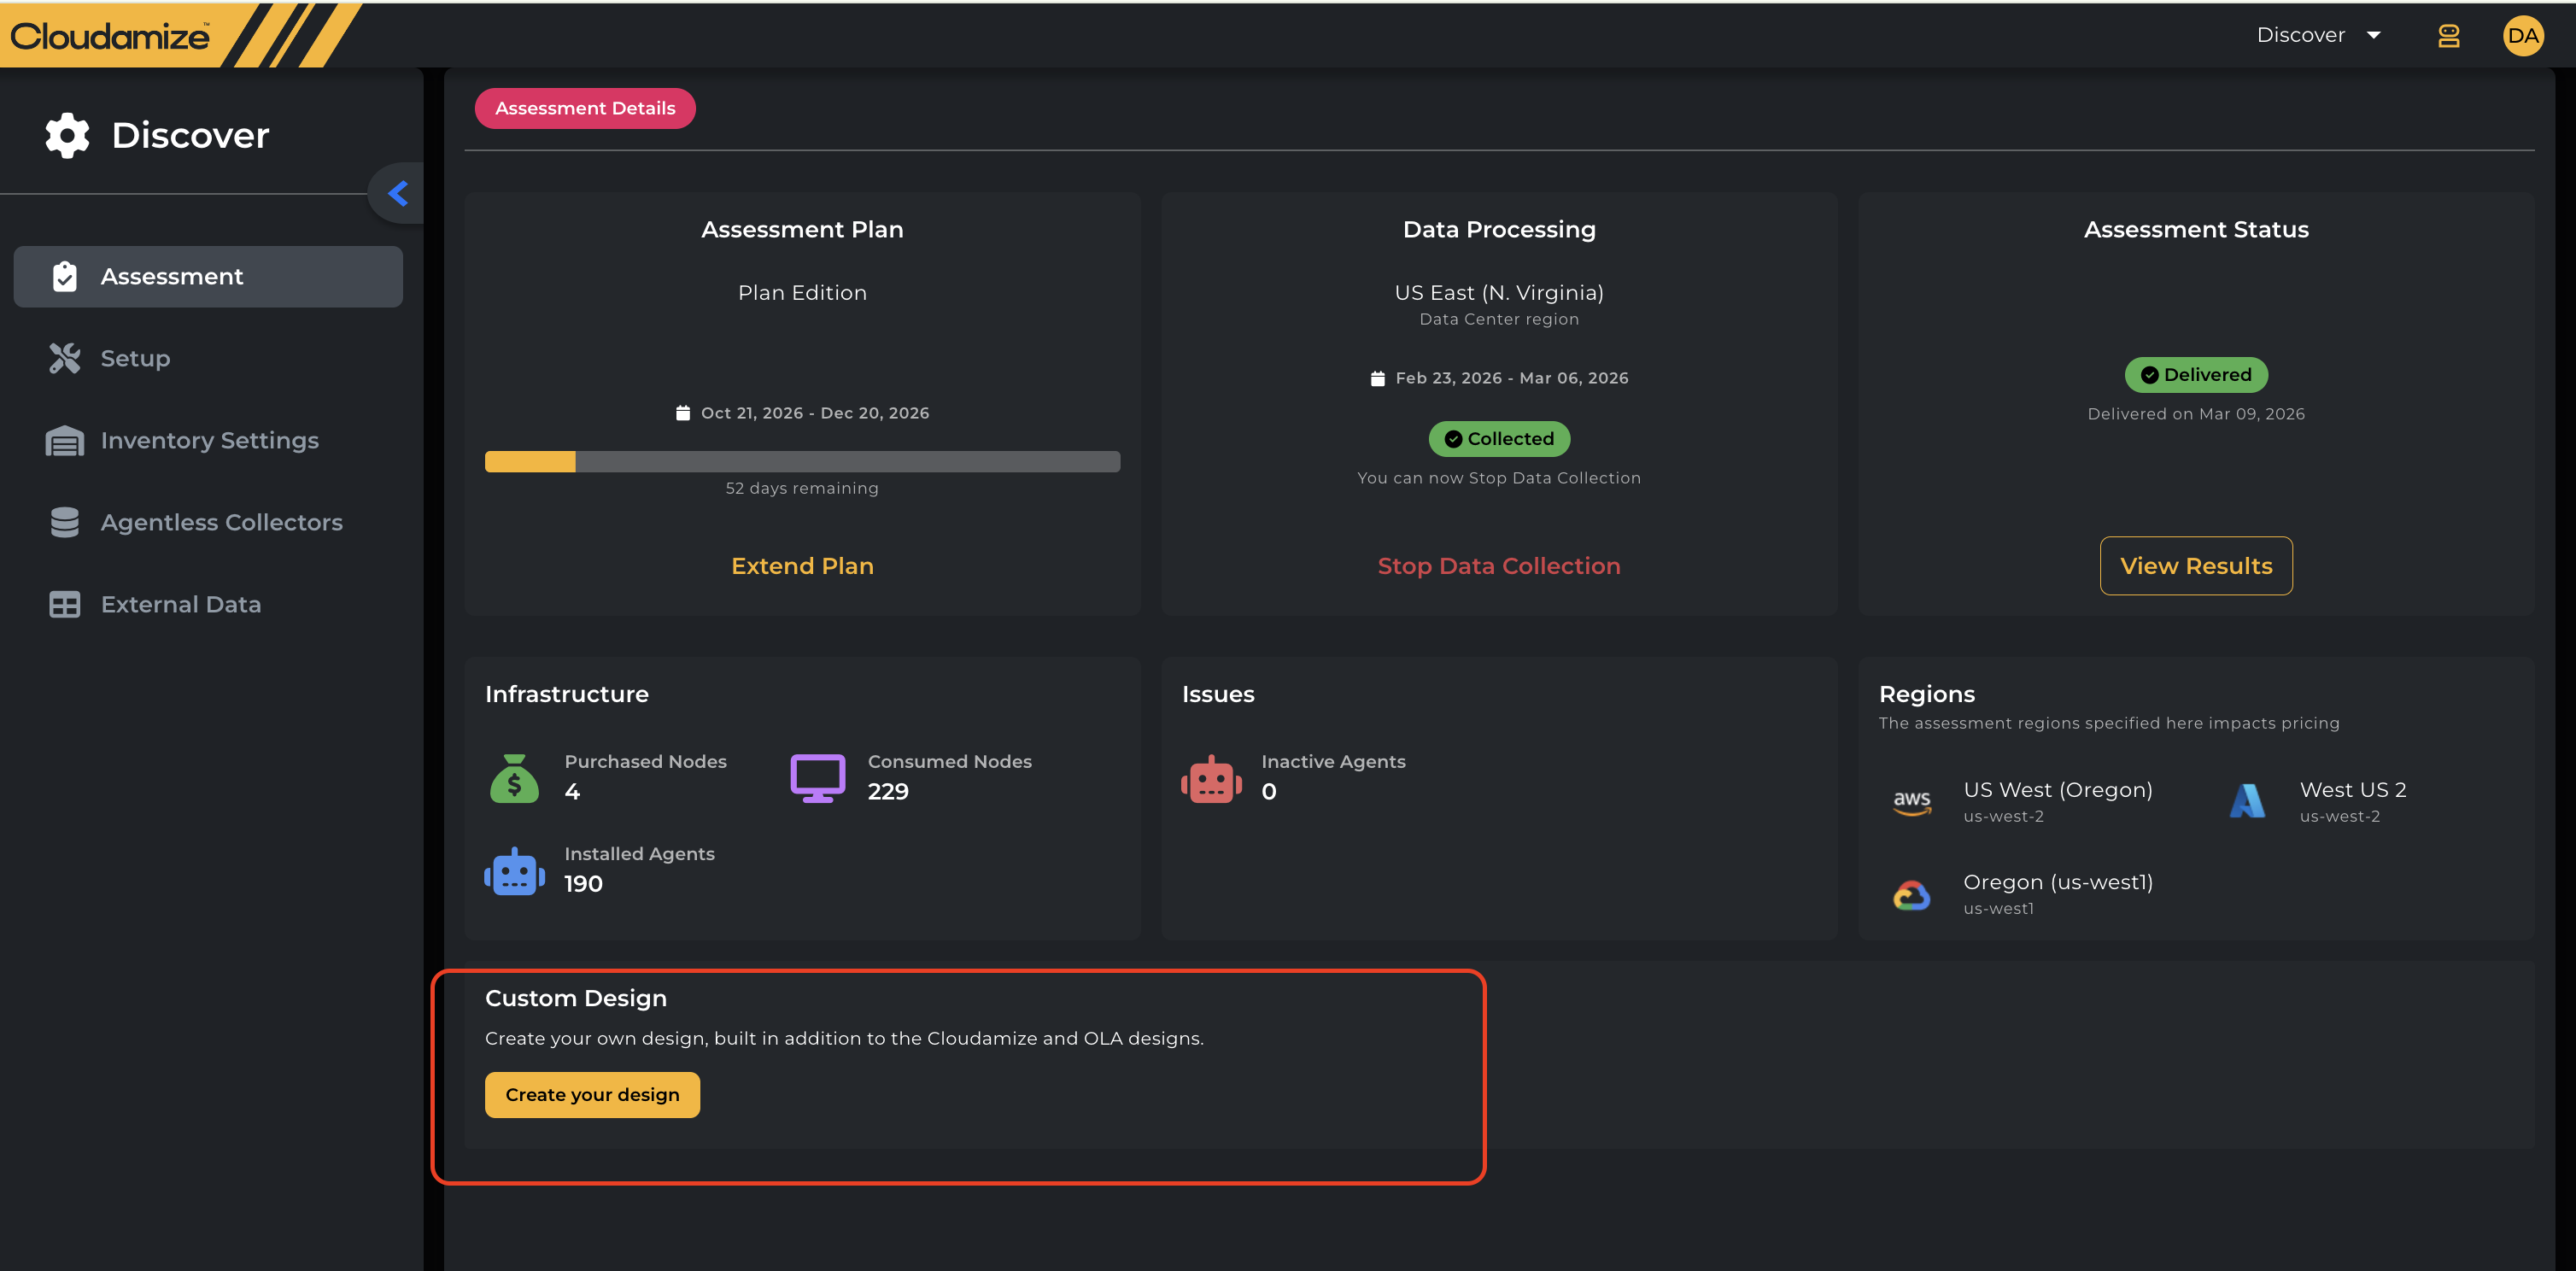
-
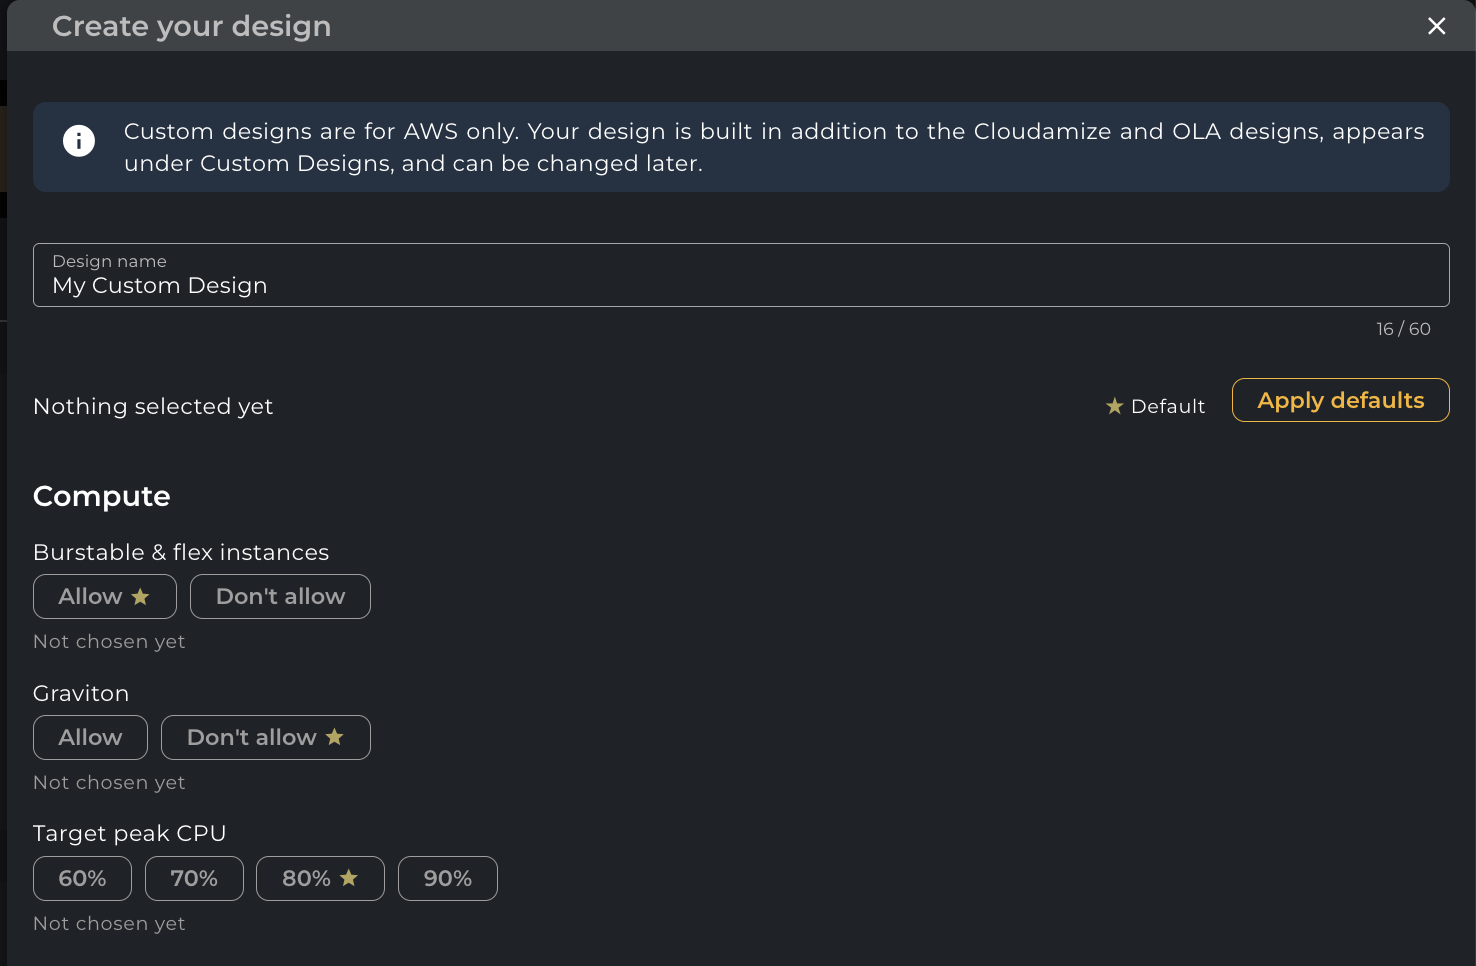
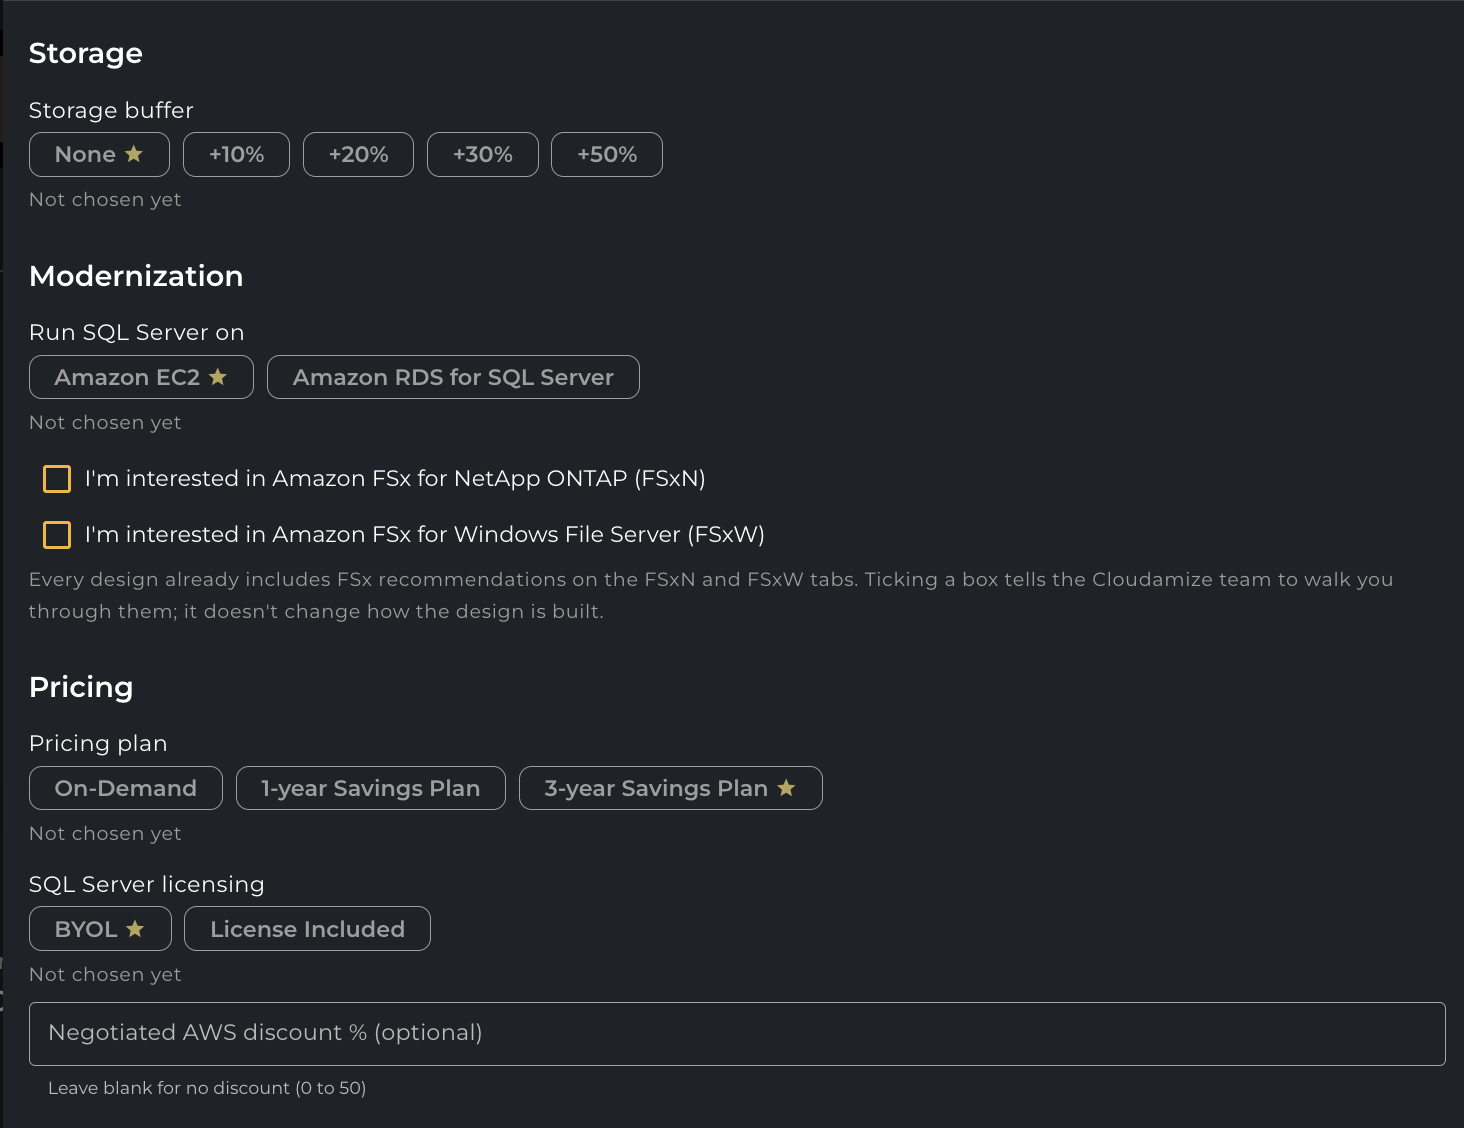
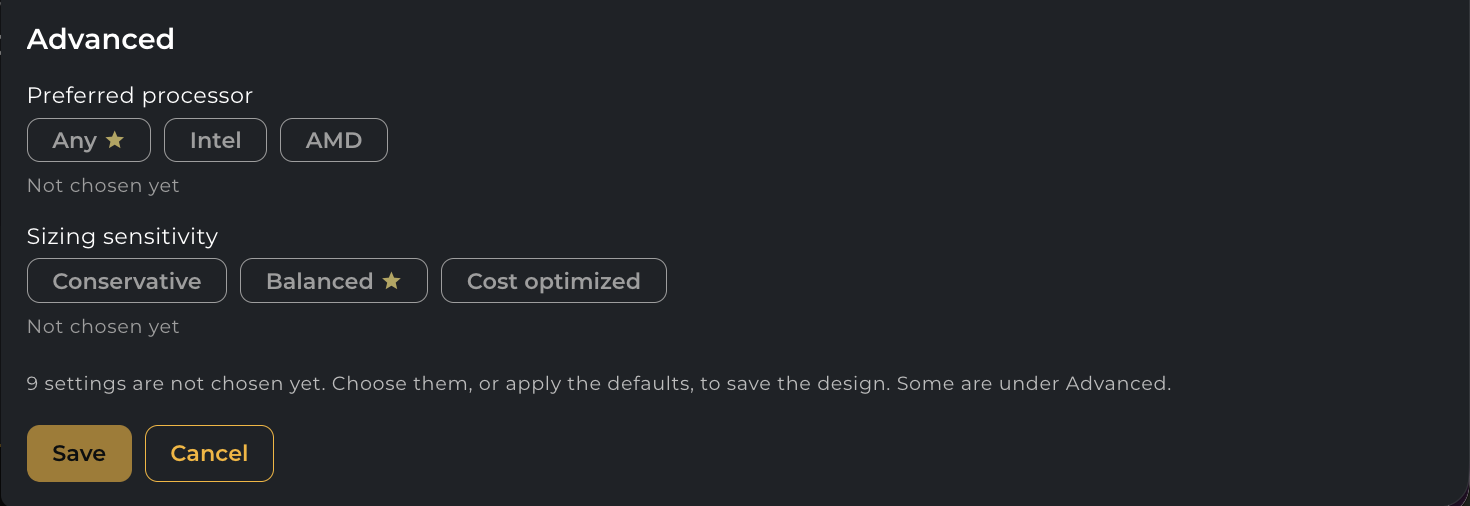
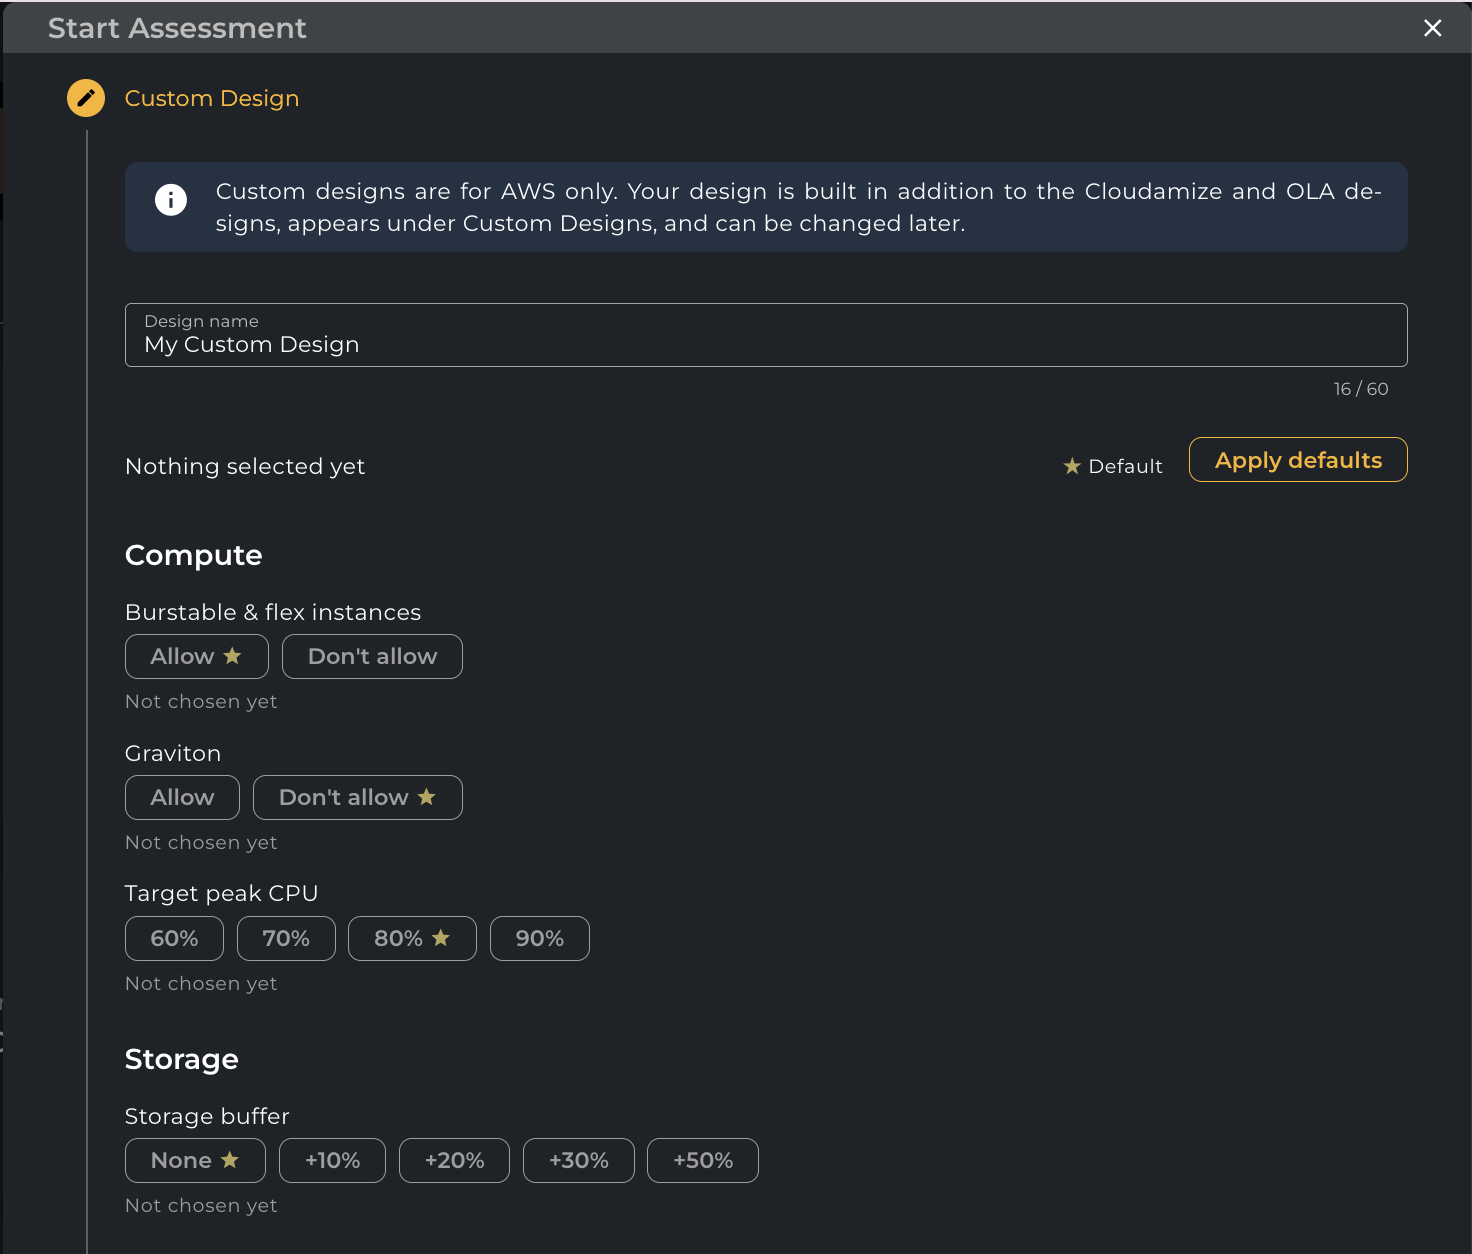
Clicking Create your design opens the design form:
-
Once the design is saved, the card shows its settings and an Edit design button:
2. Design Dropdown (Analyze Page)
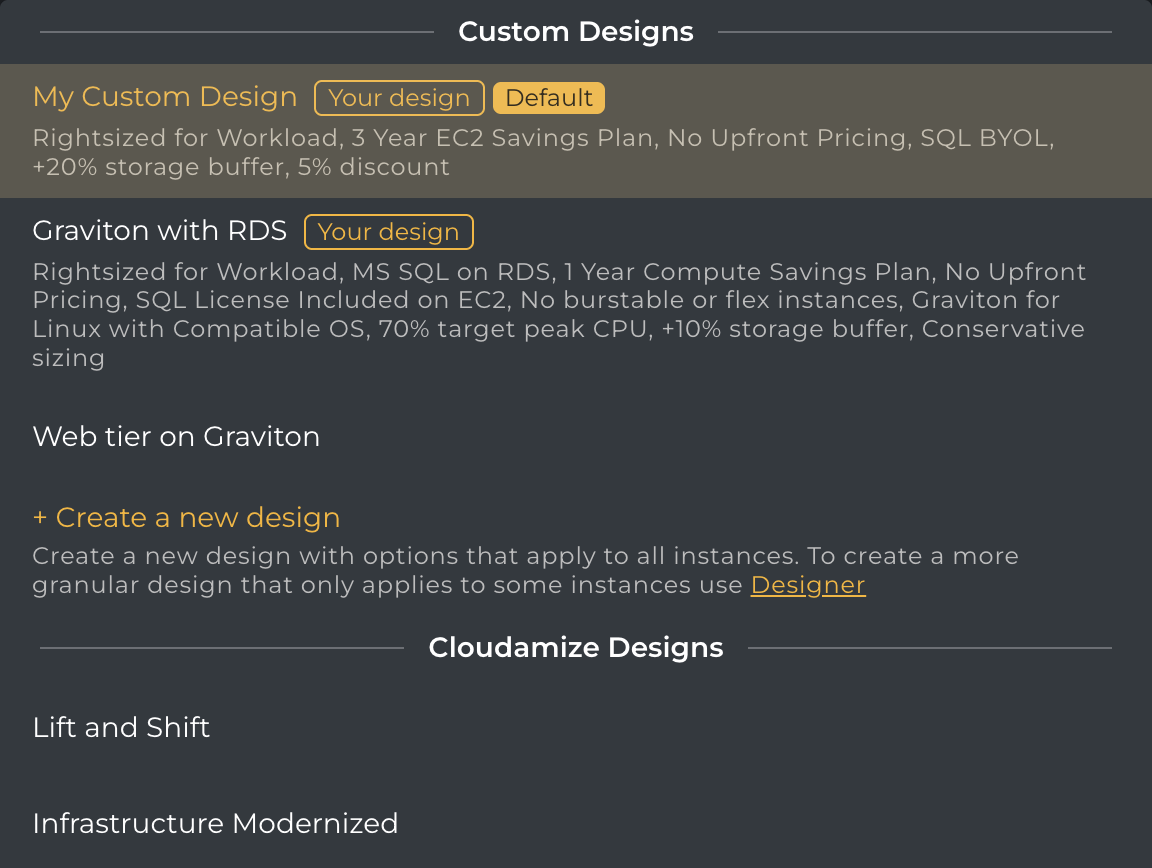
Your Designer 2.0 Lite designs appear at the top of the Design selector:
-
Your Designs: User-created designs (tagged
Your design; initial plan taggedDefault). -
Designer Designs: Complex or custom-filtered plans from legacy Designer.
-
+ Create a new design: Opens the design configuration form. -
Standard Designs: Standard Cloudamize templates and OLA 1–10.
Start Assessment Wizard Workflow (AWS)
When launching an assessment with AWS selected as a target provider, the wizard includes a dedicated setup step:
|
Step |
Step Name |
Description |
Status |
|
1 |
Node Summary |
Review discovered nodes and data collection readiness. |
Standard |
|
2 |
Region Settings |
Select target cloud deployment regions. |
Standard |
|
3 |
Custom Design |
Define target sizing, modernization, and pricing parameters. |
New and available only for AWS. |
|
4 |
Duration Settings |
Select processing observation dates. |
Standard |
|
5 |
Review |
Review summary of all setup steps with inline Edit links. |
New |
|
6 |
Assessment Started |
Confirmation screen verifying assessment processing. |
Standard |
Note: The wizard keeps your design as a draft during setup and saves it when you click Start Assessment. The design is then built alongside the first results delivery, and its results will appear in the Analyze dropdown once that delivery is published.
-
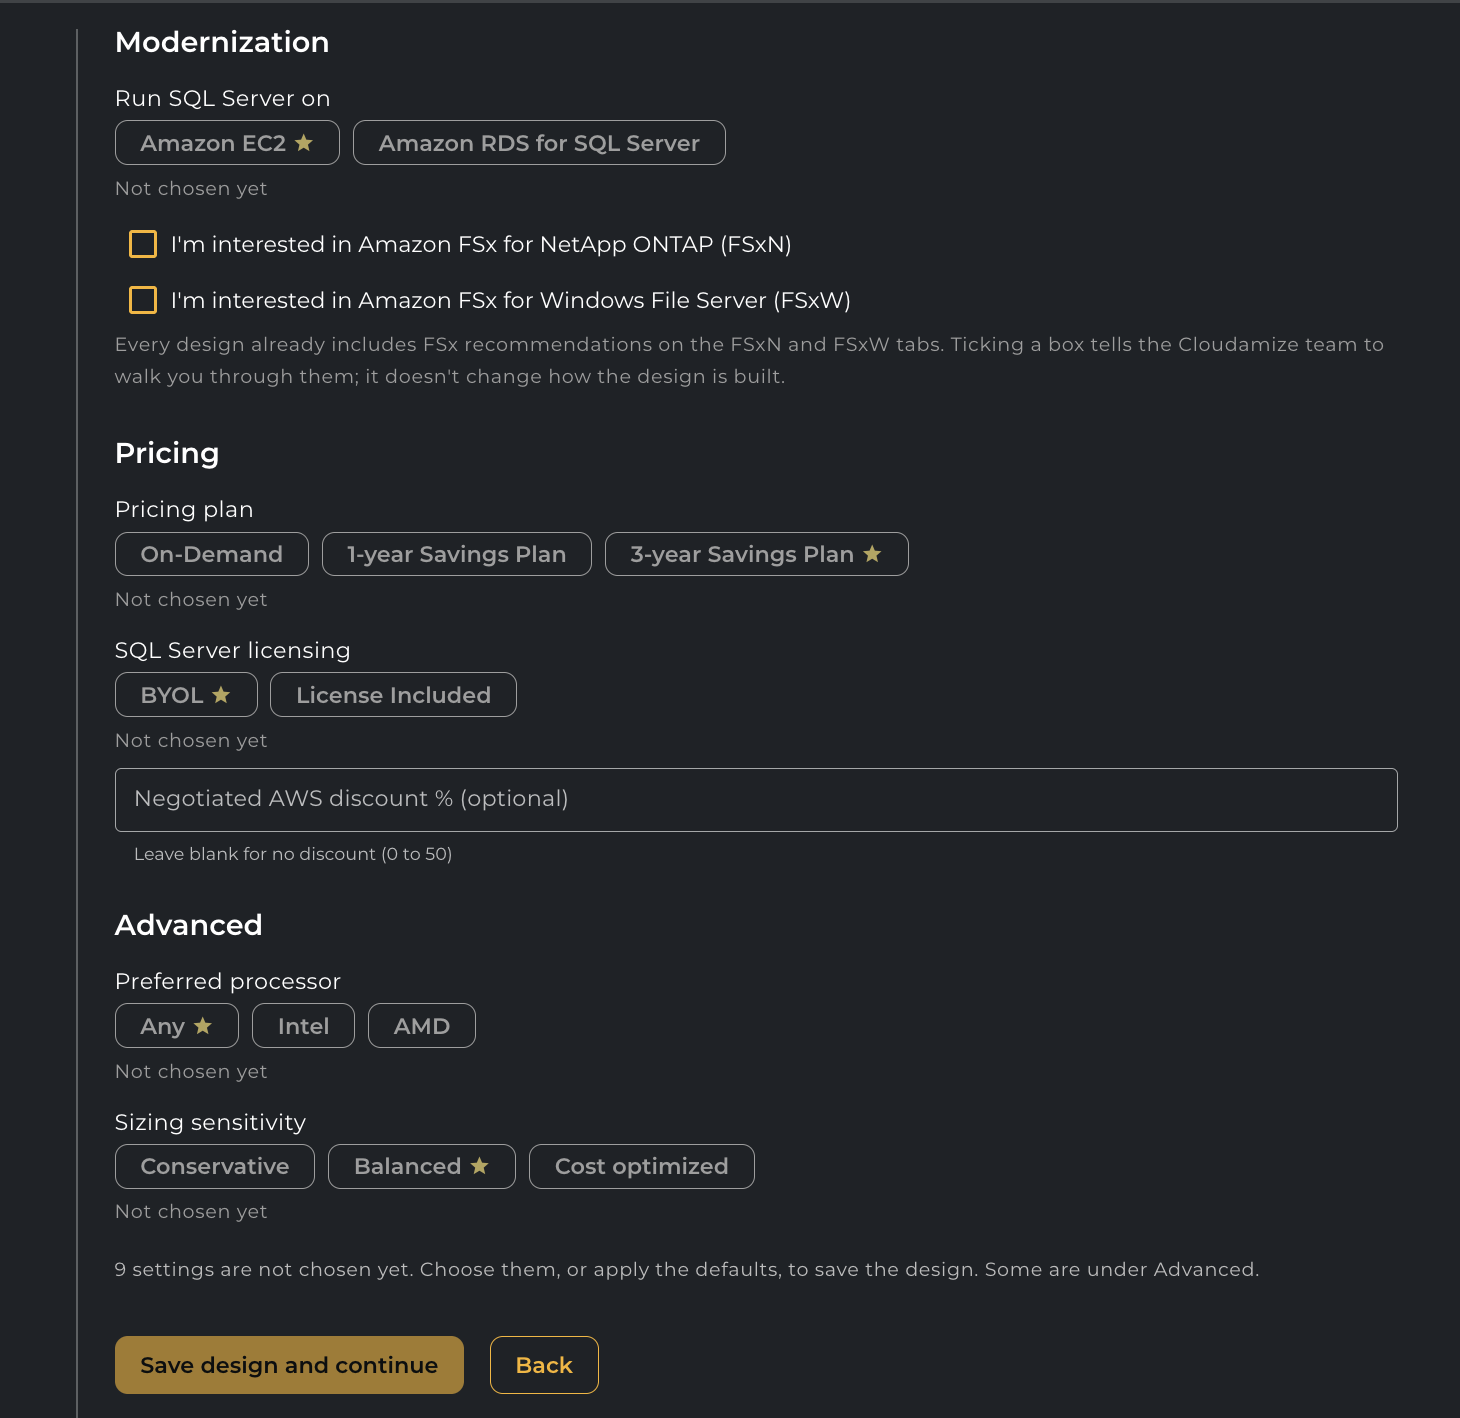
In the Start Assessment wizard, the Custom Design step shows the same form:
Configuration Settings & Options
Every field must be populated to save a design.
-
A faint yellow star indicates the system default.
-
Use Apply defaults to populate all fields automatically (a confirmation appears if settings were already changed).
-
Once values are modified, this button switches to Reset to defaults.
|
Section |
Setting |
Available Options |
Default (Matches OLA 6) |
Details & Behavior |
|
Compute |
Burstable & flex instances |
|
|
Toggle inclusion of T-series and burstable/flex families. |
|
Compute |
Graviton |
|
|
Disabled if Preferred processor is set to Intel or AMD. |
|
Compute |
Target peak CPU |
|
|
The highest CPU utilization the recommended instance should reach during peak load (for example, an 80% target reserves 20% headroom). |
|
Storage |
Storage buffer |
|
|
Adds headroom across all EBS volumes (including root). Does not apply to FSx. |
|
Modernization |
Run SQL Server on |
|
|
Choosing RDS matches OLA 8 logic: discovered SQL instances move to RDS (License Included). RDS compute is priced On-Demand or using a 1-year No Upfront Database Savings Plan when a Savings Plan is selected. |
|
Modernization |
FSx interest |
Checkboxes:
|
|
Captures modernization intent for shared storage architectures. |
|
Pricing |
Pricing plan |
|
|
When selecting a Savings Plan, specify:
|
|
Pricing |
SQL Server licensing |
|
|
Applies to EC2 deployments. |
|
Pricing |
Negotiated AWS discount |
|
|
Optional enterprise discount percentage. |
|
Advanced |
Preferred processor |
|
|
Setting Intel or AMD locks out the Graviton option above. |
|
Advanced |
Sizing sensitivity |
|
|
Decides which peak of each server’s measured usage is sized to, then fitted under the target CPU utilization (default 80%).
|
Known Limitations
-
Design Limit: Maximum of 3 designs per customer workspace.
-
Deletion: Designs cannot be deleted once created for now.
-
Scope: Designer 2.0 Lite designs apply across all assessment instances. To create designs scoped to specific subsets or groups of machines, use the Designer tool.
-
FSx Modernization Checkboxes: Selecting FSx for NetApp ONTAP (FSxN) or FSx for Windows File Server (FSxW) does not alter the sizing or pricing output, as every design already calculates and includes FSx recommendations by default. These checkboxes serve only to record the customer's modernization interest.
-
Legacy Designer Compatibility: Designer 2.0 Lite designs appear as disabled rows in the legacy Designer list with instructions to manage them via the Analyze screen. You cannot open, edit, or delete them from the Designer view.
If you have any queries, please get in touch with the helpdesk via our Helpdesk Portal or by email at helpdesk@cloudamize.com.